
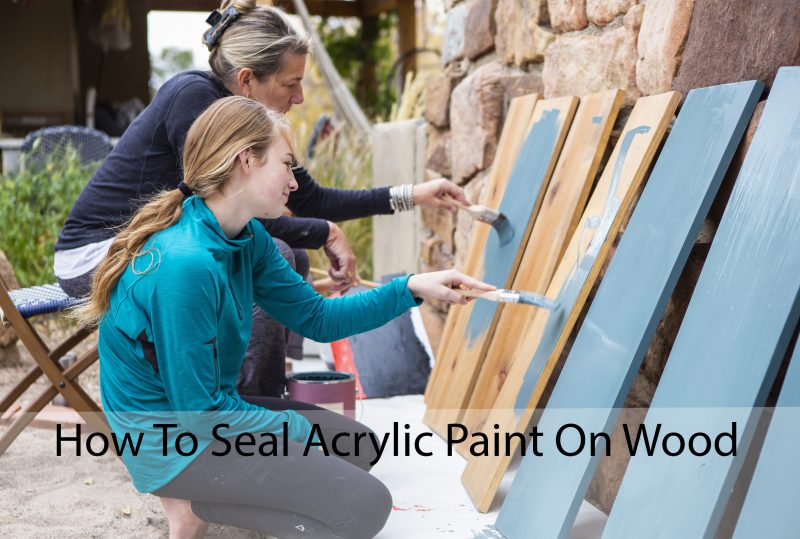
Are you the type of person who likes to add a personal touch to everything you own? Whether it’s a piece of furniture or a home decor item, sometimes that touch comes as an acrylic paint design on wood. But now you’re left wondering how to seal acrylic paint on wood to ensure your hard work doesn’t chip or fade over time. Enter the solution: sealing your acrylic paint on wood.
Think of it like a shield, protecting your art from the elements. And lucky for you, it’s not rocket science – it’s a quick, easy process that can be done with just a few simple steps. With this guide on sealing acrylic paint on wood, your creativity will be protected and shining bright for years to come.
Selecting the Right Sealer for Your Project
Choosing the right sealer for your acrylic paint-on-wood project is crucial to ensure a professional finish and long-lasting protection. To help you make an informed decision, let’s take a closer look at the different types of sealers available and their benefits.
A. Varnish
Varnish is a popular choice for sealing acrylic paint on wood due to its durability and versatility. There are two main types of varnish – water-based and solvent-based – each with its own advantages:
- Water-based Varnish
This type of varnish is easy to clean up, environmentally friendly, and has a low odor. It dries quickly and provides excellent protection against UV rays, which can cause colors to fade over time. It’s ideal for both indoor and outdoor projects.
- Solvent-based Varnish
Although it’s more difficult to clean up and has a stronger odor, solvent-based varnish tends to be more durable and offers a higher level of protection against moisture and scratches.
Matte vs. Glossy Finish
Varnishes are available in both matte and glossy finishes. Consider the desired appearance of your project when choosing between the two:
- Matte Finish
This finish provides a non-reflective, soft appearance that’s perfect for rustic or vintage-style projects.
- Glossy Finish
A glossy finish adds a shiny, reflective surface that can make colors appear more vibrant and create a polished look.
B. Polycrylic
Polycrylic is another excellent option for sealing acrylic paint on wood. This water-based, non-yellowing protective finish is perfect for light-colored woods and offers several benefits:
Quick drying
Polycrylic dries faster than most varnishes, allowing you to apply multiple coats in a shorter amount of time.
- Easy application
This sealer can be easily applied with a brush or roller, making it suitable for both beginners and experienced DIYers.
- Non-yellowing
Unlike some other sealers, polyacrylic won’t yellow over time, ensuring your artwork remains true to its original colors.
- Indoor and outdoor use
Polycrylic is suitable for both indoor and outdoor projects, providing protection against water, chemicals, and abrasion.
C. Spray Sealers
Spray sealers are a convenient option for those looking for an easy-to-apply solution. They come in aerosol cans and offer several advantages:
- Even Coverage
Spray sealers provide a consistent, even layer of protection without the risk of brush marks or streaks.
- Quick Drying
Most spray sealers dry quickly, allowing you to apply multiple coats in a short amount of time.
- Easy Application
Simply shake the can and spray from the recommended distance, making this option ideal for those who may be new to sealing acrylic paint on wood.
However, spray sealers may not be as durable as brush-on sealers, so consider the specific needs and longevity requirements of your project when choosing a sealer.
Tips for choosing the right sealer

Keep these tips in mind when selecting a sealer for your acrylic paint-on-wood project:
- Consider your project’s specific requirements, such as whether it will be used indoors or outdoors, and the desired level of protection against UV rays, moisture, and scratches.
- Think about the desired finish (matte or glossy) and how it will affect the overall appearance of your project.
- Read product reviews and ask for recommendations from others who have completed similar projects.
By considering these factors and weighing the benefits of each type of sealer, you can select the best option for your painting project and achieve professional, long-lasting results.
Now that you’ve chosen the right sealer for your project, it’s time to prepare the wood surface to ensure a flawless finish.
Preparing the Wood Surface
Properly preparing the wood surface is essential for achieving a professional finish and ensuring the sealer adheres well to both the wood and acrylic paint. In this section, we will guide you through the process of cleaning, drying, and sanding your wood surface to ensure an optimal outcome.
Cleaning the wood surface
Before applying any sealer, it’s crucial to start with a clean and dust-free surface. Follow these steps to clean your wood surface effectively:
- Remove loose debris
Use a soft-bristle brush or a dry cloth to gently remove any loose debris, such as dirt or sawdust, from the wood surface.
- Clean with a mild detergent
If the wood surface is particularly dirty or greasy, mix a mild detergent with warm water and use a soft cloth or sponge to clean the surface gently. Be sure not to soak the wood, as this can cause warping or damage.
- Rinse and dry
If detergent was used, rinse the wood surface with a damp cloth to remove any soap residue. Allow the surface to air dry or use a clean, dry cloth to speed up the process.
Inspect the surface for imperfections
Before moving on to sanding, take the time to inspect the wood surface for any imperfections, such as dents, scratches, or uneven areas. These must be addressed before applying the sealer to achieve the best possible finish.
Sanding the Surface for a Smooth Base
Sanding the wood surface helps create a smooth base for the sealer to adhere to and can also remove minor imperfections. Here’s how to sand the surface effectively:
- Choose the right grit:
Start with medium-grit sandpaper (around 120-grit) to remove larger imperfections, and then move on to fine-grit sandpaper (around 220-grit) for a smooth finish.
- Sand with the grain:
Always sand in the direction of the wood grain to avoid scratches or cross-grain marks.
- Check your progress:
Periodically check the surface as you sand to ensure you’re achieving the desired smoothness without removing too much material.
Removing dust and allowing the surface to dry
After sanding, it’s essential to remove any remaining dust from the surface to ensure a clean base for the sealer:
- Wipe with a tack cloth
Use a tack cloth or a slightly damp cloth to gently wipe away any dust and debris from the wood surface.
- Allow drying completely
Give the surface ample time to dry completely before applying the sealer. This is especially important if you use a damp cloth to remove dust, as moisture can interfere with the adhesion of the sealer.
What is the importance of proper surface preparation?
Taking the time to prepare the wood surface properly is crucial for achieving a professional and long-lasting result. A clean, dry, and smooth surface will allow the sealer to adhere effectively and create a protective barrier that preserves your acrylic paint-on-wood project for years to come. By following these steps and paying attention to detail, you’ll set the stage for a successful sealing process and a beautifully finished piece.
With the surface prepped and ready, let’s dive into the application process to achieve a lasting, protective seal for your acrylic paint on wood.
Applying the Sealer
Applying the sealer correctly is essential for achieving a professional, durable finish for your acrylic paint-on-wood project. In this section, we’ll provide step-by-step instructions for both brush-on and spray sealers, along with tips to help you achieve thin, even coats and avoid streaks or brush marks.
Applying brush-on sealer
When using a brush-on sealer, follow these steps to ensure a smooth, even application:
- Choose the right brush
Select a high-quality synthetic brush with soft bristles that are suitable for the type of sealer you’re using (water-based or solvent-based). The right brush will help prevent streaks or brush marks during application.
- Stir the sealer
Gently stir the sealer to ensure it’s properly mixed, but avoid creating bubbles, which can transfer to the wood surface during application.
- Apply Thin, Even Coats
Dip the brush into the sealer and remove any excess by gently tapping it against the side of the container. Apply the sealer in thin, even coats, following the direction of the wood grain. This will help prevent drips and ensure a consistent finish.
- Cover the Entire Surface
Be sure to cover the entire surface of the wood, including edges and corners, to provide complete protection for your acrylic paint.
- Allow to Dry
Let the sealer dry according to the manufacturer’s instructions, typically 1-2 hours.
Tips for avoiding streaks and brush marks
- Apply the sealer in long, continuous strokes, maintaining even pressure on the brush.
- Avoid overloading the brush with sealer, as this can cause drips and uneven coverage.
- If you notice any streaks or brush marks while the sealer is still wet, gently smooth them out with the brush before the sealer dries.
Applying Spray Sealer
For spray sealers, follow these steps for a successful application:
- Shake the can
Shake the aerosol can vigorously for the recommended time on the label to ensure the sealer is well-mixed.
- Test spray
Before applying the spray sealer to your project, test it on a scrap piece of wood or cardboard to ensure proper spray pattern and coverage.
- Maintain proper distance
Hold the spray can at the recommended distance from the wood surface (usually 10-12 inches) to ensure even coverage and prevent drips.
- Apply Thin, Even Coats
Use a sweeping motion to apply the sealer in thin, even coats, overlapping each pass by about 50% to ensure full coverage.
- Allow to dry
Let the sealer dry according to the manufacturer’s instructions, typically for 15-20 minutes between coats.
Tips for Achieving a Smooth, Even Finish with Spray Sealer
- Apply the sealer in a well-ventilated area and protect surrounding surfaces from overspray.
- Maintain a consistent speed and motion while spraying to avoid pooling or uneven coverage.
- If you notice any drips or uneven areas while the sealer is still wet, use a clean, dry brush to smooth them out before the sealer dries gently.
By following these detailed instructions and tips for both brush-on and spray sealers, you can achieve a professional, long-lasting finish for your acrylic paint-on-wood project. Proper application of the sealer will not only enhance the appearance of your artwork but also provide the protection it needs to stand the test of time.
To further enhance the finish and durability of your sealed artwork, consider sanding between coats.
Sanding Between Coats (Optional)
While sanding between coats is not always necessary, it can provide several benefits that lead to a smoother, more professional finish. In this section, we’ll discuss the advantages of sanding between coats and outline the proper technique for doing so.
Benefits of sanding between coats
Sanding between coats of sealer can significantly improve the final appearance and feel of your acrylic paint-on-wood project:
- Smoother finish
Lightly sanding between coats helps remove any brush marks, imperfections, or debris that may have settled on the surface during application, resulting in a smoother overall finish.
- Improved adhesion
Sanding between coats also creates a slightly roughened surface that allows subsequent coats to adhere better, ensuring a stronger bond and longer-lasting protection.
- Enhanced appearance
A smoother surface can enhance the appearance of your project by providing a more even, consistent finish that highlights the beauty of both the wood and the acrylic paint.
Proper technique for sanding and removing dust between coats
To ensure optimal results when sanding between coats, follow these steps:
- Allow the sealer to dry
Before sanding, make sure the sealer is completely dry according to the manufacturer’s instructions. Sanding too soon can damage the sealer and create an uneven surface.
- Choose fine-grit sandpaper
Use fine-grit sandpaper (around 320-400 grit) for sanding the surface gently. This will help remove imperfections without causing damage or removing too much sealer.
- Sand with light pressure
Apply light pressure and sand in the direction of the wood grain to avoid scratches or cross-grain marks. Focus on areas with visible brush marks or imperfections, but sand the entire surface lightly to ensure even adhesion for the next coat.
- Remove dust
After sanding, use a tack cloth or a slightly damp cloth to gently wipe away any dust and debris from the surface. Allow the surface to dry completely before applying the next coat of sealer.
While sanding between coats can lead to a smoother finish, it’s essential to remember that multiple coats of sealer may be necessary for optimal protection. In the next section, we’ll discuss how many coats are needed and the importance of proper curing to ensure your acrylic paint-on-wood project remains vibrant and protected for years to come.
Applying Additional Coats and Curing
To ensure optimal protection and durability for your acrylic paint-on-wood project, it’s crucial to apply the appropriate number of sealer coats and allow them to cure properly. In this section, we’ll discuss the recommended number of coats for different sealers, the importance of drying time between coats, and the curing process.
Recommended number of coats for different sealers
The number of coats needed can vary depending on the type of sealer you’re using and the specific requirements of your project. Here are some general guidelines:
- Varnish
Typically, 2-3 coats of varnish are recommended for optimal protection. However, if you’re using a high-solids varnish, you may only need 1-2 coats.
- Polycrylic
Polycrylic sealers usually require 2-3 coats for adequate protection, with additional coats needed for high-wear surfaces or outdoor projects.
- Spray Sealers
Due to their thinner application, spray sealers may require 3-4 coats for optimal coverage and protection.
Always follow the manufacturer’s recommendations regarding the number of coats needed for your specific sealer.
Importance of drying time between coats
Allowing each coat of sealer to dry fully before applying the next one is crucial for achieving a professional finish and ensuring proper adhesion between coats:
- Prevents bubbles and cracks
Applying a new coat before the previous one has dried can trap moisture, leading to bubbles or cracks in the finish.
- Ensures even coverage
Fully dried coats provide a stable base for subsequent coats, resulting in more even coverage and better overall protection.
- Avoids tacky surfaces
If the sealer hasn’t dried completely, it may feel tacky or sticky, making it difficult to apply an even layer of the next coat.
Follow the manufacturer’s instructions for drying times between coats to ensure the best results.
What is the curing process and its role in durability?
Curing refers to the process through which the sealer hardens and bonds to the wood surface, providing a durable protective barrier for your acrylic paint. The curing process is essential for ensuring the longevity of your sealed artwork:
- Strengthens the finish
As the sealer cures, it forms a strong bond with the wood surface and acrylic paint, creating a resilient barrier that resists damage from moisture, UV rays, and general wear and tear.
- Improves appearance
A fully cured sealer will have a more consistent, professional appearance, showcasing the beauty of both the wood and the acrylic paint.
- Prevents premature failure
Properly cured sealers are less likely to peel, crack, or yellow over time, ensuring your artwork remains protected and vibrant for years to come.
Tips for proper curing
To ensure your sealer cures properly, follow these tips:
- Allow adequate drying time
Follow the manufacturer’s recommendations for drying times between coats and after the final coat. This can range from a few hours to several days, depending on the product.
- Avoid extreme temperatures and humidity
Ideal curing conditions typically include moderate temperatures (around 70°F) and low humidity. Extreme heat, cold, or humidity can negatively affect the curing process.
- Be patient
Resist the temptation to use or display your project until the sealer has fully cured. Premature use can damage the finish and compromise the protection it provides.
By applying the appropriate number of sealer coats, allowing each coat to dry fully, and giving the sealer ample time to cure, you’ll ensure your acrylic paint-on-wood project remains protected, beautiful, and durable for
Conclusion
Sealing acrylic paint on wood is a vital step in preserving and protecting your artwork, ensuring it remains vibrant and damage-free for years to come. By carefully selecting the right sealer for your project, properly preparing the wood surface, applying the sealer with care, sanding between coats (if necessary), and allowing the sealer to cure fully, you can achieve a professional, long-lasting finish that showcases your creativity.
Remember to research the various sealer options and choose the one that best suits your project’s needs. Pay close attention to detail during surface preparation and sealer application, as this will set the foundation for a successful and durable finish.
So go ahead, and add that personal touch to your wooden items with confidence, knowing that your creativity will be protected and preserved for years to come. Embrace your artistic side, and let your imagination run wild as you create beautiful, unique pieces that reflect your personality and style.
5 thoughts on “How To Seal Acrylic Paint On Wood? A Handy Guide”