How to Paint Wrought Iron Railing Like a Pro?

How to Paint Outdoor Metal Railing Like a Pro

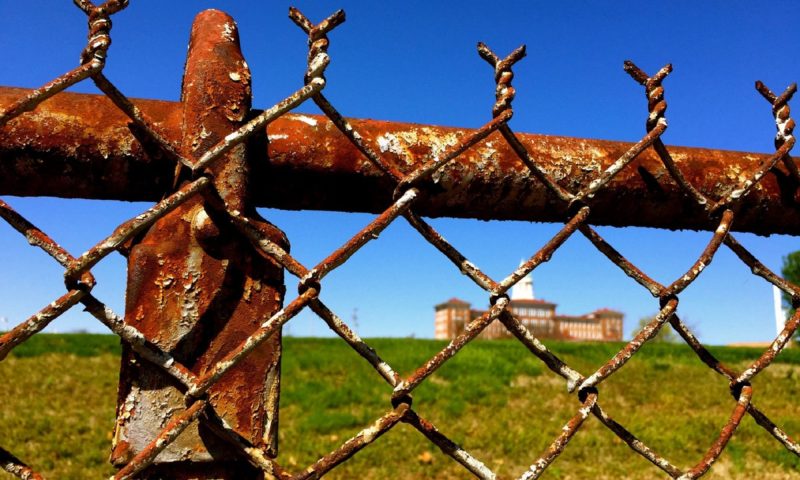
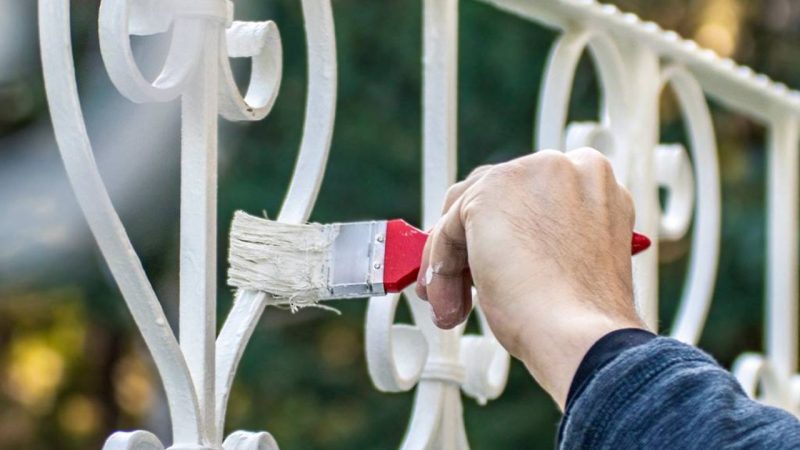
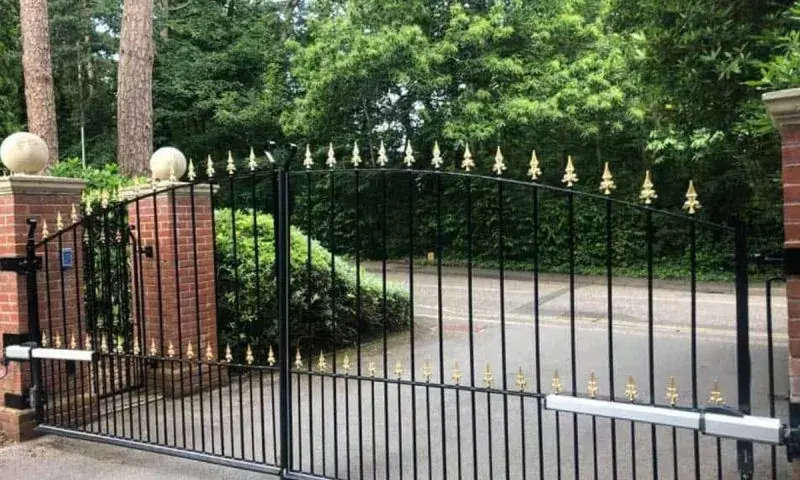
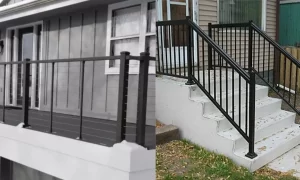
Have you ever looked at your old, rusty metal railing and thought, “there has got to be a better way?” because the metal railing is the beautiful focal point of your home’s exterior, but it’s looking a little worse for wear? so the first impression your guests have of your home isn’t the best one.

When you have an outdoor metal railing that is old and faded, it is time to give it a new coat of paint. This project is not as difficult as it might seem, and with the right preparation and tools, you can have your railing looking like new in no time.

If you want to paint the metal railing on your deck, porch, or balcony, and you don’t know where to start, in this blog post we provide a step-by-step guide, you’ll be able to achieve a professional-looking finish without spending a fortune.

So what are you waiting for? Let’s get started.

What to Consider Before You Start?

Painting your outdoor metal railing is a fairly straightforward project, but there are a few things you should keep in mind before you get started.

Type of outdoor metal railing

A stylish and modern stainless steel outdoor metal railing with clean lines and a polished finish, exuding elegance and contemporary charm to enhance any outdoor space.


The first thing to consider is the type of outdoor metal railing you have. Is it made of steel, aluminum, or wrought iron? Each type of metal will require different types of paint and preparation.

If you have wrought iron, you will need to use a primer made specifically for wrought iron railings. and if the railing is aluminum, you’ll need to use paint that is specially made for aluminum surfaces. so that the paint will adhere properly and not chip or peel.

Condition of outdoor metal railing

A well-maintained outdoor metal railing showcasing its sleek design and glossy finish, providing durability and stability for a safe and secure outdoor environment.


Another important consideration is the condition of your railing. If your railing is in good condition, it will be much easier to paint than if it is rusted or flaking. because the good position of the railing will help the new paint adhere better.

If your railing is in bad condition, you will need to sand it down the railing because sanding will smooth out the surface and help the new paint to adhere evenly so that your railing will have a professional-looking finish.

Location of the railing

A beautifully designed outdoor railing perfectly blending with the scenic landscape, adding elegance to a charming garden path.


The location of the railing is also important to consider because you will need to make sure that you can access all sides of the railing in order to paint it properly. If your railing is in a difficult-to-reach spot, it might be difficult to get an even coat of paint on all sides. And you will need to make sure that you have the proper ladder or scaffolding to reach the railing.

Weather conditions

Clear blue sky and sunshine illuminate a sturdy outdoor railing surrounded by lush greenery, creating a perfect setting for outdoor activities.


Another factor to think about is the temperature; you don’t want it to be so hot or cold. if the weather is too hot, the paint on the outdoor railing will dry too quickly, and it will be difficult to get an even coat. In this condition, the railing will be more likely to peel or chip.

Conversely, if it’s too cold, the paint will take longer to dry, and it will be difficult to achieve a smooth finish. So you’ll need to check the weather forecast for the days that you plan on painting your railing and make sure that the temperature is going to be just right.

7 Tips for Painting Metal Railings Like a Master

Metal railing is a beautiful addition to any home, but it can be tricky to paint. With the right preparation and know-how, you can achieve a professional-looking finish without spending a fortune. Here are 9 tips for painting metal railings like a master:

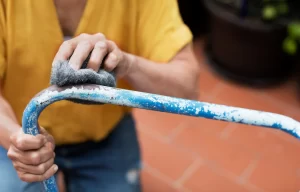
1. Remove the old, flaking plant material with a soft cloth

Removing the old, flaking plant material before painting the railing may seem like a tedious and time-consuming task. However, taking the extra time to do this will result in a much better-finished product. The paint will adhere better to the clean surface, and the railing will have a neater appearance.

In addition, any loose plant material that is not removed before painting could end up trapped under the paint, ultimately causing the paint to peel. So while it may take a bit of effort upfront, removing the old plant material before painting is well worth it in the end.

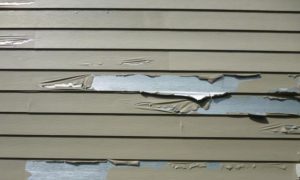
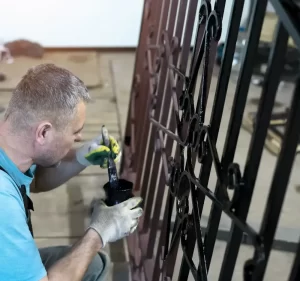
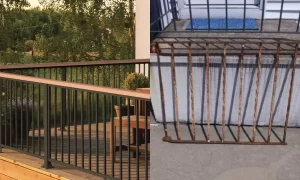
2. Use a wire brush to remove any rust

If your railing is made of steel or iron, it is likely to develop rust over time. Rust can be unsightly and will make your railing look old and worn. Luckily, rust is fairly easy to remove with a wire brush. Use a wire brush to remove any rust on the surface of the railing. If the rust is deep-seated, you may need to use a rust converter before painting.

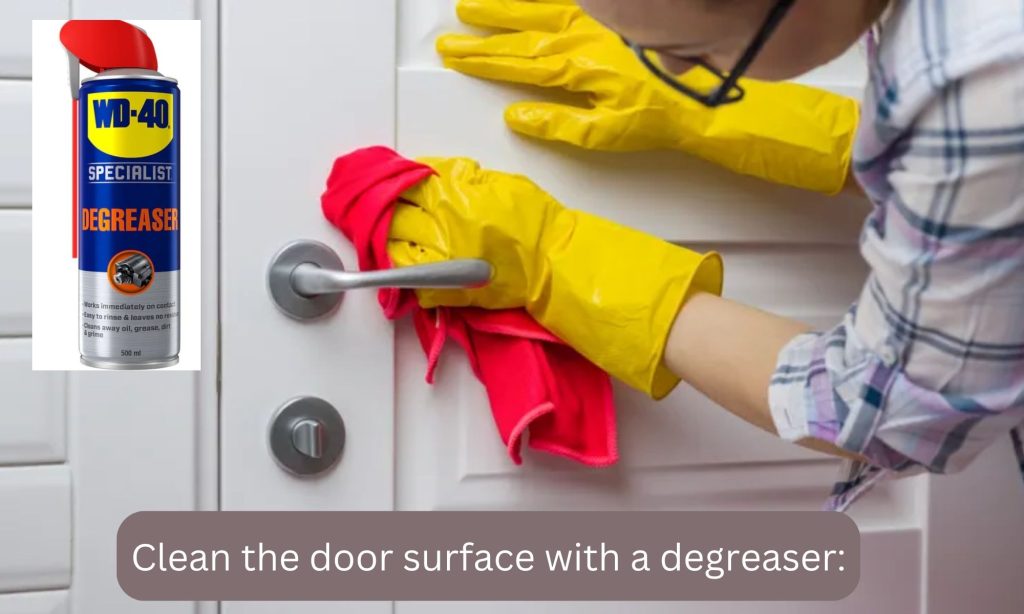
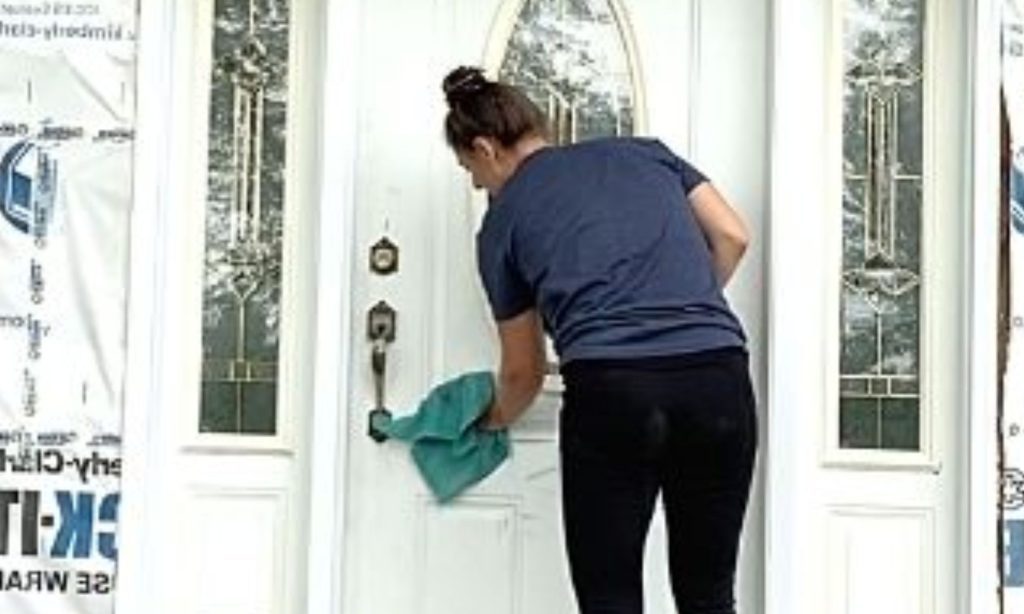
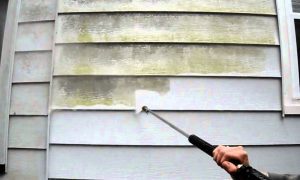
3. Wipe down the railing with a damp cloth to remove any dirt or dust

After you have removed the old plant material and rust, wipe down the railing with a damp cloth to remove any dirt or dust. Dust and dirt on the metal railings will prevent the paint from adhering properly, resulting in an uneven finish.

When you remove the dirt and dust from the metal railing, be sure also to wipe down any nearby surfaces that could be contaminated. This includes the ground around the base of the railing, any nearby plants, and any furniture or other objects that are close to the railing.

4. Sand down the railing to create a smooth surface

Once the metal railing is clean and free of dirt, dust, and rust, it is time to sand it down. Sanding the railing will create a smooth surface for the paint to adhere to. So the metal railing should be sanded before painting.

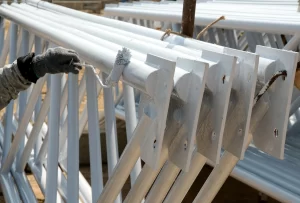
5. Prime the railing with a quality primer

Priming the railing is an important step in ensuring a professional-looking finish for metal railing.

A quality primer will provide a barrier between the metal and the paint. So the paint will not be able to penetrate through the primer and adhere to the metal.

In addition, a quality primer will help to protect the metal from rusting and will also provide a better surface for the paint to adhere to. As such, it is important to use a quality primer when painting the metal railing.

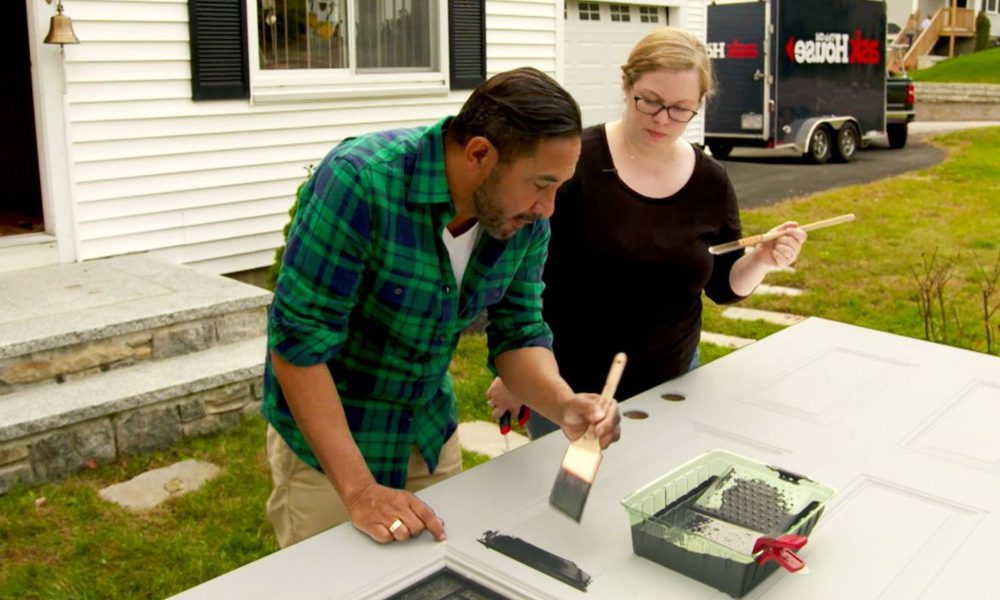
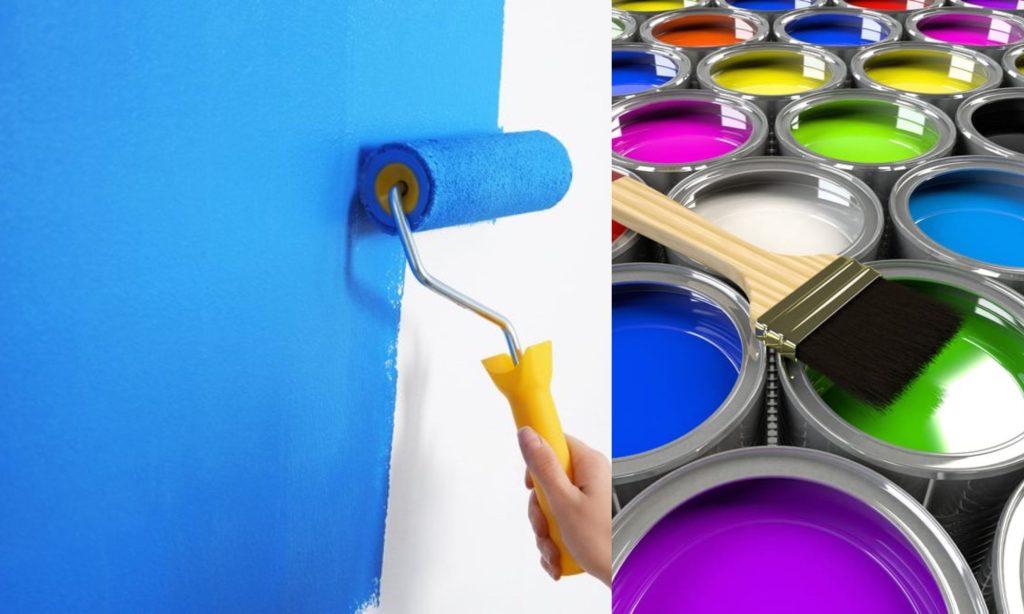
6. Apply a coat of paint on the railing (in your chosen color)

Now that the railing is primed, it is time to apply a coat of paint. You should apply the paint in thin, even coats. Because a thin and even coating of paint will result in a smoother and more professional-looking finish.

Allow each coat of paint to dry completely before applying it to the next coat.

7. Let the paint dry completely before touching or using the railing

It is important to let the paint dry completely before touching or using the railing. Once the paint is dry, it will be much more resistant to scratches and damage. So a minimum of 24 hours is recommended for the paint to dry completely.

What is The Best Time of Year to Paint Outdoor Metal Railings?

Most people think that the best time of year to paint metal railings is in the spring. However, there are a few things to consider before making this decision.

For one, spring weather can be unpredictable, and you may end up having to repaint your railings sooner than expected if the weather takes a turn for the worse.

Additionally, springtime is when many people are trying to complete home improvement projects, which can mean that paint supplies are in high demand and prices may be inflated.

If you’re willing to take a bit of a risk, painting your railings in late fall or early winter can be a great way to save money and get the job done without too much hassle. Just be sure to keep an eye on the weather forecast and have a backup plan in case of bad weather.

What Colors Can You Paint Outdoor Metal Railings?

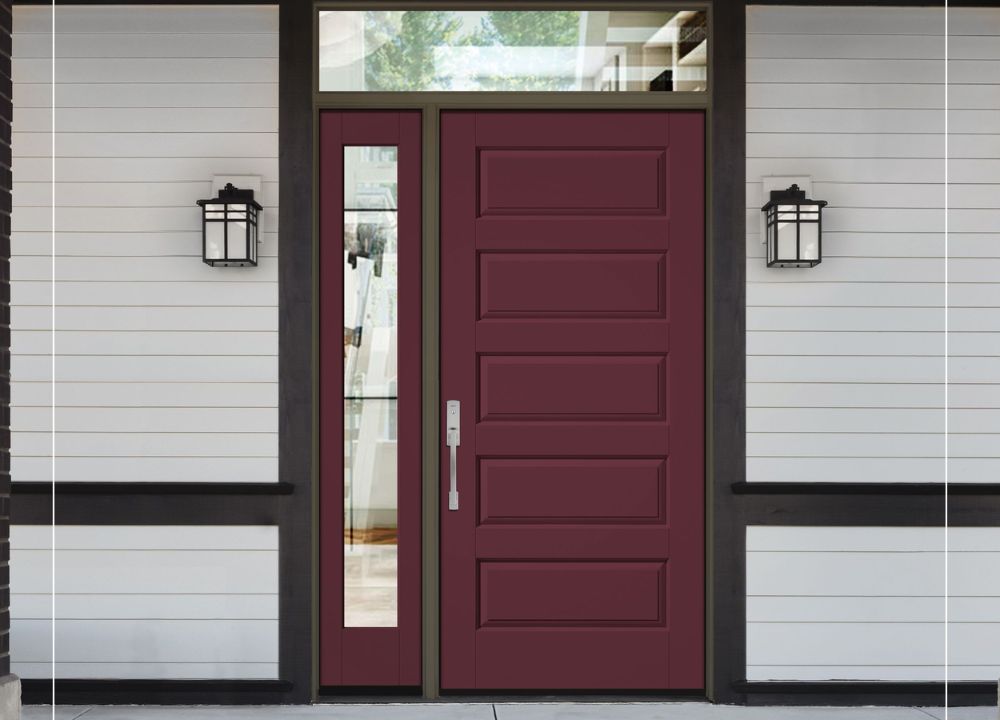
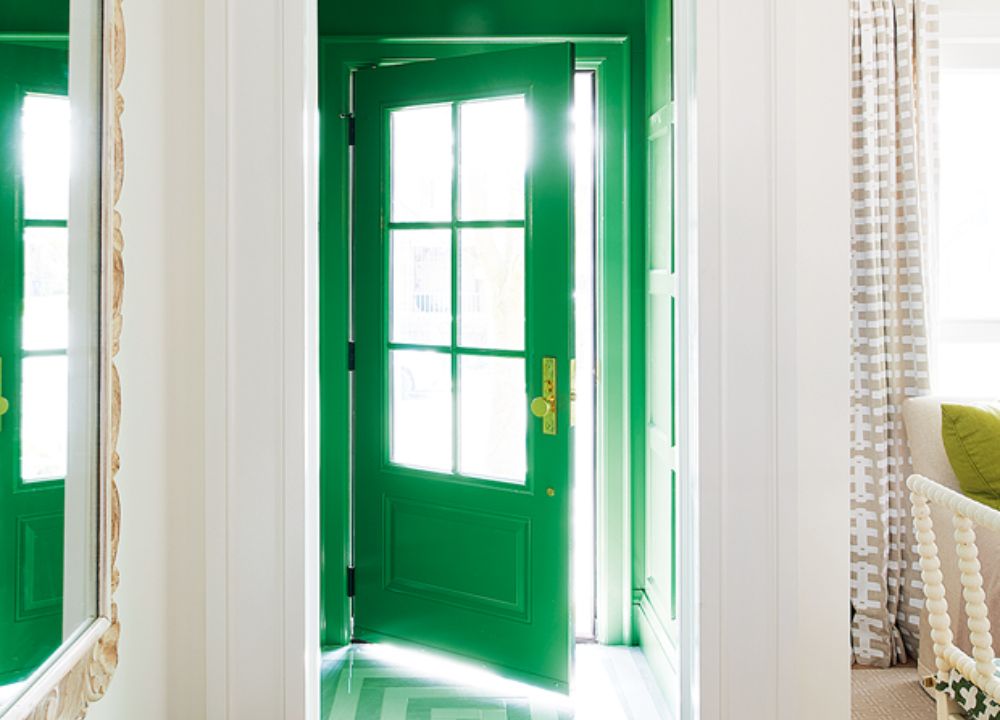
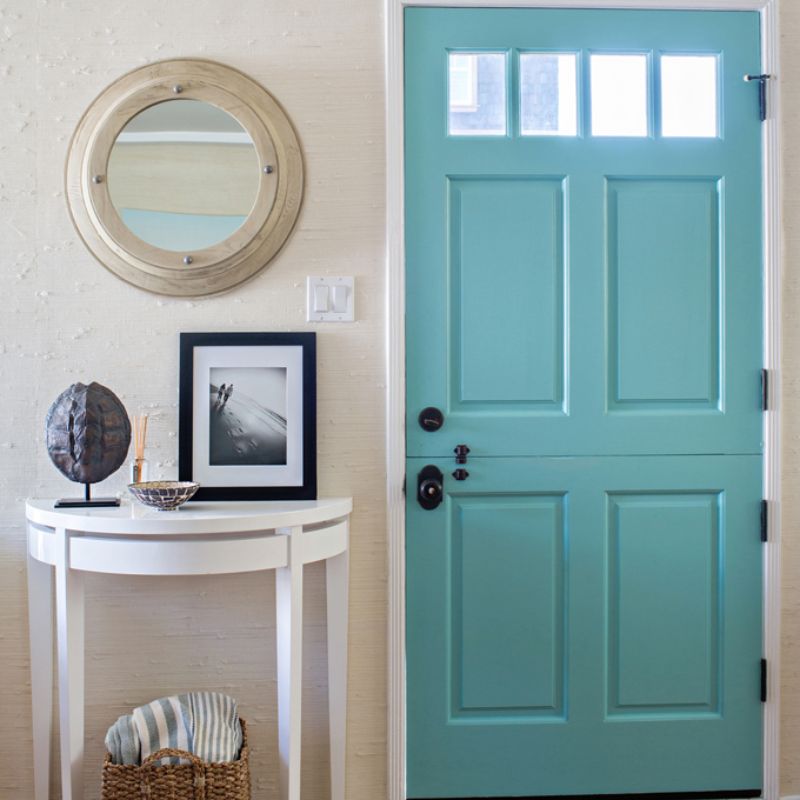
Outdoor metal railings are a stylish way to add personality to your home while providing safety and functionality. But what colors can you paint outdoor metal railings? The short answer is any color you want! Whether you want a classic black or white railing or something more adventurous, like bright pink or green, the choice is yours.

However, there are a few things to keep in mind when choosing a color for your outdoor metal railings.

The overall style of your house

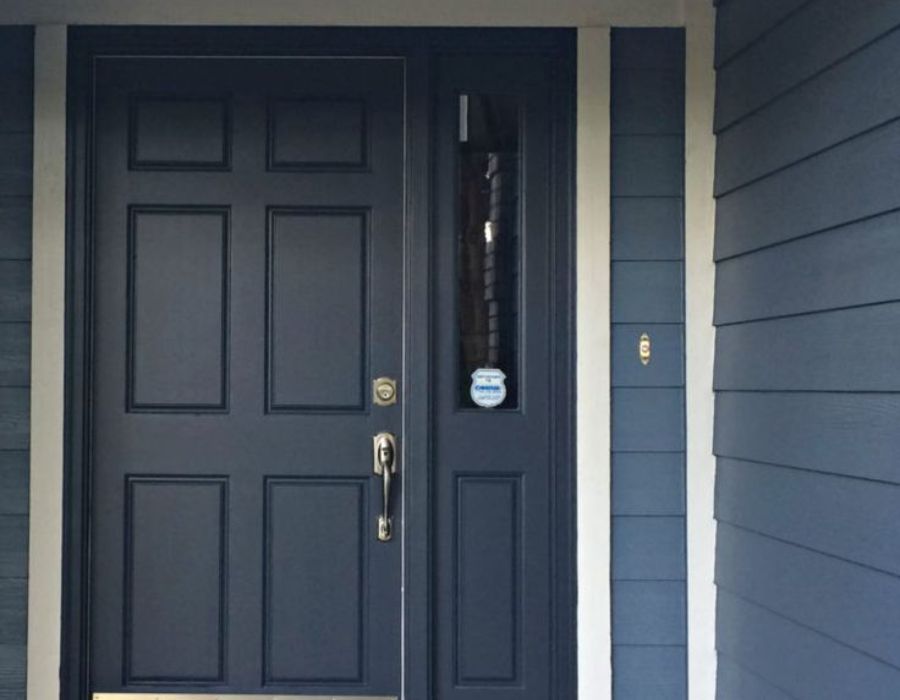
If you have a more traditional home, you might want to stick with classic colors like black or white. Because the traditional colors will complement the style of your home. The railing of traditional colors will make your home look more elegant.

But if you have a more modern home, you can get away with painting your outdoor metal railings in any color you want! If you want to add a pop of color to your home, try painting the railings in a bright pink or green. These colors will definitely make your house stand out from the rest.

So whatever color you choose, make sure it compliments the style of your home.

Color will look in different lighting conditions

Another thing to keep in mind when choosing a color for your outdoor metal railings is how the color will look in different lighting conditions.

When you live in an area that gets a lot of sunlight, you might want to choose a lighter color for your railings. because the light will reflect off the railing and make the color appear brighter.

But if you live in an area that doesn’t get a lot of sunlight, you might want to choose a darker color for your railings. Because the lack of light will make the color appear darker.

No matter what color you choose, be sure to test it out in different lighting conditions before making your final decision.

Choose the color that maintains easily

If you’re looking for a color that will be easy to maintain, stick to lighter shades. These won’t show dirt and grime as easily as darker colors. Light colors are easy to clean and don’t require as much upkeep as dark colors. so lighter colors are the way to go if you’re looking for a low-maintenance option.

Personal preference

At the end of the day, the color you choose for your outdoor metal railings is entirely up to you! If you love the color pink, go ahead and paint your railings pink. If you prefer classic black or white, that’s fine too. It’s all about what YOU like.

Frequently Asked Questions

Can I paint my outdoor metal railings myself?

Yes, you can definitely paint your outdoor metal railings yourself. Just be sure to follow the steps outlined in this article, and you’ll be on your way to painting like a pro.


What type of paint should I use for my outdoor metal railings?

The best type of paint to use for outdoor metal railings is durable, weather-resistant paint. This will ensure that your railings look great for years to come.

How often do I need to repaint my outdoor metal railings?

Generally speaking, you’ll need to repaint your outdoor metal railings every few years. But this will vary depending on the climate you live in and how well you take care of your railings.

Conclusion

Metal railings can be a beautiful addition to your porch or deck, but they require a bit of upkeep to keep them looking their best. By following these simple tips for painting metal railings, you can achieve a professional finish and keep your outdoor space looking great all year long. Be sure to visit our blog regularly for more helpful hints on home improvement projects both big and small!

How to Paint a Steel Door Interior Without Removing it?

How To Choose The Perfect Paint Color For Your Steel Door Interior?

A steel door is the most popular for residential and commercial properties. You can sleep soundly at night knowing that your family is safe and protected with a steel door installed. But what about the look of your door? So how to paint a steel door interior for a perfect finish?

Whenever you decide to paint your steel door interior, you want to choose the best quality paint for your steel door interior. You want to get it right the first time. But you may be feeling overwhelmed about what color paint to choose for the interior of your steel door.

The paint color for your steel door interior should reflect the style of your home. It should also be in keeping with the colors of the other doors in your home. When there is a lot of color in your mind, it can be difficult to decide on which one is perfect.

Don’t worry; in this article, we will give you some of the perfect paint color ideas for your steel door interior.

The Best paint colors for Your Steel Door interior:

Looking for a way to add some pizzazz to your steel door interior? Painting can be a great way to do just that! Here are some of the best paint colors to use for your steel door interior:

1. Burgundy:

Burgundy


You know that first impression is everything. Burgundy gives your home the best curb appeal there is. It’s the color of luxury, royalty, and sophistication. It can also make your home look more expensive than it is.

When you paint your steel door interior burgundy, it tells the world you’re serious about style. Not to mention, it’s a perfect way to add a pop of color to an otherwise bland space. So if you’re looking for a way to make your steel door interior stand out from the rest, burgundy is the way to go.

2. Kelly green

Kelly green


Have you been looking for the perfect paint color to bring life back to your steel door interior? Look no further than Kelly Green. Kelly Green combines sophistication and playfulness, making it the perfect choice for a steel door interior. This color is preferred by many because it’s very easy to match with other colors and furnishings.

The green color gives a touch of nature to your home, and it also makes your steel door interior more lively. Whenever you enter the home, it will give you a refreshing look. It will also make your steel door interior look more expensive.

If you’re looking for a way to make your steel door interior stand out, Kelly Green is the perfect color.

3. Navy blue:

Navy blue


Navy blue is the color of natural charm. It is also a very versatile color and can be used in both formal and informal settings. It also shows that you’re serious about style. It’s perfect for a steel door interior because of its stylish and elegance.

When you apply navy blue to your steel door interior, it will make it more luxurious and give it a high-end look. And you don’t have to worry about it clashing with other colors because it goes well with almost everything.

If you want to make a statement with your steel door interior, then navy blue is an excellent color. It’s also a great way to add color to an otherwise bland space.

4. Turquoise:

Turquoise


Turquoise is a combination of light blue and green. It’s a very refreshing color that will make your steel door interior look more lively. Turquoise is perfect for those who attain a natural and easy look. The best thing about turquoise is it is a color that can go well with any type of interior surface of the steel.

When selecting this color for an interior steel door, make sure you choose the right turquoise. Not all turquoise will look good on steel. For example, electric turquoise can be too bright for a steel door interior. You want to find turquoise that is more blue than green. This will make it look more natural and serene.

If you’re looking to add a touch of color to your steel door interior, turquoise is the way to go. Just make sure you select the right shade! and apply it correctly.

5. Lavender:

Lavender


Lavender is the contrast between blue and purple. Blue is a sign of stability and calmness, while purple is a sign of creative energy. The color lavender is unique because it can bring both tranquility and vibrancy to your steel door interior.

If you consider lavender for your steel door interior, it will give it a softer look. It’s perfect for those who want to add a touch of color without overwhelming the space. Lavender is also known to promote relaxation, so it’s perfect for a steel door interior.

So if you have a steel door interior and want to give it a softer look, then lavender is the perfect color for you. Just make sure to use the shade because some lavender can be too purple. You want to find lavender that is more blue than purple.

6. Chocolate brown:

Chocolate brown


Chocolate color represents security and safety, and the brown color gives a feeling of reliability. This color can be used for the steel door.. because it will create a feeling of warmth and comfort. Chocolate brown is a versatile color combination that can be used in steel door interiors.

Whenever you select the color for your steel door interior, always keep in mind the overall look of your house. You don’t want to create a jarring effect by choosing a color that doesn’t match the rest of your home’s exterior.

So, if you have a light-colored home, using a dark color like chocolate brown for your steel door interior can create a beautiful contrast. If you have a dark-colored home, using a lighter color like chocolate brown can help brighten the space.

7. Taupe:

Taupe


Steel door interior painting seems daunting but easy when the paint color is taupe. Taupe is an earthly hue perfect for those who want to create a naturalistic space. This color will also highlight the hardware on your door.

When you apply this color to steel interior doors, you are admirably adding value to your home. You will be able to enjoy the process as well. Taupe is a great way to go.

Tips for choosing the best paint color for a steel door interior:

Here are a few tips to help you choose the best paint color for your steel door interior: 

The overall style of your home

You want to make sure the color you choose for your steel door interior compliments the style of your home.

If you have a modern home, you may want to use a more contemporary color, like black or white, because it will create a sleek and minimalistic look. Modern homes are known for their clean lines, so you want to ensure the color you choose doesn’t add too much visual noise.

But if you have a traditional home, you may want to go with a more classical color like beige or light blue because it will create a warm and inviting look. Traditional homes are often more ornate, so you want to ensure the color you choose doesn’t clash with the existing style.

The colors of your other doors

You want to make sure the color you choose for your steel door interior coordinates with the colors of your other doors. Because it will create a cohesive look. When the look is cohesive, it will make your home appear more put-together and well-designed.

If you neglect his tip, it will make your home look disjointed and unfinished. So make sure to take this into consideration when choosing a color for your steel door interior.

Lighting in your home

The lighting in your home can make a big difference in the way the color you choose looks. If you have a lot of natural light, you may want to go with a darker color because it will create a more dramatic look. And give your home a feeling of coziness and invitingness.

But if you have low lighting, you may want to go with a lighter color because it will help brighten up the space. However, you don’t want to choose a color that is too light because it can make the space feel sterile and uninviting.

No matter what color you choose, make sure to test it out in space first to see how it looks in the lighting conditions of your home.

The climate of your region

The climate is the big one. You also want to take the climate into consideration when choosing a color for your steel door interior because it can fade over time. And climate can have a big effect on how long the paint will last.

If you live in an area with a lot of sunlight, you may want to go with a lighter color because the sun will fade the darker colors over time. The color you choose for your steel door interior must be repainted more often.

But if you live in an area with a lot of rain, you may want to go with a darker color because it will help the paint last longer. And won’t require as much maintenance.

Your personal style

At the end of the day, you want to choose a color for your steel door interior that reflects your personal style. Because it’s your home and you should love the way it looks. If you’re not sure what color to choose, take some time to look at inspirational images online or in magazines.

And don’t be afraid to experiment with different colors until you find the perfect one for your home.

Frequently Asked Questions

What is the best color to paint a steel door interior?

The best color to paint a steel door interior depends on various factors, including the overall style of your home, the colors of your other doors, the lighting in your home, and the climate of your region. However, some good colors to paint a steel door interior include black, white, beige, light blue, and gray.

Can you paint my steel door interior myself?

Yes, you can paint your steel door interior yourself if you feel confident in your painting skills. However, it is always best to consult with a professional painter to get the best results.

How often should you paint my steel door interior?

The frequency of repainting will depend on the color you choose and the climate of your region. For example, darker colors may require more frequent repainting in sunny regions, while lighter colors may last longer in rainy regions. Ultimately, you should repaint as often as needed to maintain the freshness of the color.

Conclusion

Choosing the perfect paint color for your steel door interior can be a daunting task. With so many colors to choose from, how do you know which one is right for you? Fear not; we’re here to help. In this blog post, we’ll give you some tips on how to choose the best paint color for your steel door interior and show you some of our favorite paint colors for steel doors. Be sure to visit our blog regularly for more home improvement tips and tricks.

How to Paint the Primed Steel Door?

How to Paint the Primed Steel Door

A steel door is one of the best choices for a front door. and the front door is the first impression of your home. A steel door has many benefits. It is strong, and it can’t be kicked in. It is also weather resistant and low maintenance.

When the steel door is primed, the benefits of using a primed steel door are even greater.

A primed steel door is more than just a functional and durable door. It is also an aesthetic choice that can add curb appeal to your home. A primed steel door will ensure that the paint adheres to the door and does not chip or peel.

If you have a primed steel door and you want to paint it, there are a few things you need to do in order to ensure that the paint job is successful. In this article, we will show you how to paint the primed steel door in just a few easy steps.

So don’t wait any longer and let’s get started!

Tips ( in three parts) for Painting Your primed Steel Door:

Painting your steel door doesn’t have to be a difficult task. With a little bit of preparation and the right tools, you can easily paint your primed steel door and give it a fresh new look.

In this section, we will give you some tips on how to paint your primed steel door.

Part 1: Prep the door surface

Preparation of the door surface is the key to a successful paint job. if you don’t prep the door properly, the painting job will not be good and the paint will not last long.

Remove the hardware from the door:

Remove the hardware from the door:

The hardware of the door is essential for the functioning of the door, but it can be a hindrance when you are trying to paint the door. so, in order to make your job easier, remove the hardware from the door before you start painting.

The hardware of the steel door includes the doorknob, the deadbolt, and the hinges. use proper tips for the removal of each type of hardware so that you don’t damage the door.

Clean the door surface with a degreaser:

Clean the door surface with a degreaser

After you have removed the hardware, it is time to clean the door surface. use a degreaser to remove any dirt, grease, or grime from the door surface. The degreaser will also help to remove any grasses or fingerprints that might be on the door.

Sand the door surface:

When the door surface is clean, you need to sand it in order to make the surface smooth. use fine-grit sandpaper to sand the door surface. fine-grit sandpaper will remove any imperfections from the door surface because imperfections cause the door to look uneven when it is painted.

Wipe the door surface with a damp cloth:

Wipe the door surface with a damp cloth:

After you have sanded the door surface, use a damp cloth to wipe away any dust that might be on the door. Dust on the door surface can cause the paint to look uneven. When you use a damp cloth to clean the door surface, make sure that you don’t use too much water because too much water can damage the door.

However, make sure that the door surface is completely dry before you start painting. because if the door surface is wet, the paint will not adhere to the door properly.

Part 2: Apply the paint:

Now that the door surface is prepared, you can start painting. but the quality and color of paint you use are important for the success of your painting job.

Use a high-quality paint:

Use a high-quality paint:

When you are painting the primed steel door, It is important to use high-quality paint for the painting job. because high-quality paint will adhere to the door surface better and the door surface will be more resistant to chipping and peeling.

However, high-quality paint is more expensive than other types of paint. But, It is worth the investment because you won’t have to repaint the door as often. In addition, high-quality paint is preferable to use because it will give your door a more professional and polished look.

Choose the right paint color:

Color can either make your door look bigger or smaller. It can also make your door look more modern or more traditional. When you are choosing the color of paint for your door, you need to take into account the colors of the other doors in your house.

If you want your door to stand out, you can choose a bright color for your door. but if you want your door to blend in with the other doors in your house, you can choose a more subdued color.

However, the color of paint you choose is ultimately up to you.

Apply the paint in thin coats:

When you have decided which color to paint your door, you need to apply the paint in thin coats.

A thin coat of paint will help the paint to adhere to the door surface better and it will also help to prevent the formation of bubbles.

In addition, thin coats of paint will also give you a more even and consistent finish. However, you need to be patient when you are applying the paint in thin coats because it will take longer for the paint to dry.

But when applying the paint in thick coats, the paint will take longer to dry and it will be more difficult to achieve an even finish.

Let the paint dry completely:

After you have applied the paint in thin coats, you need to let the paint dry completely before you add any hardware back to the door.

It is important to let the paint dry completely because otherwise, the paint will not be able to adhere to the door properly and it will also be more susceptible to chipping and peeling.

Part 3: Enjoy your newly painted door!

Now that you have finished painting the door, you can enjoy your newly painted door! but how can you enjoy your newly painted door?

Here are some ideas:

Hang good luck sing on your door:

Hang good luck sing on your door:

One way to enjoy your newly painted door is to hang a doormat on your door. this will give you a place to wipe your feet before you enter your house.

In addition, you can also hang a wreath on your door. This will give your door a more festive look and it will also help to welcome guests into your home.

Place flowers on either side of your door:

Place flowers on either side of your door:

Flowers are the symbol of life. Flowers of different colors can also help to add some color to your door. you can place flowers on either side of your door or you can place them in front of your door.

But, make sure that the flowers you choose are appropriate for the season. For example, if it is summer, you can choose to place sunflowers in front of your door.and if it is winter, you can choose to place poinsettias in front of your door.

Add a door knocker:

Door Knockers are not only functional but they can also be very beautiful. If you want to add a door knocker to your door, you can choose one that matches the style of your door.

For example, if you have a modern door, you can choose a door knocker that is made of stainless steel. but if you have a more traditional door, you can choose a door knocker that is made of brass.

Place a potted plant by your door:

Potted plants are not only beautiful but they can also help to purify the air. A potted plant in your steel door can also help to give your door a more natural look. You can choose to place a potted plant on either side of your door or you can place it in front of your door.

But, make sure that the plant you choose is appropriate for the climate. For example, if you live in a cold climate, you can choose to place a potted evergreen plant by your door. and if you live in a warm climate, you can choose to place a potted palm plant by your door.

These are just some of the ways you can enjoy your newly painted door. But, ultimately, it is up to you how you want to enjoy your newly painted door. So, go ahead and paint your door and then enjoy it in whatever way you choose!

Frequently Asked Question:

Q: Can you apply the paint in thick coats?

A: Yes, you can apply the paint in thick coats but it will be more difficult to achieve an even finish. Furthermore, the paint will take an extended amount of time to dry and it will be more prone to bubbles and peeling.

Q: Do you need to primer the door before I paint it?

A: No, you don’t need to primer the door before you paint it. However, if you want to achieve a more even and consistent finish, you can apply a coat of primer before you paint the door.

Q: Can you use any kind of paint on my steel door?

A: No, you can’t use just any kind of paint on your steel door. You need to use paint that is specifically designed for steel doors. This type of paint will give you a more even and consistent finish.

Q: What is the best way to apply the paint?

A: The best way to apply the paint is to use a brush or a roller. This will help to prevent the formation of bubbles and it will also give you a more even and consistent finish.

Q: How long does it take for the paint to dry?

A: It usually takes about 24 hours for the paint to dry. However, if you are painting in a humid environment, it may take longer for the paint to dry.

Q: Do you need to seal the door after I paint it?

A: No, you don’t need to seal the door after you paint it. However, if you want to achieve a more even and consistent finish, you can apply a clear sealer after you paint the door.

Conclusion:

Now that you have your supplies ready and surface prepped, it’s time to get started on painting your primed steel door. The following steps will give you guidance on how to apply the paint for a smooth finish. Be sure to enjoy your newly painted door once you’re finished! Visit our blog regularly for more helpful tips like this one.

How to Paint Wrought Iron Fences that have Rust Like a Pro?

How to Paint Wrought Iron Fences that have Rust

Rust never sleeps, and neither does your wrought iron fence. The two of them are in a constant battle, with the rusty red creeping its way across the black metal. Every day, it seems like the rust is winning a little bit more ground.

But you’re not going to let that happen. You’re going to fight back. How? With a can of paint, of course! A fresh coat of paint will not only cover up the rust but will also protect the fence from further damage. It’s a win-win! So what are you waiting for? Pick up a brush and get to work!

6 Genius Hacks for Painting Wrought Iron Fences that have Rust

Painting a wrought iron fence is a great way to add curb appeal to your home. However, it’s important to properly prepare the surface before painting to ensure that the paint will adhere properly and last for years to come.

Here are six tips to help you achieve the best results:

Prepare the wrought iron fence for painting:

Prepare the wrought iron fence for painting

A wrought iron fence is a beautiful addition to any home. But over time, the elements can take their toll, leaving the fence looking dull and in need of a fresh coat of paint. Before you begin painting, it’s important to prepare the surface properly.

This will help ensure that the paint adheres evenly and lasts for years to come. The first step is to clean the fence. This will remove any dirt, debris, or rust that has accumulated on the surface. Once the fence is clean, you can then begin painting. With a little preparation, you can easily give your wrought iron fence a fresh new look.

Remove the rust from the fence:

Remove the rust from the fence

If your wrought iron fence is looking more orange than black, it’s time to take action. Rust is not only unsightly, but it can also cause damage to the integrity of the metal. Left unchecked, rust will eventually eat through the wrought iron, leaving your fence vulnerable to collapse.

There are a few ways to remove rust from wrought iron fences, and the best method will depend on the severity of the rust. For light rust, a wire brush can be used to gently remove the corrosion. If the rust is more significant, a chemical rust remover may be necessary.

Once the rust is removed, it’s important to protect the fence from future corrosion. This can be done by painting or applying a sealant to the fence.

Remove the old paint from the rusty fence:

Remove the old paint from the rusty fence

Have you ever seen a house with a faded, peeling fence and thought to yourself, “That looks terrible!”? Well, there’s an easy way to fix that problem: by removing the old paint from the fence before painting. This may seem like a lot of work, but it’s actually quite simple. And once you see the results, you’ll be glad you took the time to do it right.

Here’s how to remove the old paint from your rusty fence:

First, gather your supplies

You’ll need a wire brush, a putty knife, sandpaper, and a paint stripper.

This is the process that you follow

Take a look at your fence and decide where to start. Once you’ve chosen a spot, begin brushing away the loose paint with your wire brush. Be sure to work in small sections so that you don’t miss any spots.

Next, use your putty knife to scrape off any remaining paint. If there are stubborn areas of paint that refuse to budge, sand them down with your sandpaper.

Finally, apply your paint stripper according to the manufacturer’s instructions. Once the stripper has had time to work its magic, simply rinse it off with water and you’re done! Now your fence is ready for a brand-new coat of paint.

Prime the wrought iron fence:

Prime the wrought iron fence

Before you paint your wrought iron fence, there’s one important step you need to take: priming. By priming the fence before you paint it, you’ll help to prevent rust and ensure that your paint job lasts for years to come.

Here’s what you need to know about priming a wrought iron fence. First, choose a primer that’s designed for use on metal. Then, apply the primer to the fence using a brush or roller. Once the primer is dry, you’re ready to paint your fence.

Apply paint to the fence:

Apply paint to the fence

Applying paint to a wrought iron fence may seem like a daunting task, but it’s actually quite simple – and the results can be truly stunning. A bristle brush is the best tool for the job, as it will allow you to get into all the nooks and crannies of the fence.

Plus, the bristles will help to create a textured finish that will really make the paint job stand out. So don’t be afraid to pick up a brush and get started on your fence today!

How Much Does it Cost to Paint a Wrought Iron Fence?

A wrought iron fence adds a touch of elegance to any property, but it can be a lot of work to keep it looking its best. Painting a wrought iron fence is a great way to protect it from the elements and keep it looking new. But how much does it cost to paint a wrought iron fence? The answer may surprise you.

Depending on the size of the fence and the type of paint you use, the cost can range from a few hundred dollars to a few thousand. But don’t let that deter you from giving your fence the protection it needs. With a little bit of planning, you can find a way to paint your fence that fits your budget.

Which Paints are Best for Wrought Iron Fences?

Painting a wrought iron fence is a great way to add curb appeal to your home. But with so many different types of paint on the market, it can be hard to know which one is right for your fence.

If you want to paint that will last longer and look good, you need to choose one that is specifically designed for wrought iron. These paints are usually made with an oil-based formula, which helps to resist chipping and fading.

In addition, they typically contain a rust-inhibitive agent, which will help to keep your fence looking new for years to come. When choosing paint for your wrought iron fence, be sure to select one that meets all of your needs.

With the right product, you can enjoy a beautiful and durable fence for years to come.

Should you use a Sealant on a Painted Wrought Iron Fence?

If your wrought iron fence is looking a little worse for wear, you may be considering applying a sealant. But before you reach for the can of polyurethane, there are a few things you should consider.

First, does your fence really need a sealant? If it’s made of quality materials and has been properly maintained, it may not need one at all.

Second, what type of sealant should you use? There are dozens of different products on the market, and not all of them are created equal.

And finally, how much sealant will you need? A little goes a long way, so be careful not to overdo it.

By taking the time to answer these questions, you can be sure that you’re using the right product in the right way to get the best results.

Conclusion:

Rust can be a beautiful thing. It gives character and history to objects, like wrought iron fences. If you’re not careful, though, rust can also take over and make those objects look old and decrepit. The key to keeping your wrought iron fence looking new is to paint it regularly, using the right techniques.

We’ve outlined the best tips and tricks for painting a wrought iron fence that has rust, so follow these guidelines and your fence will be good as new in no time! Do you have any questions about how to paint a wrought iron fence? Leave us a comment below or visit our blog regularly for more helpful advice.

How To Paint A Metal Exterior Door?

How To Paint A Metal Exterior Door Without Removing It From Hinges

Have you ever noticed how the front door is always one of the first things people see when they come to your house? First impressions are important, so why not make sure yours is looking its best? You might be surprised to learn that painting your metal exterior door is a quick and easy project that doesn’t require removing the door from its hinges.

Plus, it’s a great way to add a pop of color and personality to your home’s exterior. Here’s what you need to know to get started.

Paint a Metal Exterior Door In 8 Steps:

Who has time to remove a door just to paint it? If you’re like most people, the thought of removing a door from its hinges, taking it outside and then re-hanging it is enough to make you never want to paint your door again.

But there’s a better way! With a little elbow grease and the right materials, you can paint a metal exterior door without removing it. Here’s how:

1. Remove the hardware from the door

Remove the hardware from the door

If you’re planning on giving your door a fresh coat of paint, there’s one important step you can’t forget: removing the hardware. Taking off the doorknob, hinges, and any other metal fixtures will ensure that your paint job turns out looking neat and professional.

It might seem like extra work, but it’s worth taking the extra few minutes to avoid any unsightly smudges or streaks. Plus, once the hardware is off, you’ll be able to paint the door in one smooth, uninterrupted motion.

So save yourself some headaches down the road and take care of this crucial step before you start painting.

2. Cover the areas you don’t want to be painted

Cover the areas you don't want to be painted

Are you painting your front door and want to make sure you don’t make any mistakes? Cover the areas you don’t want to be painted in before you start painting the metal door. This will help you avoid any accidents and ensure that the paint job turns out exactly how you envision it. 

You don’t have to be a professional painter to achieve a great-looking front door. By following this simple tip, you can rest assured that your door will look amazing when you’re finished.

So don’t wait any longer, get started today and enjoy your new front door!

3. Fix the dents and scratches on the metal door

Fix the dents and scratches on the metal door

Have you ever looked at a door with dents and scratches and thought to yourself, “That needs to be fixed before I can paint it.” Well, you’re in luck! Fixing those dents and scratches is easy – all you need is a hammer.

With a few quick taps of the hammer, you can make those imperfections disappear. And once the door is smooth, painting is a breeze. So next time you’re staring at a door with dents and scratches, don’t despair – just grab a hammer and get to work!

4. Prepare the metal door surface for painting

Cleaning and sanding the metal exterior door are among the steps involved in its preparation.

What is the best way to clean the metal door?

What is the best way to clean the metal door

If you’re planning to paint your metal door, there’s one important step you can’t skip: cleaning the door first. Even if the door looks clean, there’s likely to be a build-up of grime and dirt that will prevent the paint from adhering properly.

Fortunately, cleaning a metal door is a fairly straightforward process. Here’s what you need to do to get your door ready for a fresh coat of paint.

First, start by giving the door a good wash with soap and water. Pay special attention to any areas that seem especially dirty or grimy. Once the door is wet, use a stiff brush to scrub away any remaining dirt. Rinse the door off with clean water and let it dry completely.

Sanding the metal exterior door:

Sanding the metal exterior door

Have you ever painted a door and then wonder why the paint just won’t stay put? It may be because you didn’t sand the door properly before painting. Sanding the door helps to create a smooth surface that the paint can adhere to more easily.

Sanding also eliminates any old, peeling paint. This ensures that the new paint will have a clean surface to grip on, making it more likely to last for a longer period of time. So, next time you’re painting a metal door, make sure to give it a good sanding first – your paint job will thank you for it!

5. Apply good quality primer

Apply good quality primer

Have you ever painted a metal door only to have the paint peel off a few months later? If so, you were probably using a low-quality primer (or no primer at all). A good quality primer is a key to ensuring that your paint job will last. By creating a barrier between the metal and the paint, primer helps to prevent chipping and peeling.

In addition, primer provides a smooth surface for the paint to adhere to, resulting in a professional-looking finish. So next time you’re painting a metal door, be sure to use a high-quality primer for the best results.

6. Paint the metal door

Paint the metal door

Have you ever walked up to a freshly painted door and just wanted to reach out and touch it? The smooth, even surface of the paint is so inviting that it draws you in. Now imagine if that door was yours.

You can have that same feeling of satisfaction every time you come home, by simply painting your metal door with a brush and applying two coats of paint. Not only will your door look amazing, but it will also be protected from the elements. So don’t wait any longer, pick up a brush and start painting!

7. Let the door dry

Once you’re finished painting, let the door dry completely before opening it. This will ensure that the paint doesn’t get damaged.

It’s also a good idea to wait at least 24 hours before hanging anything on the door, such as a wreath or a welcome sign.

8. Hang a wreath or welcome sign (optional)

A wreath or welcome sign is the perfect finishing touch to a newly painted metal door. Not only will it add a touch of personality to the door, but it will also help to protect the paint from weather damage.

A wreath or sign can also be a great way to show off your unique style, and it’s a surefire way to add curb appeal to your home. So if you’re looking for a quick and easy way to give your home a facelift, hang a wreath or sign on your newly painted metal door. You won’t regret it!

What Supplies You’ll Need to Paint a Metal Exterior Door?

Before you start painting, it’s important to gather the right supplies. Here’s a list of what you’ll need to paint a metal exterior door: 

  • A primer designed for metals (this will help the paint to adhere better) 
  • A high-quality paintbrush ( synthetic brushes are a good option) 
  • A hammer
  • Drop cloths or old sheets (to protect your floors from paint drips)  
  • Tape (to create crisp lines along the edge of the door) 
  • A sandpaper
  • Soap and water
  • Wreath or welcome sign (optional)

With these supplies in hand, you’re ready to start painting. Just be sure to take your time and work in small sections so that the paint has time to dry properly. And before long, you’ll have a beautiful new front door that’s sure to impress your guests.

Conclusion:

Painting a metal exterior door doesn’t have to be difficult. Follow these simple steps and you’ll have a beautiful, freshly painted door in no time! If you’re looking for more painting tips or advice, be sure to visit our blog regularly. We’ll keep you updated on the latest trends and techniques so that your next painting project can be your best yet. Thanks for reading!

How To Paint An Iron Fence like A Pro

How To Paint An Iron Fence like A Pro

Have you ever looked at an iron fence and thought, “That would be a fun project to take on!”A fresh coat of paint can do wonders for an iron fence. Not only will it make the fence look new again, but it will also help protect it from the elements.

Of course, painting an iron fence is not a simple task. If you’re not careful, you can easily end up with a messy and uneven finish. Fortunately, there are a few simple tips that can help you paint an iron fence like a pro. With a little patience and some practice, you’ll be able to achieve a beautiful and long-lasting finish.

So, what are you waiting for? Let’s get started!

What type of Material will you Need to Paint an Iron Fence?

you will need:

  • A wire brush
  • Rust-resistant primer
  • Good quality paint
  • Paint thinner (for oil-based paint) or water (for latex paint)
  • Paintbrush or roller
  • Drop cloths or plastic sheeting
  • Safety goggles
  • Dust mask
  • sandpaper

The Basic Tips and Tricks for Painting an Iron Fence? 5 step

Have you ever looked at an old, rusty iron fence and thought to yourself, “That could use a fresh coat of paint!”? Well, you’re not alone.

Painting an iron fence is a great way to give it new life and protect it from further damage. But before you get started, there are a few things you need to know.

Here are six basic tips and tricks for painting an iron fence:

1. Clean the surface iron fence:

Clean the surface iron fence

The first step is to remove any dirt from the fence. A wire brush will do the trick nicely. Once you’ve brushed off the loose debris, it’s time to tackle the tough stuff. For this, you’ll need a mixture of water and vinegar.

Apply the mixture to the fence with a sponge or cloth and scrub thoroughly. Be sure to rinse off the vinegar afterward. Now your fence is clean and ready for the next step.

2. Sand the iron fence

Sand the iron fence

Sanding an iron fence is not only a necessary step before painting, but it’s also an opportunity to give the metal a smooth, finished look. The process is simple: using sandpaper and a little elbow grease, you can remove any rough patches or imperfections from the surface of the iron.

In addition, sanding provides a chance to prep the metal for paint, ensuring that the finished product will have a professional appearance. So don’t skip this important step – with a little time and effort, you can make your iron fence look new.

3. Remove the rust from the fence

Remove the rust from the fence

The next step is to remove any rust that has built up on the iron. If you don’t remove the rust first, the paint will not adhere properly and will eventually start to chip and flake off.

The good news is that removing rust from an iron fence is a fairly simple process that anyone can do with a little elbow grease. All you need is a wire brush. Just make sure to wear gloves and eye protection glasses while you’re working!

With a little bit of effort, you’ll have a rust-free fence that’s ready for a new coat of paint.

4. Apply a rust-resistant primer

Apply a rust-resistant primer

If you’re planning on painting your iron fence, there’s one important step you can’t skip: applying a rust-resistant primer on a rusty fence Not only will this help to prevent the formation of new rust,  but it will also  give the paint a smoother surface to grip onto.

In addition, the primer will help to protect the paint from fading and chipping. As a result, taking the time to apply a rust-resistant primer is essential for achieving a long-lasting finish.

5. Paint the fence

Paint the fence

What kind of Paint should you use on an Iron Fence?

Are you looking for a way to add a pop of color to your yard? Or are you wanting to touch up a worn-down fence? Painting an iron fence is a great way to achieve either of these objectives, but it’s important to use the right kind of paint.

  • Oil-based paints are durable and resist chipping, but they can be more difficult to apply.
  • Water-based paints are easier to work with but don’t last as long.

When choosing paint for your iron fence, it’s important to consider both your needs and your preferences. With a little bit of research, you’re sure to find the perfect paint for the job.

How to Apply Paint Properly on an Iron Fence with a roller or brush?

Once the primer is dry, you can now start painting the fence with your chosen color. When using a roller, start from the top and work your way down in even strokes. If you’re using a brush, start from one side and work your way across.

Make sure to tap off any excess paint before applying it to the fence. And that’s it! With these simple tips, you’ll have your iron fence looking great in no time.

6. Let the paint dry

Now that you’ve finished painting, it’s time to let the fence dry. Depending on the type of paint you used, this could take anywhere from a few hours to a few days.

In any case, it’s important to be patient and not rush the drying process. Once the paint is completely dry, your iron fence will be ready to enjoy.

What Is The Best Time of Year to Paint an Iron Fence?

The best time of year to paint an iron fence is during the spring or fall. The weather during these seasons is mild, which prevents the paint from drying too quickly or becoming too brittle.

In addition, there is typically less wind during the spring and fall, which makes it easier to apply a smooth coat of paint. However, it is important to check the forecast before painting, as a sudden rainstorm can ruin your work.

If you plan on a painting during the summer, make sure to choose a day when the temperatures are cooler and there is little chance of rain. With careful planning, you can achieve a beautiful and long-lasting finish on your iron fence.

Which Colors Look Good when you decide to Paint Iron fences?

Most people believe that when it comes to painting iron fences, black is the only color that looks good. However, this simply is not true! There are a variety of colors that can add beauty and style to an iron fence, depending on the look you are going for.

For instance, a classic white iron fence can give your home an elegant and regal appearance. Or, if you want something with a more modern edge, consider painting your fence in a bold color such as red or yellow.

No matter what your personal taste may be, there is definitely a color out there that will look great on your iron fence. So don’t be afraid to experiment – the results might just surprise you!

Final Thoughts:

Painting an iron fence may seem daunting, but with the right tools and a bit of know-how, it can be a breeze. Follow our simple tips and tricks, and you’ll have a beautiful fence to enjoy in no time. Be sure to visit our blog regularly for more helpful advice on painting everything from fences to furniture. Happy painting!

What Kind of Paint Do You Use on Aluminum Siding?

What Kind of Paint Do You Use on Aluminum Siding

Looking to update your home’s exterior? aluminum siding is a popular choice for many homeowners. But if you’re going to paint aluminum siding, it’s important to use the right kind of paint.

When it comes to painting aluminum siding, there are two main types of paint you can use:

Latex and oil-based paint:

Ultimately, the best type of paint to use on aluminum siding depends on your personal preferences and needs.

If you’re looking for a project that will give your home’s exterior a fresh new look, painting aluminum siding is a great option. Just be sure to use the right type of paint so that your project turns out exactly as you envisioned it.

What Is The Best Interior and Exterior Paint for Aluminum Siding?

What Is The Best Interior and Exterior Paint for Aluminum Siding?

Aluminum siding is a durable and popular choice for both home and business exteriors. But what about the paint job? What are the best interior and exterior paint colors for aluminum siding? With so many choices on the market, it can be tough to decide. But fear not! We’ve done the research and compiled a list of our top picks.

If you’re looking for high-quality paint that will give you excellent coverage and a beautiful finish, then acrylic latex paint is a great option.

Why should you choose Acrylic Latex Paint Over other Paints for Painting Aluminum Surfaces?

Acrylic latex paint is a type of water-based paint that contains acrylic resin. It’s often used for both interior and exterior painting projects because it has a number of advantages which are described here:

1. Excellent Coverage and durability:

Excellent Coverage and durability

Are you looking for a paint that will give you excellent coverage and durability? Look no further than acrylic latex paint. This type of paint is ideal because it provides a long-lasting finish that is resistant to both fading and chipping.

So if you’re looking for a high-quality paint that will give you excellent coverage, acrylic latex paint is a perfect choice.

2. Easy to apply on aluminum siding:

Easy to apply on aluminum siding

You may be surprised to learn that painting your aluminum siding can be not only easy but also easy to apply to give your home’s exterior a much-needed facelift. By using acrylic latex paint specifically designed for metal surfaces, you can achieve amazing results with little effort.

In fact, painting aluminum siding is so easy that anyone can do it, regardless of their skill level. And best of all, you won’t have to spend a fortune to get the job done.

So if you’re looking for a quick and easy way to improve your home’s curb appeal, then painting your aluminum siding with acrylic latex paint is the way to go.

3. Resistant to Moisture:

Resistant to Moisture in alumium siding

There’s nothing worse than starting a painting project only to have the paint start peeling off shortly after. That’s why many homeowners and professional painters alike prefer to use acrylic latex paint, which is known for its resistance to moisture.

Whether you’re painting your bathroom or your bedroom, you can rest assured that the paint will stay put, no matter how much moisture is in the air. Acrylic latex paint is also a good choice for any exterior painting projects, as it will stand up to the elements without fading or chipping.

So if you’re looking for a paint that will give you long-lasting results, acrylic latex is the way to go.

4. Low VOC:

Volatile organic compounds (VOCs) are emitted into the air as gasses from certain solids or liquids. They can be harmful to your health, so it’s important to choose paint with low VOCs.

Acrylic latex paint has very low VOCs, making it a safer choice for both you and the environmental organic compounds (VOCs) that are emitted into the air as gasses from certain solids or liquids.

They can be harmful to your health, so it’s important to choose paint with low VOCs. Acrylic latex paint has very low VOCs, making it a safer choice for both you and the environment.

5. Easy to Clean and versatile:

Easy to Clean and versatile

Looking for paint that is easy to clean and will look great in your home? Consider acrylic latex paint! This type of paint is specifically designed to be easy to clean, making it a great choice for busy families or anyone who wants to avoid spending hours scrubbing paint stains.

In addition, acrylic latex paint is available in a wide range of colors and shades, so you can easily find the perfect color for your home. So if you’re looking for a paint that is both easy to clean and stylish, consider acrylic latex paint!

6. Affordable:

There’s no denying that a fresh coat of paint can transform any room in your home. But when it comes to choosing the right paint, there are so many options on the market that it can be hard to know where to start.

If you’re looking for an affordable and budget-friendly option, acrylic latex paint is a great choice. Latex paint is already known for being one of the most affordable types of paint on the market, but acrylic latex goes one step further by being specifically designed to be budget-friendly.

So if you’re looking for an affordable option that won’t sacrifice quality, acrylic latex paint is the way to go.

7. It’s also ideal for high-traffic areas:

When you need paint that will withstand the rigors of daily life, you need acrylic latex paint. Unlike other types of paint, acrylic latex is specifically designed to withstand high levels of traffic without showing signs of wear and tear.

Whether you’re painting your front door or your kitchen cabinets, acrylic latex will give you the long-lasting results you need. In addition, acrylic latex is easy to maintain, so you can keep your home looking its best for years to come. When it comes to making your home beautiful and durable, acrylic latex paint is the way to go.

How Long does Paint Last on Aluminum Siding?

How Long does Paint Last on Aluminum Siding

Most people think that paint is paint, so it doesn’t matter what surface it’s applied to. They couldn’t be more wrong! The fact is, the lifespan of your paint job depends greatly on the type of surface you’re painting.

When it comes to aluminum siding, you need to be especially careful to choose high-quality paint (Acrylic Latex Paint) that will last. So how long does paint last on aluminum siding? With proper preparation and the right product, your paint job can last for years.

But if you don’t take the time to do things right, you’ll be stuck repainting much sooner than you’d like. Keep reading to learn more about how to choose the right paint for your aluminum siding and how to properly prepare the surface for a long-lasting finish.

Should You Use a Primer Before Painting Aluminum Siding?

Most people don’t consider using a primer before painting aluminum siding, but it can be a game-changer. A primer provides a smooth surface for the paint to adhere to, and it also helps to fill in any imperfections in the metal.

As a result, your paint job will last longer and look better. In addition, using a primer can help to reduce the risk of paint peeling or chipping.

So if you’re planning on painting metal siding, be sure to use a primer first. It’ll make all the difference in the quality of your finished product.

Conclusion:

Whether you are looking to paint the exterior or interior of your home, it is important to choose the right paint for the job. In this blog post, we have discussed some of the best options for painting aluminum surfaces. We recommend using acrylic latex paint, as it will provide good coverage and durability on aluminum siding. Be sure to visit our blog regularly for more helpful tips like this.

Iron Door Painting: 7 Soul-Saving Techniques for a Stunning Entrance

How To Paint The Iron Door: What You Need To Know?

There’s more to a can of paint than meets the eye. 

Painting your iron door is a skill that requires considerable artistry. The particular color of the paint can make all the difference between a drab, uninteresting door and a show-stopper. A can of paint must also be chosen carefully based on the door’s material.

For example, an iron door should never be painted with oil-based paint, which will cause the door to rust. Of course, choosing the right one can be overwhelming with so many different types of paint available on the market.

But don’t worry, we’re here to help. In this article, we’ll walk you through everything you need to know about painting your iron door, from choosing the right type of paint to applying it like a pro. By the time you’re finished reading, you’ll be ready to transform your door into a work of art.

So let’s get started!

The Solid Reason Why you Should Paint your Iron Door?

The Solid Reason Why you Should Paint your Iron Door

Most people don’t know this, but an iron door can last centuries without ever needing to be painted. However, painting your iron door has several benefits that are well worth considering.

For one, paint provides an extra layer of protection against the elements. It can help prevent rust and other types of damage that can shorten the door’s lifespan.

Paint also allows you to personalize your door and make it truly unique. You can choose any color or combination of colors and even add patterns or other design elements. The sky’s the limit when it comes to painting your iron door.

Finally, painting your iron door can increase its value. If you ever decide to sell your home, a well-painted door will be a major selling point.

Now that we’ve gone over why you should paint your iron door let’s discuss how to do it.

How to Paint Your Iron Door Like a Pro?

How to Paint Your Iron Door Like a Pro

When painting your iron door, there are a few things you need to keep in mind to get the best results.

Choose the right type of paint:

First, you need to choose the right type of paint. Specialized paints are available specifically for use on metal surfaces, so make sure to pick one of these up from your local hardware store. The paints used on iron doors are meant to endure the elements and prevent rusting, making them ideal for an iron door.

If you want your door to stand out, consider using metallic paint. These paints come in various colors, from classic silver to bold shades like gold or copper. Metallic paints can give your door a unique look that will make it stand out.

Choosing the perfect color:

The next thing you need to do is choose the perfect color for your door. Get creative with your color choice. Once you’ve chosen the right type of paint, it’s time to start thinking about color.

When selecting a color for your door, it’s important to consider the overall look of your home. You want the door to complement the rest of the house, not clash with it. If you’re unsure about what color to choose, ask for help at your local hardware store.

If you’re unsure what color to choose, look at the other doors in your neighborhood for inspiration. You can also use a paint visualizer tool to see how different colors will look on your door. Once you’ve chosen the perfect color, it’s time to start painting.

How you Paint an Iron Door in 7 Easy Steps?

Now that you’ve chosen the right type of paint and color, it’s time to start painting your door. Follow these seven easy steps, and you’ll have a beautifully painted door in no time.

Step 1: What You’ll Need for the Paint Job

  • A can of primer
  • A can of paint
  • A brush or roller
  • A drop cloth or tarp
  • Painter’s tape
  • Sandpaper (optional)
  • Paint scraper
  • Screwdriver
  • paint striper

Now that you have all your materials, you’re ready to begin prepping for your paint job!

Step 2: Remove the door hardware

The next step is to remove the door hardware. This includes the doorknob, deadbolt, and any other hardware on the door. To do this, you will need a screwdriver. Start by removing the screws that hold the doorknob in place.

Once the screws are removed, you can pull the doorknob off of the door. Next, remove the screws that hold the deadbolt in place. Once the screws are removed, you can pull the deadbolt out of the door. Finally, remove any other hardware on the door.

Step 3: Clean the iron door carefully.

Before painting your iron door, it is essential to clean it thoroughly. This will remove any dirt, debris, or rust that could prevent the paint from adhering properly. To clean the door, start by using a paint scraper to remove any loose paint.

Next, use a brush or roller to apply a layer of primer. Once the primer is dry, sand the door lightly with sandpaper. This will create a smooth surface for the paint to adhere to. Finally, use a drop cloth or tarp to protect the area around the door while you’re painting. Once you’ve removed all the dirt and grime, rinse the door off with clean water.

Step 4: Remove the old paint on the iron door

Removing paint from metal can be tricky- you don’t want to damage the surface of the metal door. First, start with a paint stripper. Apply the paint stripper according to the instructions on the package.

Once the paint stripper has had a chance to work, use a paint scraper to remove the old paint. If the paint is stubborn, you may need to use a heat gun or blow torch to loosen it. Be careful not to damage the metal door while you’re removing the old paint.

Step 5: Sand the door

It’s critical to sand down a metal door’s surface before painting it, roughing it up, and eliminating any rust. This will help the paint to adhere better and create a stronger bond. Start by using medium-grit sandpaper to remove any rust.

If the door is already painted, use fine-grit sandpaper to create a smooth surface for the new paint. Once you’ve removed all the rust and paint, wipe down the door with a clean cloth to remove any dust.

Step 6: Apply a coat of primer to the door

Applying a coat of primer to your iron door is an important step in ensuring that the door retains its finish for years to come. Primer provides a barrier between the metal and the elements, helping to prevent rust and corrosion. It also creates a smooth surface for the paint to adhere to.

To apply the primer, use a brush or roller to evenly cover the door. Make sure to cover all surfaces of the door, including any corners and crevices. You’re ready to paint your door once the primer has dried.

Step 7: Paint the door by using a brush or roller

When painting a door, there are a few things to keep in mind. First, be sure to choose a color that you love and that will complement the rest of your décor. Second, use a brush or roller to apply the paint evenly. Third, allow plenty of time for the paint to dry before hanging the door back up.

How to Care for a Painted Iron Door?

Once you have completed the iron door painting job successfully, you will want to know how to care for your newly painted door. Here are ten effective tips that will help you keep your door looking its best for years to come.

  1. Inspect the door regularly for any chips or cracks in the paint. If you see any damage, touch up the paint as soon as possible.
  2. Avoid hanging anything heavy on the door, as this could cause the paint to chip or crack.
  3. In the event that the door does become damaged, sand down the area and repaint it.
  4. Wipe up any spills or stains on the door immediately.
  5. Dust the door regularly with a soft cloth.
  6. Once a year, wash the door with a mild soap and water solution.
  7. If you live in an area with high humidity, consider using rust-inhibitive paint on your door.
  8. store any paint that you have left over from the project in a cool, dry place.
  9. Dispose of any paint cans or other materials properly.
  10. Enjoy your newly painted iron door!

In addition, if you live in an area with cold winters, it’s important to take steps to prevent the door from freezing. One way to do this is to apply a clear sealant to the door before the first frost. This will help to protect the paint and keep the door looking its best.

Frequently Asked Questions:

What kind of paint should I use on wrought iron?

When painting wrought iron, it’s important to choose a paint that is specifically designed for use on metal. These paints are typically oil-based or latex-based. They contain binders that help the paint adhere to the metal surface, and they also have rust-inhibitive properties.

How do you keep paint from peeling off metal?

There are a few different ways to keep paint from peeling off metal. One way is to use a primer before painting. This will help to create a barrier between the paint and the metal so that the paint is less likely to peel off. Another way is to sand the metal before painting it. This will help to create a smooth surface for the paint to adhere to.

Final words:

Painting your iron door is a great way to add curb appeal to your home.  It can also add security to your home by making it more difficult for someone to break in. With proper care, your newly painted iron door will last for many years to come.

But if you don’t do it right, you could end up with a chipped, peeling mess. So be sure to follow the tips in this guide to ensure that your door looks its best for years to come. Thanks for reading!

Be sure to visit our blog regularly for more tips and advice on home improvement projects.

How To Give Your Metal Door A Wood Finish That Looks Authentic?

How To Give Your Metal Door A Wood Finish That Looks Authentic

Metal doors are often thought of as being cold and industrial, but a wood finish can give them a warm, inviting look. But how to give your metal door a wood finish?

Wood grain patterns can be embossed onto the metal, or real wood veneers can be applied. This finish not only looks authentic, but it also helps to protect the door from being scratched and scuffed.

A wood finish can help reduce noise levels, making it an ideal choice for busy households. In addition, a metal door with a wood finish can add a touch of distinction and elegance to any home. Whether you’re looking for a new front door or want to update the look of your existing doors, this option is definitely worth considering.

What is The Best Paint To Give A Woody Look To Metal Doors?

What is The Best Paint To Give A Woody Look To Metal Doors

There are a few things you need to consider when choosing the right type of paint for your metal door. If you want the door to look like wood, you’ll need to choose a paint that can mimic the grain and color of the wood.

You’ll also need to make sure the paint is durable and won’t chip or peel easily. Here are a few types of paint that would work well for this project:

Oil-based paints:

Oil-based paints have a certain level of viscosity that allows them to flow evenly across surfaces, resulting in a smooth, professional-looking finish. In addition, oil-based paints are highly resistant to wear and tear, making them ideal for high-traffic areas like kitchens and bathrooms.

However, oil-based paints do have some drawbacks. They tend to be more expensive than other types of paint, and they require a longer drying time.

Latex paints:

Latex paint is water-based paint, as opposed to oil-based paint. It is made from synthetic rubber or polymer resins and contains no actual latex from rubber trees. Latex paint dries quickly and has a low odor, making it ideal for painting indoors.

The drawback of latex paint is that it can be less durable than oil-based paint and is not as easy to touch up and repair.

Acrylic paints:

These paints are a good middle ground between oil-based and latex paints. Acrylic paint is not only for art canvases or paper. You can also use this type of paint to achieve a beautiful and unique look on metal doors that resemble wood.

The best thing about painting metal doors with acrylic paint is that you may be very creative and inventive with the colors you use. You can go for a natural wood look by choosing browns, tans, and oranges, or you can add a pop of color to your home by choosing brighter shades like blues, greens, and pinks.

No matter what look you are trying to achieve, acrylic paint is an excellent option for Metal doors that look like wood.

The 6 Magical Tricks For You To Paint The Metal Door: A Step-By-Step Guide

If you’re looking to paint your metal door to make it look like wood, there’s a secret trick that can help make the process a lot easier. Here are the steps you need to take:

1. Select the paint color (for a wooden look brown is best)

Choosing the best paint color for your door can seem like a daunting task, but with a little know-how, you can narrow down your options and find the perfect shade for your home. If you’re looking for a classic wooden look, brown is always a good choice

2. Clean the door and remove all hardware

Before you can begin painting your door, you need to take some time to prep the surface. This includes cleaning the door and removing all hardware. Start by giving the door a thorough cleaning. Use a mild soap and water solution to remove any dirt, dust, or debris.

Once the door is clean, you can remove the hardware. This includes doorknobs, hinges, and any other decorative elements.

3. Tape off the areas you don’t want to get paint on

Painting can be a messy business, but there are ways to minimize the risk of paint ending up where it shouldn’t. One of the most important steps is to tape off the areas you don’t want to get paint on before beginning to paint.

The best way to do this is to use painter’s tape. Painter tape is a type of adhesive tape specifically designed for use on painted surfaces, and it will create a sharp line between the area you’re painting and the area you’re not.

When applying painter’s tape, press firmly on all edges to seal it properly.

4. Apply a coat of primers to help the paint stick

When you are painting the metal door, it is always best practice to put on a coat of primer before the actual paint. This helps the paint to adhere better to the surface of the door and also provides a more even and smooth finish. Using a primer can help reduce the amount of paint needed for the job, as it will provide better coverage.

5. Paint the metal door using a brush or roller.

Painting the door with a brush or roller is a fairly straightforward process. If you’re using a brush, choose one with synthetic bristles; natural bristles tend to absorb too much paint and can leave behind streaks.

When painting, start with the edges of the door and work your way in toward the center.

6. Let it dry completely before reinstalling the hardware.

This step will help prevent any damage to the new paint job and will also give the hardware a chance to properly adhere to the surface.

In most cases, it is best to wait at least 24 hours before reinstalling hardware. If you are in a hurry, you can try using a hair dryer or heat gun to speed up the drying process.

Why Do People Choose Metal Doors That Look Like Wood Over Traditional Wood?

Why Do People Choose Metal Doors That Look Like Wood Over Traditional Wood

These days, more and more people are choosing metal doors that look like wood. Why the sudden shift? There are several reasons for this.

First, metal doors are more durable than wood doors. They’re not as susceptible to weather damage, rot, or insect infestation. And they won’t warp or crack over time.

Wood doors are traditional and classic, and they add a touch of elegance to any home. However, they require regular maintenance, such as painting or staining, to keep them looking their best. Metal doors are much easier to care for and they are also more durable than wood doors.

Secondly, metal doors can be made to look like wood, so you can have the best of both worlds – the beauty of wood with the durability of metal.

Third, metal doors can give you the same classic look as a wood door but with a modern twist.

Fourth, metal doors can be more energy-efficient than wood doors, which is a plus if you want to save on your energy bills.

So if you’re in the market for a new door, don’t discount metal doors that look like wood – they just might be the perfect option for you.

Frequently Asked Questions:

Do you need special paint for a metal door?

Yes, you will need to use special paint for a metal door. This is because metal doors are subject to corrosion and other weathering effects. Special paints help to protect the door from these effects.

Do you have to sand a metal door before painting?

You don’t necessarily have to sand a metal door before painting, but it will help the paint to adhere better and give you a more professional-looking finish. If you do decide to sand, use fine-grit sandpaper so you don’t damage the door.

Should I use a brush or roller to paint a metal door?

It depends on your personal preference and the type of paint you’re using. Some people find that brushes provide a more even coat, while others prefer rollers for their ease of use. If you’re unsure, you can always try both methods and see which one you prefer.

Conclusion:

So, there you have it. A metal door that looks like wood is a great way to save money on your home renovation project and still get the look of a wooden door. If you’re looking for an easy way to make your home look nicer, consider painting on a metal door to give a woody look. It’s a simple solution that can make a big difference in the appearance of your home.

Can Steel Siding be Painted? Yes, and Here’s How!

The Finest Paints for Steel Siding: How is it Applied?

Have you ever walked by a building intrigued by the colorful steel siding? Steel siding is a great way to add a pop of color to any building, and it can also help to protect the underlying structure from the elements.

When choosing a paint for steel siding, it’s important to select a product specifically designed for steel use. These paints typically contain corrosion-resistant ingredients that help to protect the steel from rust and other forms of damage. In addition, they often have a high initial gloss that helps to give the siding a radiant sheen.

With so many benefits, it’s no wonder steel siding is becoming increasingly popular. So if you’re looking for a way to add some pizzazz to your property, consider painting your steel siding. It’s sure to make a lasting impression.

What Do You Need to Know Before Painting Your Steel Siding?

What Do You Need to Know Before Painting Your Steel Siding?

You’ve decided to paint your home a new look by painting the steel siding. But before you break out the paint and brushes, there are a few things you need to know. Steel siding differs from other types of siding, requiring a particular type of paint and primer.

First, it’s important to select the right type of paint. Look for a paint that is specifically designed for use on steel siding. This will ensure that the paint adheres properly and doesn’t chip or peel over time.

Second, make sure you prepare the surface before you start painting. This means thoroughly cleaning the siding and removing any rust or dirt. Once you’ve done this, you’re ready to start painting and enjoy your new, refreshed home.

Once you’ve got your materials ready, simply start painting! Just be sure to work in small sections and use even strokes for the best results. With a little time and effort, you’ll have beautifully painted steel siding that will last for years.

The Best Paints to Use on Steel Siding?

If you’re looking for paint to make your steel siding stand out, then acrylic is the way to go. Acrylic paint is available in many colors, so you’re sure to find the perfect shade to match your home’s style. Plus, it resists fading and chipping, so your siding will look great for years to come.

Acrylic paint is known for its bright colors and high opacity, making it the perfect choice for creating a bold statement. Plus, it’s extremely durable, so you won’t have to worry about repainting anytime soon.

And if you’re concerned about the environment, then you’ll be happy to know that acrylic paint is completely water-based and contains no harmful chemicals. So not only is it great for your home, but it’s also good for the planet.

Another great option for painting steel siding is oil-based paint. This type of paint is known for its deep, rich colors and high durability. Plus, it’s resistant to chipping and fading, so your siding will look great for years to come.

The Most Durable Paint for Steel: Oil-Based Paint

The Most Durable Paint for Steel: Oil-Based Paint

Steel is one of the most popular materials used in construction and manufacturing. Looking for a paint that will last on steel? Then look no further than oil-based paint. Oil-based paint is one of the most effective types of paint for steel. This type of paint forms a tough, durable film resistant to chipping, peeling, and flaking.

It also withstands the elements better than other types of paint, making it an excellent choice for outdoor projects. Plus, oil-based paint is easy to clean up with soap and water. So if you’re looking for paint that will stand the test of time, be sure to use high-quality standard oil-based paint.

In addition, oil-based paint is less likely to crack or peel than other types of paint, making it an excellent choice for protecting steel against corrosion.

Tips and Tricks for Painting Your Steel Siding: 

What materials you’ll need:

Before you start painting your steel siding, gathering the supplies you’ll need is essential.

  • Old Clothes
  • Pair of gloves to protect your hands
  • Buckets and sponges
  • paintbrush or roller
  • Sandpaper
  • Paint(oil-based paint)
  • Painter tape
  • Primer
  • Rags or old towels

Recommendations:

Clean the surface of the steel siding

Before you can paint steel siding, you must thoroughly clean the surface. That means getting rid of any dirt, dust, or grime built over time. You can use a pressure washer for this task, but make sure to use a low-pressure setting, so you don’t damage the siding.

Once you’ve cleaned the surface, you should also remove any rust. You can do this by using a wire brush or sandpaper. Once the surface is clean and smooth, you’re ready to start painting.

Apply a primer specially designed for use on steel surfaces

Applying a primer to steel surfaces is important for two reasons. First, it helps the paint to adhere better to the surface of the steel. Second, it helps to protect the steel from rust and corrosion.

There are many different types of primers available on the market, but it is important to choose one specifically designed for use on steel surfaces. In general, these primers are characterized by their high adhesion level and ability to resist rust and corrosion. When applied correctly, they can help extend your steel surfaces’ life and keep them looking good for years to come.

Allow the primer to dry:

Once you’ve applied the primer, it’s important to allow it to dry completely before proceeding. This usually takes about 24 hours, but consult the product’s instructions to be sure. If you try to paint over a wet primer, the paint will likely peel or chip within a few days.

Allowing the primer to dry allows it to adhere correctly to the surface and create a smoother base for the paint.

Apply the paint to the steel surfaces

It’s essential to apply the paint evenly to steel surfaces to get a good finish. The best way to do this is to use a brush or roller specifically designed for use with metal. Apply the paint in thin, even coats, letting each coat dry completely before adding another.

It’s also important to sand the surface lightly between coats to ensure that the paint adheres properly. With patience and care, you can achieve an excellent finish that will protect your steel surfaces for years to come.

Allow the paint to dry completely:

Allow the paint to dry fully after application before using the steel surface. This is generally about 24 hours but check with the manufacturer’s recommendations to be sure. The paint must dry thoroughly before it is applied to maintain a long-lasting finish.

Enjoy your freshly painted steel siding!

You’re probably wondering how to enjoy your freshly painted steel siding. It’s easy! Just take a look at it and appreciate all the hard work you put into making it look perfect. Then, go inside and relax because you don’t have to worry about repainting for years to come!

The Dos and Don’ts of Painting Your Steel Siding:

It’s no secret that painting your steel siding can be a daunting task. There are so many factors to consider, from the type of paint to the color scheme. But don’t worry, we’re here to help! Here are a few dos and don’ts to keep in mind when painting your steel siding:

Do: Choose the right type of paint. Oil-based paints are ideal for steel siding, providing good coverage and adhesion.

Don’t: Skimp on quality. A cheap paint may seem like a good idea at the time, but it will likely peel and chip quickly. It’s worth spending a little extra on high-quality paint that will last.

Do: Plan your color scheme carefully. Steel siding can be tough to work with, so choosing a color scheme you love is essential. If you’re not sure where to start, consult with a professional painter or designer.

Don’t: Go overboard with the colors. Too many colors will make your home look busy and cluttered. Stick to two or three colors for the best results.

Do: Prep your surface before painting. This means cleaning the surface thoroughly and sanding any rough edges. Proper prep work will help ensure that your paint job turns out great.

Don’t: Rush the job. Painting is a big project, so take your time and do it right. Rushing will only lead to mistakes, so set aside enough time to do the job correctly.

 Following directions carefully and taking your time, you can achieve excellent results!

Frequently Asked Questions:

Can you paint over rust steel?

It’s possible to paint over rust steel, but it’s not always the best option. If the rust is minor, you may be able to clean it off with a wire brush and then paint over it. However, if the rust is more severe, it may be necessary to remove all of the rust before painting.

This can be done with a chemical rust remover or by sanding down to the bare metal. Once the rust is removed, you can paint over it with a primer designed for use on steel.

Can you put regular paint on steel?

No, you cannot put regular paint on steel. You will need to purchase a quality exterior paint designed specifically for use on steel surfaces. Be sure to follow the manufacturer’s instructions carefully when painting steel siding.

What is the best paint for galvanized steel?

There are several different types of paint that can be used on galvanized steel, but not all paints are created equal. You must purchase a quality exterior paint designed specifically for use on galvanized surfaces.

How much does it cost to paint a steel side?

The cost of painting a steel side will vary depending on the size of the surface and the type of paint used. Expect to pay between $2,000 and $4,000 for most projects.

Conclusion:

Steel siding is a popular home improvement choice for many homeowners. It’s durable, long-lasting, and can be painted to match your color scheme. If you’re thinking about painting your steel siding, read our dos and don’ts first. 

And if you need help finding the perfect paint or want to know how it should be applied, read our tip section. With a little planning and the right product, your home will look beautiful for years!