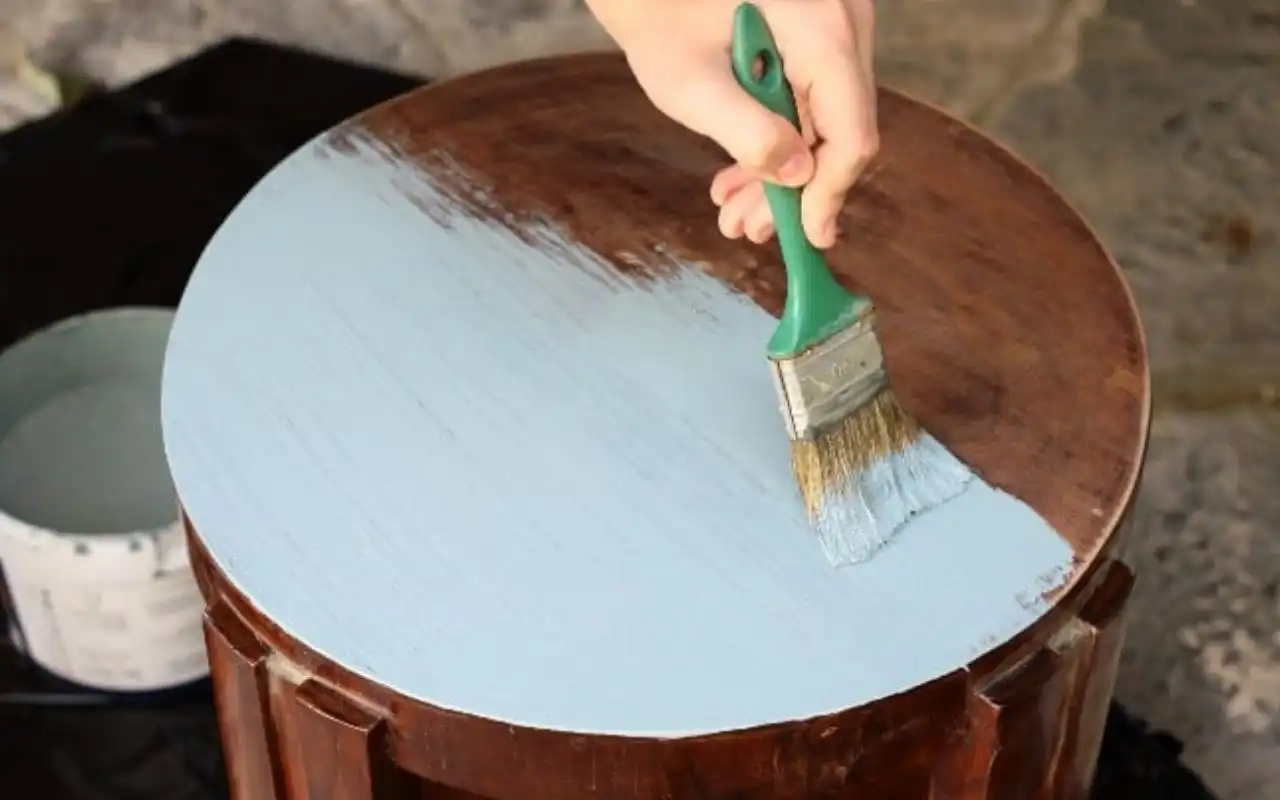
How Long Does Acrylic Paint to Dry on Wood?

How Long Does Acrylic Paint to Dry on Wood

Acrylic paint is known for its versatility, as it can be used on a variety of surfaces. Wood is a popular choice for those who want to create a unique piece of art, but the question remains – how long does acrylic paint take to dry on wood?

The answer may surprise you! Acrylic paint can actually dry quite quickly on wood, often within minutes or even seconds. However, this doesn’t mean that the paint is completely cured and ready for heavy use. In fact, depending on the brand and type of paint you’re using, it can take anywhere from 15 to 30 minutes to an hour for the paint to dry completely.

If you’re in a hurry, there are a few things you can do to speed up the process. In this blog post we’ll give you some tips on how to make your acrylic paint dry faster on wood. so you can get back to your project in no time!

How Do You Know Whether Your Acrylic Paint on Wood is Dry?

You’ve just completed a beautiful painting on a wooden surface using acrylic paint, and now you’re eager to show it off. But before you do, you need to make sure that the paint is completely dry. Acrylic paint dries quickly, but it can take longer to cure completely. Here are a few simple tips to help you tell if your paint is dry: 

How Do You Know Whether Your Acrylic Paint on Wood is Dry?

Taking a close look at the surface of your painting will usually give you a good indication of whether the paint is dry. If the paint looks flat and dull, it’s probably dry to the touch. However, if it still looks shiny or wet, it’s likely that it’s not yet ready to be handled. 

Another way to tell if your paint is dry is to lightly press your finger against the surface. If the paint feels tacky or sticky, it’s not yet dry. However, if your finger leaves no impression on the paint and it feels completely smooth, then it’s most likely ready to be enjoyed.

How Can You Speed Up the Drying Process for Your Acrylic Paint on Wood?

One of the benefits of using acrylic paint is that it dries relatively quickly. This can be helpful when you are working on a project with a tight timeline. However, there are times when you might want it to dry even faster. Here are seven tips for speeding up the drying process for your acrylic paint on wood:

1. Use a hairdryer:

If you’re looking for a way to speed up the drying process for your acrylic paint on wood, using a hairdryer is an effective option.

Here’s how it works: the hair dryer blowing air over the wet paint will help to evaporate the water, allowing the paint to dry faster. Additionally, the heat from the hairdryer will help to set the paint, making it less likely to smudge or run. So if you’re in a hurry to get your project finished, using a hairdryer is a great way to speed up the drying process.

2. Set up a fan:

if you don’t have a hairdryer and want another simple and effective way to dry your acrylic paint on wood.

Luckily, there is a simple solution: setting up a fan.

Fans work by circulating the air around the painting, which helps to evaporate the moisture in the paint. As a result, your paint will dry much faster than it would without a fan. And best of all, this method is perfectly safe for both your paint and your wood surface. So next time you’re looking for a way to speed up the drying process, be sure to give this technique a try.

3. Use a heating lamp:

When it comes to painting with acrylics, one of the most frustrating things can be the drying process. It can seem like no matter how long you wait, the paint just won’t dry. Fortunately, there is a way to speed up the process by using a heating lamp.

By pointing the lamp at the wet paint, the heat will help to evaporate the water and allow the paint to dry more quickly. The best part is that this method is perfectly safe and will not damage the wood. Additionally, the heat from the lamp will help to set the paint, making it less likely to smudge or run.

If you’re looking for a way to speed up the drying time for your acrylic paint, be sure to try using a heating lamp.

4. Turn up the heat:

Cranking up the thermostat can also help to speed up the drying process for your acrylic paint on wood. The increased temperature will help to evaporate any moisture from the paint, helping it to dry more quickly. Just be careful not to get the temperature too high, as this could cause damage to your painting.

5. Open up a window:

In addition to turning up the heat, opening up a window can also help improve air circulation and speed up the drying process for your acrylic paint on wood. The fresh air will help evaporate any moisture from the paint, helping it to dry more quickly.When painting with acrylics, be sure to open up a window to help improve air circulation and speed up the drying process.

6. Use a humidifier:

A humidifier is a great way to speed up the drying process for your acrylic paint on wood. The humidifier will add moisture to the air, which will help evaporate any water from the paint. As a result, your paint will dry more quickly. So if you’re looking for a way to speed up the drying process, be sure to give this method a try.

7. Use a spray bottle:

If you want an easy and effective way to dry your acrylic paint on wood, using a spray bottle is a great option.

Here’s how it works: The spray bottle will aid in the speedy drying of the paint by removing any moisture from it. Furthermore, the spraying method will protect your wood, making it much less likely to become ruined. If you want to accelerate the drying process, try this approach.

How to Choose the Right Acrylic Paint for Your Project?

When it comes to choosing the right acrylic paint for your woodworking project, there are a few things you need to take into account. The type of wood you’re working with, the look you’re going for and the durability you need are all important factors. But with so many different types of acrylic paint on the market, how do you know which one is right for you?

How to Choose the Right Acrylic Paint for Your Project?

Here’s a quick guide to help you choose the best acrylic paint for your next woodworking project:

  • If you’re looking for a natural look, go for acrylic paint that is close to the color of the wood. This will give your project a more subtle look.
  • For a more durable finish, choose an acrylic paint that is designed specifically for wood. This will help protect your project from wear and tear.
  • If you want a high-gloss finish, go for acrylic enamel paint. This type of paint will give your project a shiny finish that is sure to impress.

So there you have it – a quick guide to choosing the right acrylic paint for your next woodworking project. With so many different types of paint on the market, it can be tough to know which one is right for you. But by taking into account the type of wood you’re working with, the look you’re going for and the durability you need, you can narrow down your options and find the perfect paint for your project.

How to Choose the Best Brush for Acrylic Paint?

When it comes to selecting the finest brush for acrylic paint, there are a few factors to consider.

How to Choose the Best Brush for Acrylic Paint?

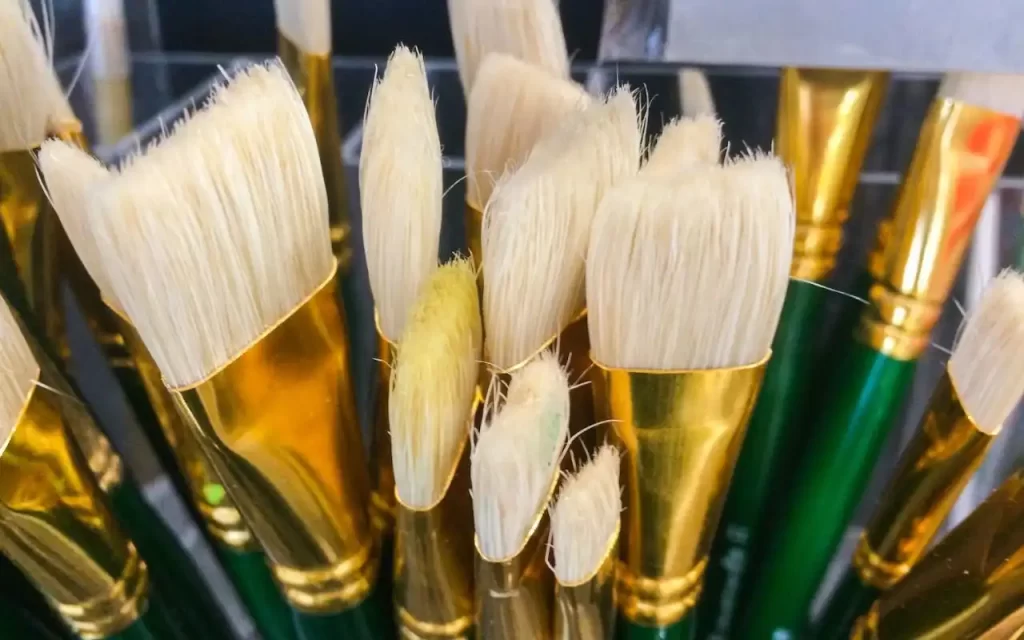
First of all, what kind of finish do you want? If you’re going for a smooth, even finish, then you’ll need to choose a synthetic brush with synthetic bristles. However, if you’re looking for a more textured finish, then a natural bristle brush might be the way to go.

Secondly, what size do you need? Acrylic paint can be quite thick, so you’ll need a fairly large brush if you want to avoid any streaks or lines. Finally, how much control do you need? If you’re new to painting with acrylics, then it might be worth opting for a shorter brush that’s easier to control. With these factors in mind, you should be able to find the perfect brush for your needs.

What are the Factors That Make Acrylic Paint Dry Slowly on Wood?

When it comes to painting, slower is often not better. If your paint dries slowly on wood, it can be frustrating and cause your project to take longer than necessary. Fortunately, there are a few ways to tell if your paint is drying slowly so you can make adjustments accordingly.

What are the Factors That Make Acrylic Paint Dry Slowly on Wood?

Here are eight tips: 

  • Check the temperature of the room you’re painting in. If it’s too cold, the paint will take longer to dry. 
  • Check the humidity levels as well. High humidity can also prevent paint from drying properly. 
  • Make sure you’re using a good quality paintbrush. Lower-quality brushes can hold onto moisture and prevent the paint from drying correctly. 
  • Inspect the wood itself for any irregularities that might be causing the paint to dry slowly. 
  • Try a different type of paint altogether. Some paints are simply designed to dry more slowly than others. 
  • Finally, remember that some woods simply absorb Paint slower than others – so if you’re having trouble regardless of what you try, it might just be the type of wood you’re working with! 

Hopefully, these tips will help you get your project done in a timely manner!

Frequently Asked Question

Q. Can I thin out acrylic paint with water?

Yes, you can thin out acrylic paint with a little bit of water. This will help it to dry more quickly. but be careful not to add too much water, as this can affect the quality of the paint.

Q. What type of paint dries the quickest?

Some types of paint are designed to dry more quickly than others. If you’re looking for a quick-drying option, consult your local hardware store or art supply shop.

Q.Why does acrylic paint stay tacky?

There are a few reasons why acrylic paint might stay tacky. It could be due to the temperature, humidity levels, or type of paint you’re using. Be sure to check all of these factors before beginning your project.

Conclusion

Acrylic paint is versatile and comes in a variety of finishes, making it the perfect medium for any project. Whether you are a beginner or an experienced painter, there are a few tips you should know before beginning your next acrylic painting on a wood project. 

By following these simple guidelines, you can ensure that your paint dries properly and results in a beautiful finished product. Be sure to visit our blog regularly for more helpful tips and tricks on all things DIY!

Can You Build a Deck in the Rain?

Can You Build a Deck in the Rain.

Building a deck is often seen as the perfect summer project. After all, what could be more enjoyable than spending time outdoors, surrounded by the beauty of nature? However, summer isn’t the only time to build a deck. Building a deck adds value to your home and provides you with a wonderful outdoor space to enjoy. But what if it rains? Can you build a deck in the rain?

If you want to learn the answer to this question and are planning to construct a deck in the rain.in this blog, we will be discussing everything you need to know about building a deck in the rain.

So you can make an informed decision about whether or not this is the right project for you.

Is it ok to build a deck in the rain?

Is it ok to build a deck in the rain?

Building a deck in rain may not be the best idea since the wood could warp or the final product could be slippery and dangerous. Wood is more flexible when it’s wet, so there’s a greater chance it will warp as it dries.

Also, the deck may not have enough time to dry before the next rain comes, which could cause the wood to rot. Even if you’re able to build the deck in the rain, it might not be safe to use. The slippery surface could make it easy to fall and get hurt.

However, one thing that most deck builders can agree on is that building in the rain is a recipe for disaster. Not only is it difficult to keep tools and materials dry, but wet wood is also more likely to warp or rot. In addition, rain can make it difficult to see potential hazards, leading to accidents. For these reasons, it is best to wait for a sunny day before starting your deck-building project.

What are the challenges of building a deck in the rain?

For many of us, the rain is a gentle reminder that we need to take a break and relax indoors with a hot cup of tea. But for others, the rain is a ceaseless enemy that seems determined to prevent them from completing their outdoor projects. Building a deck is one such project that can be fraught with difficulties in wet weather. Here are eight challenges of building a deck in the rain, along with some tips on how to overcome them.

1. Soaking Wet Wood:

Soaking Wet Wood for new deck

you’re ready to install that new deck you’ve been dreaming of. But then it rains. And suddenly your wood is too wet to work with. Why does rain make wood so difficult to work with? 

The answer has to do with the way water affects the fibers in wood. When wood gets wet, the fibers swell and expand. This makes the wood much more difficult to cut and nail into place. In addition, wet wood is more likely to warp and split as it dries. As a result, it’s important to wait for the wood to completely dry before beginning any deck installation project. 

For you, here’s a useful hint.

So, it’s important to be patient and wait for the wood to completely dry before beginning your deck project. Otherwise, you may end up with a warped and unusable mess.

2. Slip-and-Fall Hazards:

Slip-and-Fall Hazards use when you're building a deck in the rain

Slip-and-fall hazards are often underestimated, but they can be extremely dangerous – especially when you’re building a deck in the rain. slippery surfaces can lead to serious falls and injuries, so it’s important to take precautions to prevent accidents.

But if you build a deck in rain, you may not have enough time to let the surface completely dry before the next rain comes. This could create a slip-and-fall hazard for anyone using the deck. To avoid this, it’s best to wait for a sunny day to work on your deck project.

Solution

One way to avoid this is to wear proper footwear with good traction. Another is to use caution when walking on wet surfaces. Finally, if you do fall, try to fall safely by protecting your head and limbs from impact. By taking these simple steps, you can help to prevent slip-and-fall hazards and keep yourself safe while working in rainy conditions.

3. Leaks and flooding:

Leaks and flooding wood deck repair

Spring is the perfect time to build that beautiful new deck you’ve been dreaming of all winter. But before you break out the power tools, there’s something important you need to consider: the risk of leaks and flooding. A deck is an open-air structure, which means it’s vulnerable to the elements.

If you live in an area with a lot of rainfall, building a deck during the rainy season can be a recipe for disaster. Water can seep into the wood, causing it to rot and eventually collapse. In addition, heavy rains can cause flash flooding, which can damage your deck and pose a serious safety hazard.

Simple solution

Here are a few things to keep in mind when building a deck in the rain.

  • Make sure that your foundation is level and properly drained. A level foundation is essential for preventing leaks and ensuring that water flows away from your home.
  • Use waterproofing products on all exposed surfaces. This will help to prevent water damage and ensure that your deck stays looking good for years to come.
  • Be sure to seal all joints and seams with caulk or tape. This will help to prevent water from seeping through and causing damage to your home.

By following these simple tips, you can avoid the problems associated with building a deck in the rain.

4. Mold and mildew:

If you’re planning on building a deck, you might want to think twice about doing it in the rain. While it might seem like the perfect time to get the job done, the reality is that mold and mildew can quickly take over, leaving you with a mess that’s both unsightly and difficult to clean. And if you have family members or friends who are allergic to mold, it can even pose a serious health risk.

Useful solution

There are a few things that you can do to try to prevent mold and mildew from taking over your deck. For example, you can make sure that the area is well-ventilated and that any wet materials are removed as soon as possible. You might also want to consider using a Mold and Mildew resistant coating before construction begins.

But ultimately, if you’ve built in rainy weather, you’re taking a bit of a gamble. So, if at all possible, it’s best to wait for drier conditions before starting your project.

5. Rust:

If you build your deck in the rain, you run the risk of rust. Rust can damage the hardware of your deck, making it difficult to open and close doors and windows. Rust can also make your deck slippery, which is a hazard for both you and your guests. In addition, rust can discolor your deck, making it less attractive.

A practical solution

It’s important to choose rust-resistant nails, screws, bolts, and other hardware when building a deck in the rain. In addition, be sure to apply a coat of rust-resistant paint or sealant to any exposed metal surfaces before they have a chance to rust.

6 . Electrical hazards:

When you're building a deck, the last thing you want to worry about is electrical hazards

When you’re building a deck, the last thing you want to worry about is electrical hazards. Unfortunately, if you’re working in the rain, those hazards can become all too real. Water and electricity don’t mix, and even a small amount of moisture can cause serious problems. Here are just a few of the dangers that you need to be aware of:

• Short circuits: When water comes into contact with electrical wires, it can cause a short circuit. This can not only damage your equipment, but it can also start a fire.

• Electrocution: If you’re working with wet hands or standing in puddles of water, you could be electrocuted if you come into contact with an electrical current. Even low-voltage currents can be dangerous, so it’s important to exercise caution.

• Damage to equipment: Water and electronics don’t mix, so if your deck is built in the rain, there’s a good chance that your equipment will be damaged. If possible, try to wait for a dry day to work on your deck.

A solution that will work for you

To reduce the risk of shock or fire, be sure to keep all electrical cords and devices away from puddles or standing water. In addition, avoid using power tools in areas where there is a potential for leakage into live electrical outlets. If you must use electrical equipment in wet conditions, be sure to wear rubber gloves and boots for insulation against shocks.

7 . Limited visibility:

In any home improvement project, it is important to consider the potential risks involved. One hazard that is often overlooked is the limited visibility that can occur when you build a deck in the rain. When working with tools and materials, it is essential to be able to see clearly.

However, rain can make it difficult to see what you are doing, increase the risk of slips and falls, and even cause electrical hazards.

A grateful tip

It is important to take precautions when working in rainy conditions. By wearing the proper safety gear and taking breaks frequently to assess the work area, you can help ensure a safe and successful deck-building project.

Frequently Asked Question

Q.How long does it take wood to dry after rain?

A. It can take wood several days to a week to dry after being exposed to rain. The amount of time will depend on the type of wood, the thickness of the lumber, and the weather conditions. If possible, it is best to wait for a period of dry weather before beginning your project.

Q.How long does it take to build a deck?

A. The time it takes to build a deck depends on the size and complexity of the project. A simple deck can be built in a few days, while a more complex deck may take weeks or even months to complete.

Q.Is it cheaper to build a deck in the fall?

A. The cost of building a deck can vary depending on the time of year. In general, the fall is a good time to build a deck because the weather is usually mild and there are often discounts on materials and labor.

Q.Is winter a good time to build a deck?

A. While it is possible to build a deck during the winter, it can be more challenging. Cold weather can make it difficult to work with tools and materials, and the ground may be frozen, making it difficult to dig post holes. If you decide to build a deck in the winter, be sure to take extra safety precautions and have a plan for dealing with the cold weather.

Conclusion

Although it’s not advisable to build a deck in the rain, sometimes you just can’t avoid it. If you’re faced with this challenge, be sure to take into account the extra challenges that come with wet weather. Stay safe and get your deck built quickly so you can enjoy it all summer long!
Can You Use a Solo Stove on a Wooden Deck?

Can You Use a Solo Stove on a Wooden Deck

Have you ever stepped out onto your deck, only to be enveloped in a cloud of smoke? If you’ve ever attempted to use a stove on a wooden deck, you know that it can be a challenge. Between the risk of sparks and the potential for damage to the deck, it’s no wonder that many people steer clear of using their stoves on their decks.

However, with a Solo Stove, you can enjoy the convenience of cooking on your deck without fear of damage or smoke. The unique design of the Solo Stove allows it to be used on any surface, including wood, without the risk of sparks or damage. In addition, the Solo Stove outputs very little smoke, making it the perfect choice for cooking on your deck.

If you’re still not sure whether or not you should use your stove on your deck, don’t worry. In this blog post, we’ll cover everything you need to know about using a Solo Stove on a wooden deck. We’ll also provide some tips on how to use your stove in the safest and most effective way possible. If you’re ready to learn more about using a Solo Stove on a wooden deck, keep reading!

Is it okay to use a solo stove on the wooden deck?

Is it okay to use a stove on the wooden deck?

If you’re planning on using a solo stove on your wooden deck, you might want to think twice. While solo stoves are incredibly durable and easy to use, they can also be dangerous if not used properly. Here are three reasons why you should avoid using a solo stove on your wooden deck: 

  • The heat from the stove can damage the wood. 
  • There is a risk of sparks or embers escaping and causing a fire. 
  • The weight of the stove can leave marks or indentations in the wood. 

If you’re looking for a way to enjoy your solo stove without damaging your deck, there are a few options. You can use a solo stove on a concrete patio or in your backyard. You can also purchase an outdoor oven or grill that is specifically designed for use on wooden decks. By taking these precautions, you can enjoy your solo stove without damaging your wood deck.

Can you use the tool stove on any type of deck wood?

Decks are a popular feature of many homes, providing a space for outdoor entertaining and relaxation. But when it comes to choosing the right type of decking material, there are many factors to consider.

One important question is whether or not you can use a stove on your deck. While some types of wood are suitable for this purpose, others are not. Here’s a look at the pros and cons of using a stove on different types of decking material.

Hardwood:

Hardwoods such as oak and maple are popular choices for decks because they’re durable and stylish. However, hardwoods are also susceptible to fire damage, so it’s important to use caution if you’re planning to use a stove on your deck. If you do decide to use a hardwood deck, be sure to choose a type that is pressure-treated to resist fire damage.

Softwood:

Stove on a softwood Deck

Softwoods like cedar and redwood are another option for decks. These woods are less expensive than hardwoods, but they’re also flammable. As such, it’s best to avoid using a stove on softwood decks. If you must use a stove, be sure to take precautions such as putting down a fireproof mat first.

Composite:

Solo Stove on a composite Deck

Composite decking materials are made from a mixture of wood fibers and plastic. This blend makes composite boards more resistant to fire than pure wood products. It’s important to use caution when using a stove on a composite deck.

In addition, some composite decking materials may emit harmful chemicals when exposed to heat, so be sure to check with the manufacturer before using a stove on your composite deck.

What to consider before using a solo stove on a wooden deck?

Before you break out the Solo Stove on your wooden deck, there are a few things to consider. Here are seven tips to keep in mind:

1. Check for sparks.

Check for sparks on solo stove

A solo stove can create a lot of sparks, so it’s important to make sure that there are no flammable materials nearby. This includes things like dried leaves or mulch, as well as any furniture or decorations made of plastic or other synthetic materials.

When you’re using the stove, be sure to keep a close eye on any sparks that escape. If you see a spark landing in an area that could catch fire, douse it with water immediately.because the last thing you want is for your deck to go up in flames.

2. Choose the right size.

Solo stoves come in a variety of sizes, so it’s important to choose one that is appropriate for your deck. Because a stove that is too small can be easily tipped over, and one that is too large can take up too much space.

However, keep in mind that If you have a large deck, you’ll need a larger stove; if you have a small deck, you’ll need a smaller stove. so make sure to choose the right size for your deck. In general, it’s best to choose a stove that is about the same size as your grill.

3. Consider the wind

Wind can be a major factor when using a solo stove on a wooden deck. If it’s windy, the flames can spread quickly and become out of control. To prevent this, make sure to position the stove in a way that blocks the wind. You can also build a windbreak out of bricks or stones to help keep the flames under control.

4. Be mindful of pets and children.

Be mindful of pets and children for solo stove

Pets and children can be curious about Solo Stoves, so it’s important to keep them away from the stove when it’s in use. If you have pets, make sure they are safely secured inside or in another area where they can’t get to the stove. And if you have young children, never leave them unattended near the stove.

5. Don’t forget about safety precautions.

Even though solo stoves are designed for outdoor use, it’s still important to take some basic safety precautions. Never pour gasoline or other flammable liquids on the fire, and always make sure that the area around the stove is clear of debris before lighting it.

These safety tips will help you avoid any accidents while using your stove. If you don’t take these precautions your deck could go up in flames and you would be putting your life and the lives of others in danger.

6. Use a fireproof mat

Use a fireproof mat for solo stove

A fireproof mat is a type of mat that is designed to resist heat and flames. It’s a good idea to use one of these mats under your stove to protect your deck from any potential damage. Not only will it protect your deck from sparks and embers, but it will also help to prevent the fire from spreading if something does go wrong.

7. Keep a fire extinguisher handy

It’s always a good idea to have a fire extinguisher on hand when using any type of stove, including a solo stove. This way, you’ll be prepared in case of an emergency. Be sure to read the instructions on how to use it before you need it so that you’ll be able to use it quickly and effectively if a fire does break out.

By following these tips, you can help to ensure that your solo stove experience is safe and enjoyable. So go ahead and enjoy your next cookout with peace of mind, knowing that you’re taking the necessary precautions.

Does stolo stove get hot on the outside?

A stove is an appliance typically used to cook food. The heat from the stove transfers from the burner to the pot or pan, and then to the food. But does that heat travel beyond the pot or pan? Does the stove itself get hot on the outside? 

The answer may seem obvious – of course, the stove gets hot on the outside! After all, it’s generating a lot of heat internally. But it’s actually a bit more complicated than that. While stovetops can certainly become warm to the touch, they don’t usually get as hot as one might expect. 

There are a few reasons for this. First, most stoves are made with a material that conducts heat relatively slowly. This means that the heat has a hard time traveling from the inside of the stove to the exterior. Additionally, many stoves have some form of insulation between the inner workings and the outside world. This acts as a barrier, blocking some of the heat transfer. 

So yes, stoves do get hot on the outside – but usually not as hot as you might think!

Frequently Asked Question

Q. What is the best way to clean a solo stove?

https://www.youtube.com/watch?v=gbu5frynjtA

A. The best way to clean a solo stove is to use a mild soap and water solution. You can also use a dedicated stove cleaner, but be sure to follow the instructions carefully. Avoid using harsh chemicals or abrasive cleaners, as these can damage the finish of the stove. For stubborn dirt and grime, you may need to use a putty knife or other tool to scrape it off. Once the stove is clean, be sure to dry it completely before using it again.

Q. How often should I clean my solo stove?

A. How often you need to clean your stove will depend on how often you use it. If you use it regularly, you should aim to clean it at least once a month. If you only use it occasionally, you can probably get away with cleaning it less often.

Q. Can I use my solo stove indoors?

A. No, solo stoves are designed for outdoor use only. Using one indoors can be dangerous, as they produce a lot of heat and smoke. If you must use your stove indoors, be sure to open all the windows and doors to ventilate the area well. Additionally, keep a fire extinguisher handy in case of an emergency.

Q. What should I do if my solo stove catches fire?

A. If your stove catches fire, the best thing to do is to call the fire department immediately. In the meantime, try to extinguish the fire with a fire extinguisher if you can. Do not try to put it out with water, as this will only make the situation worse.

Conclusion

While it is possible to use a solo stove on a wooden deck, there are some things you should consider before making that decision. Always check with the manufacturer of your stove to make sure you are using the tool in the way it was intended. By following these simple tips, you can ensure the safe and enjoyable use of your solo stove on any surface, including a wooden deck. Have you used a solo stove on a wooden deck before? What tips would you share with others?

Can You Put A Fire Pit On A Wood Deck? A Handy Guide

Can You Have a Fire Pit on a Wooden Deck


Picture this: a crisp autumn evening, you’re on your wooden deck, and suddenly, you’re struck with the genius idea of gathering around a cozy fire pit! Oh, the joy it could bring with s’mores and warm conversations under the twinkling stars.

But wait, is it safe to have a fire pit on a wooden deck, or will you face the burn of regret like Icarus flying too close to the sun? As magical as it sounds, safety looms like a cautious mother. This burning question sparks your curiosity, challenging the limits of your deck’s potential. Can you have a fire pit on a wooden deck without transforming it into an ashy, splintered mess?

Eager to find out? Let’s dive into this blazing topic and seek out that goldilocks zone for your deck and fire pit harmony!

Is It Safe to Have a Deck Fire Pit?


Is It Safe to Have a Deck Fire Pit?

A deck fire pit is a great way to enjoy the outdoors with family and friends. They provide warmth and light on cool nights and can be used to roast marshmallows or cook food. However, there are some safety concerns that should be considered before using a deck fire pit.

The most important thing to remember is to keep the fire under control. Never leave the fire unattended, and make sure it is fully extinguished before going to bed or leaving the area.

In addition, it is important to keep flammable materials away from the fire and to have a water source nearby in case of emergencies. With a little bit of care, a deck fire pit can be a safe and enjoyable way to enjoy the outdoors.

The Dos and Don’ts of Building a Fire Pit

If you’re dreaming of spending chilly evenings outdoors huddled around a warm fire pit, you’re not alone. Building a fire pit on your deck can provide a cozy spot for entertaining or simply relaxing after a long day. But before you get started, there are a few important dos and don’ts to keep in mind.

Safety is key 

First and foremost, safety is key. Make sure you check with your local fire department to see if there are any regulations or permit requirements in your area. Once you’ve got the green light, it’s time to start planning.

Choose a site for a fire pit on your wooden deck


Choose a site for your fire pit.

The next thing to consider is where you’re going to build your fire pit. If you have a wooden deck, it’s important to choose a location that’s not too close to the house or any other structures.

You’ll also want to make sure there’s plenty of clearance for sparks. Setting a fire pit on a concrete patio or stone pavers is a good way to minimize the risk of damage to your wooden deck.

Picking an ideal material


Picking the Ideal Material

When it comes to choosing the right materials, it’s important to go with something that can withstand high temperatures without cracking or breaking. Refractory brick or concrete blocks are both good choices. And when it comes to fuel, clean-burning wood propane is best. Avoid using treated lumber, which can release harmful chemicals when burned.

With these dos and don’ts in mind, you’re well on your way to enjoying fireside fun all year long!

How to Make Your Own Fire Pit?

Building your own fire pit is a great way to enjoy your backyard on chilly evenings! Not only will it provide you with warmth and light, but it will also create a focal point for social gatherings. The best part is that it’s not as difficult as you think. Here’s what you need to do:

The perfect spot for your fire pit

First, you must select the perfect spot for your fire pit. If you’re planning on using it on your deck, make sure there are no overhead branches and that the area is clear of any flammable materials.

Once you’ve found the perfect spot, it’s time to start digging. The size of your pit will depend on how many people you plan on entertaining, but a good rule of thumb is to make it at least 3 feet in diameter.

Create a fire pit out of charred wood

Next, you’ll need to line the bottom of the pit with gravel or sand. This will help to drain water and prevent the wood from rotting. Once you’ve added the gravel, it’s time to start building your wall.

If you’re using bricks or stones, make sure to mortar them in place so they don’t topple over when the fire gets going. If you’re using cinder blocks, simply stack them up until they’re about 2 feet high. 

The fuel of your choice

Now it’s time for the fun part – choosing your fuel! For a long-lasting fire, we recommend using logs that are at least 18 inches long. You can also use wood chunks or charcoal briquettes if you prefer. Ensure you don’t use treated lumber, as the chemicals can be harmful when burned. 

Once you’ve added your fuel, it’s time to light ‘er up! Sit back, relax, and enjoy the warmth of your very own DIY fire pit.

How Much Does it Cost to Install a Deck Fire Pit?

A deck fire pit can transform any outdoor space into an oasis. But before you can enjoy s’mores and quality time with loved ones around the fire, you need to know how much it will cost to install a deck fire pit. The cost of installing a deck fire pit varies depending on the materials you choose and the size of your deck.

However, most homeowners report spending between $500 and $1,000 on installation. If you’re looking for a more budget-friendly option, you can opt for a portable fire pit that can be placed on your deck.

No matter which route you choose, make sure to factor in the fuel cost when budgeting for your deck fire pit. Once you’ve determined how much it will cost to install a deck fire pit, you can begin planning your dream outdoor space.

What kind of wood is safe to burn in a fire pit on a deck?


What kind of wood is safe to burn in a fire pit?

visualizing burning different types of wood in a fire pit and the colors and smells each type would produce.

What kind of wood is safe to burn in a fire pit? This is a question that many people ask when they are deciding whether or not to build a fire pit. There are many different types of wood, each producing different colors and smells when burned. Some woods are safer to burn than others, so it is important to know what kinds of wood are safe to use in a fire pit.

  • The best woods to use in a fire pit are hardwoods, such as oak or maple. These woods produce less smoke and smell better when burned.

  • Softwoods, such as pine or cedar, produce more smoke and smell worse when burned. However, all woods can be used in a fire pit if they are properly seasoned and dried.

  • Seasoned wood has been left outside to dry for at least six months. This process helps the wood burn more evenly and produces less smoke.

  • Dried wood has been left outside to dry for at least one year. This process helps the wood burn more slowly and produce fewer sparks.

All wood should be cut into small pieces before being used in a fire pit. This will help the wood to burn more evenly and produce less smoke. The best way to enjoy a fire pit is to use the proper type of wood and follow these simple tips. With the right kind of wood, you can create a beautiful fire that will provide warmth, light, and enjoyment for everyone who experiences it.

How do you protect my wooden deck from a fire pit?

A wood-burning fire pit is a beautiful addition to any backyard deck, but if you’re not careful, it can also be a hazard. Here are a few tips to help you enjoy your fire pit safely:

  • Ensure the fire pit is placed on an on-flammable surface, such as a concrete patio or stone pavers. This will help to prevent accidental fires.

  • Use a fire pit that is specifically designed for use on decks. These fire pits typically have heat-resistant bases and feature built-in wind guards to help contain sparks.

  • Be sure to keep the firepit well-stocked with wood so that you can control the size of the flames.

  • Clear away any combustible materials like leaves, paper, or wood chips that might have blown into the area.

  • Never leave the fire unattended. Keep a hose or bucket of water nearby in case of emergency.

  • With a little bit of planning, you can enjoy your fire pit without putting your deck at risk. Stay safe and have fun.

By taking these precautions, you can enjoy your fire pit without worrying about damaging your deck.

How do you protect your wood deck from the heat of your fire pit?

The wooden deck is a beautiful addition to any home. It can provide a place to entertain guests, relax in the sun, or simply enjoy the outdoors. However, when using a fire pit on a wood deck, it is important to take precautions to protect it from heat damage.

Us

One way to do this is to use a heat shield. A heat shield is a piece of metal or other material that helps to deflect heat away from the deck. Place the heat shield under the fire pit and extend it outwards in all directions. This will help to prevent the heat from damaging the decking material.

Firebricks make a good foundation for your fire pit

Another way to protect your wood deck is to use fire bricks around the perimeter of the fire pit. Fire bricks are designed to withstand high temperatures and will help to keep the heat contained. By taking these precautions, you can enjoy your fire pit without worrying about damaging your wood deck.

Heat-resistant pads

Have you ever considered using a heat-resistant pad to protect your deck from the heat of the fire pit? If not, you’re missing out on one of the best ways to enjoy your outdoor space. Not only do heat-resistant pads provide a barrier between your deck and the fire pit, but they also help to reflect heat back into the pit, making it easier to keep the fire going.

In addition, pads can help prevent sparks from escaping, ensuring that your deck stays safe and protected. So if you’re looking for a way to enjoy your fire pit without damaging your deck, then be sure to invest in a quality heat-resistant pad.

By following these simple tips, you can enjoy your fire pit without damaging your wood deck. With a little bit of care, you can keep your outdoor space looking great for years to come.

9 Reasons to Add a Deck Fire Pit This Summer

If you’re thinking of adding a fire pit to your backyard deck this summer, here are seven reasons why you should go for it: 

  • Fire pits are great for entertaining. They provide a gathering place for family and friends to enjoy each other’s company.

  • Fire pits add value to your home. If you’re ever considering selling your home, a fire pit is an excellent selling point.

  • Fire pits are low-maintenance. All you need is some wood and a lighter, and you’re good to go!

  • Fire pits are environmentally friendly. They’re a great way to recycle wood scraps and help reduce your carbon footprint.

  • Fire pits are versatile. You can use them for cooking, as a source of heat, or simply for relaxation.

  • Fire pits are portable. If you ever move homes, you can take your fire pit with you!

  • Fire pits make great gifts! If you know someone who loves spending time outdoors, a fire pit will make an excellent gift for them.

  • A deck fire pit is relatively easy and inexpensive to install. In most cases, you only need a level surface and access to a gas line. 

  • Finally, a deck fire pit is simply enjoyable to have around! If you’re looking for an excuse to spend more time outdoors, a deck fire pit is a perfect addition to your backyard space.

Conclusion

So, my fellow deck enthusiasts, let’s fan the flames of knowledge on this hot topic – Can you have a fire pit on a wooden deck?

First, we’ve learned that, yes, you can absolutely have a fire pit on your wooden deck if you take the proper precautions, kind of like a superhero wearing flame-proof capes.

Second, remember to use a fire-resistant mat, some sort of barrier, and the right fire pit to ensure you won’t end up with a burning mess. Think of it as a smores sandwich, with protection as the graham crackers holding it all together.

And finally, always prioritize safety first, like a vigilant lifeguard at a pool party, by following local ordinances and your own common sense. With these fiery essentials in mind, go ahead and turn your wooden deck into a warm, cozy, and safe gathering spot for friends and family while creating unforgettable memories around the fire pit.

What Happens If You Stain a Wet Deck: Time-Saving Techniques

Stain a Deck that's Already Wet Is It possible

Your deck is the perfect place to hang out with friends and family in nice weather. But if you’re not careful, the elements can take their toll on your outdoor oasis. Staining your deck is the best way to protect it from damage, but can you stain a wet deck?

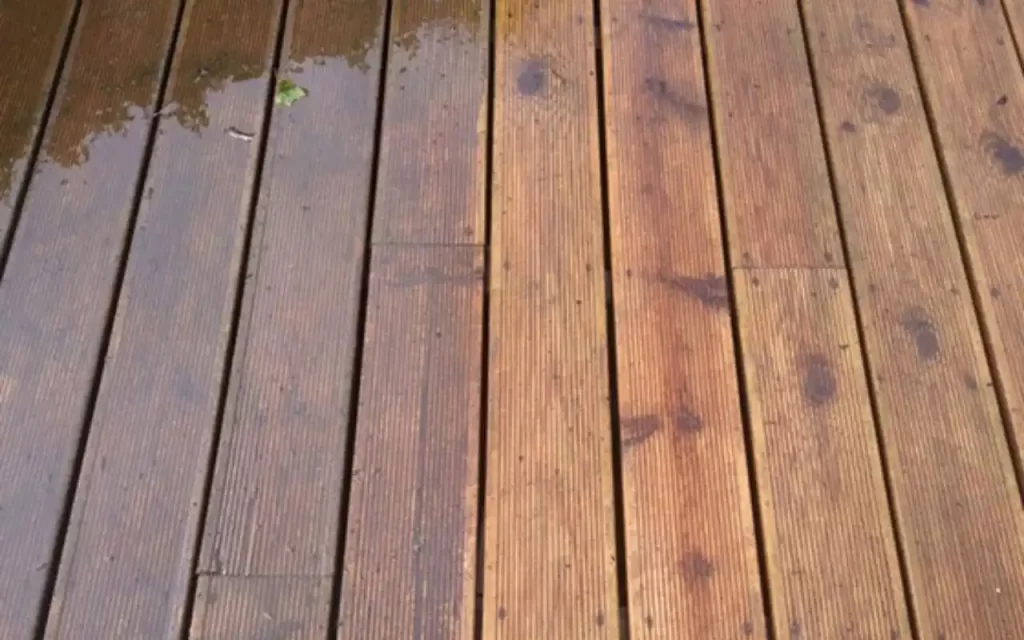
Honestly, it is not recommended that you stain a wet deck. The best way to get an even stain is to wait for the wood to dry completely. This can be a real pain, especially if you’re hurrying to get the job done.

In this article, we will guide you through the process of staining a deck that is already wet. By taking a few simple precautions, you can ensure that your deck comes out looking great. So don’t be discouraged. With a little extra care, you can still get the perfect finish for your deck.

Why Shouldn’t You Stain a Deck When It’s Wet?

Why Shouldn't You Stain a Deck When It's Wet?

There are a lot of things that you shouldn’t do when it’s wet outside. For example, you shouldn’t put your electronics in the rain, and you shouldn’t walk on wet leaves in the fall because you might slip. But one thing that you might not know is that you shouldn’t stain your deck when it’s wet.

Here’s why: 

When the deck is wet, the stain will have a hard time adhering to the wood. This means that it will eventually peel and chip, leaving your deck looking worse than it did before. In addition, wet wood is more susceptible to rot and mold, so staining it when damp could do more harm than good. So if you’re thinking about staining your deck, make sure to do it on a dry day. Your deck will thank you for that.

What happens if you stain damp or wet wood?

Why staining wet or damp wood a bad idea?

Here are seven potential problems that can occur: 

The stain will be uneven and blotchy


The stain will be uneven and blotchy. 

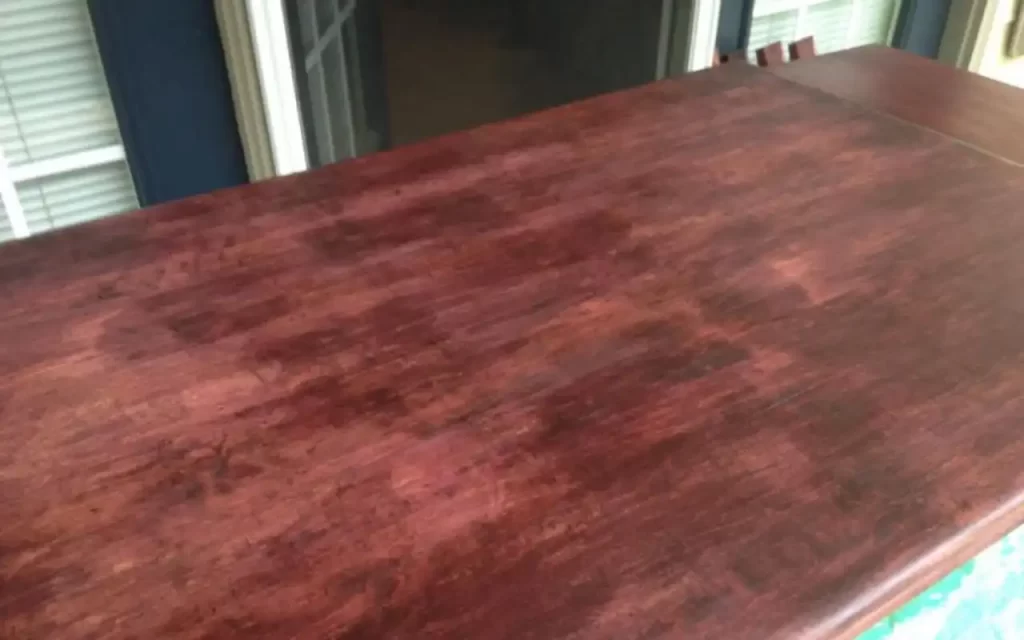
Have you ever noticed that when you spill a drink on your deck, the stain applies to it and becomes a blotchy and unfinished look? If you’re like most people, you probably assumed that you didn’t apply the stain evenly. However, the real reason is that the wood was not dry when you applied the stain. When wood is wet, the stain cannot penetrate evenly, resulting in an uneven and unfinished appearance.

The stain will take longer to dry

The stain will take longer to dry. 

When you stain damp or wet wood, the water in the wood will cause the stain to take longer to dry. This means that you’ll have to wait longer before you can enjoy your newly stained deck. In addition, it also means that there is a greater chance that the stain will be smeared or damaged while it’s still wet.

The stain will be more likely to peel and chip. 


The-stain-will-be-more-likely-to-peel-and-chip

If you’ve ever painted a wall, you know it’s important to wait until the paint is completely dry before adding a new coat. If you don’t, the new paint will peel off the old paint. The same is true for stains. If you apply a new coat of stain to wet wood, the new stain will peel off the old stain. Plus, it’s more likely to chip and flake as it dries, leaving your deck looking worse than it did before.

The color of the stain will be muted. 

When you stain wet wood, the color of the stain will be significantly muted. This is because the water in the wood prevents the stain from fully penetrating, resulting in a lighter and less vibrant color. If you’re looking for a rich and vibrant color, you’ll need to wait until the wood is completely dry before staining it.

Wood can rot or develop mold

Staining wet or damp wood can cause the wood to rot or develop mold. This is because the water in the wood creates a perfect environment for these things to grow. If you want to avoid this, you’ll need to ensure the wood is completely dry before you stain it.

The job will take longer

Staining a deck that’s already wet will take significantly longer than if you were to wait for the wood to dry first. In addition, it’s more likely that you’ll make mistakes along the way, which will only add to the time and frustration involved in the project.

As you can see, there are plenty of reasons to avoid staining wet or damp wood. So, the next time you’re working on a project, make sure the wood is completely dry before you start staining.

How do you know if your deck is dry enough to stain?

Before enjoying your newly stained deck, you need to ensure it’s dry enough to accept the stain. If you apply the stain too soon, it will simply sit on top of the wood and never penetrate the surface. This can lead to a number of problems, including peeling, flaking, and uneven coloration. So how can you tell if your deck is dry enough to stain?

Here are a few tips to get you started.

  • Check the weather forecast. If rain is in the forecast, it’s best to wait until another day to stain your deck.

  • Take a look at the wood itself. If it’s still wet or damp, it’s not ready to be stained.

  • Touch the surface of the wood. If it feels cool to the touch, it’s likely to dry enough to stain.

  • Use a moisture meter to test the moisture content of the wood. If the reading is below 12%, your deck is ready to be stained.

By following these simple tips, you can ensure that your deck is ready for its new stain.

What Kind of Stain Should You Use on a Wet or Damp Deck?

Don’t let a little water ruin your deck. There are a variety of stains that can withstand moisture so that you can enjoy your deck no matter the weather. If you’re looking for a long-lasting stain that will protect your deck from the elements, consider using a solid stain. This type of stain provides excellent coverage and is ideal for decks with a lot of foot traffic.

For a more natural look, use a semi-transparent stain. This type of stain will allow the grain of the wood to show through while still providing protection from the sun and weather. If you’re looking for an easy-to-apply option, try a wipe-on stain. This type of stain can be applied quickly and easily, making it ideal for busy homeowners.

No matter what type of deck you have, there’s a stain that’s perfect for you.

Tips for Staining a Wet Deck Quickly and Easily

If you want to stain a wet deck quickly and easily, here are seven tips for staining a wet deck:

Dry the wet deck

When you’re ready to start staining, the first step is to dry the wet deck. You can do this by wiping down the surface with a clean cloth or using a fan to circulate air around the area. Be sure to allow the deck to dry completely before moving on to the next step.

How effectively do you dry the wet deck?

If you’re in a hurry, break out the hairdryer. Yes, really. Aim the hairdryer at the wet spots on your deck and watch as the water is drawn into the air.

Use caution with this method, as you don’t want to accidentally breathe in any mold spores that may be present in the water vapor.

For a more hands-off approach, try using a fan. Set up a fan so that it blows across the surface of your wet deck. The moving air will help to evaporate the water, leaving your deck nice and dry. Just be sure to keep an eye on the fan, as you don’t want it to blow any loose debris onto your clean deck.

With these three simple methods, there’s no need to dread wet weather anymore. So next time storms are brewing, grab a towel and get ready to enjoy your dry deck.

Clean the deck

The next step is to clean the deck. This will help to remove any dirt, grime, or other debris that may be present on the surface of the wood. You can use various cleaners, including a pressure washer, hose, and brush, to clean your deck.

Sand the deck

Once your deck is clean, the next step is to sand the surface. This will help to rough up the wood so that the stain can better penetrate the surface. Be sure to use fine-grit sandpaper to avoid damaging the wood.

Apply the stain

Now that the surface is prepped, it’s time to apply the stain. Be sure to follow the manufacturer’s instructions for the best results. Once you’ve applied the stain, it’s important to allow it to dry completely. This may take several hours or even a day, depending on the type of stain you’re using.

Apply a second coat (optional)

For extra protection, you may want to apply a second coat of stain. This is especially important if you’re using a semi-transparent or clear stain. Because these types of stains tend to wear away quickly. If you decide to apply a second coat, be sure to allow the first coat to dry completely before beginning.

Enjoy your deck

After the stain has dried, you can now enjoy your deck. Keep an eye on the weather and reapply the stains as needed. With proper care, your deck will look great for years to come. So now you can rest easy knowing that your deck is protected from the elements.

Frequently Asked Questions

Can I stain my deck after rain?

Yes, you can. Just make sure the deck is dry before staining. If the wood is still wet from rain, it won’t absorb the stain evenly. So patience is key here; wait for all that moisture to evaporate before starting.

Does deck stain dry faster in the sun?

The heat and direct sunlight help the stain dry quickly. However, don’t get carried away and leave the wood in the sun for too long. The intense heat can cause the stain to dry too quickly, resulting in a patchy finish.

Does stain dry faster in heat or cold?

Stain is a bit picky and prefers warmer temperatures to dry. The temperature should stay above 50 degrees Fahrenheit for the best drying results. Cold weather can reduce the drying time to an unbearably long amount of time. You should be careful not to expose your deck to intense heat for extended periods of time.

When should you not stain a deck?

If your deck has been exposed to strong winds, rain, or snow, you should not stain it. This is because the wood is likely damp, leading to an uneven finish and a lack of adhesion. If your deck has been newly constructed, you should wait at least 30 days before staining it.

Will deck stain dry in 24 hours?

For maximum results, allow 48-72 hours before walking or putting furniture back onto your deck. However, depending on the temperature and humidity, your deck may feel dry to the touch after 24 hours. But the stain will not be fully cured until several days later.

Conclusion

Stain is the perfect way to protect your deck from the elements and give it an aesthetic boost. But can you stain a wet deck? With the right steps and the right products, you can get a flawless, long-lasting finish.

Whether you’re new to DIY or a seasoned do-it-yourselfer, these 7 tips will help guide you smoothly through the staining process. With the right approach and the right products, you can confidently get a finish that will stand the test of time and give your deck an amazing look.

So don’t let a bit of wetness put you off. With the right approach, staining a wet deck can be a breeze.

Can you Drill into Trex Decking – Working with Composite Deck

How can you Drill into Trex Decking The Best Drilling Tips

Not all decks are created equal. In fact, there’s a new sheriff in town regarding composite decking material ‘Trex”. Trex is a composite material made from recycled plastic and wood fibers.

It’s more resistant to fading, scratching, and staining than traditional lumber, and it doesn’t require any yearly sealing or staining. Trex is also easy to drill into for attaching hardware like railing and lighting.

But can you drill into Trex decking? The good news is that it’s quite easy. In this blog post, we’ll show you how to drill into Trex decking correctly. So make sure you don’t damage your deck.

Tips and Tricks for Drilling Hole into Trex Decking

Trex decking is a popular choice for many homeowners because it is durable and easy to maintain.

But what if you want to add some flair to your deck? Drilling holes into Trex decking is one way to do that. With a few simple tips and tricks, you can easily add personality to your deck.

Here are 8 steps to drilling holes into Trex decking:

1. Choose the right drill bit

Choose the right drill bit

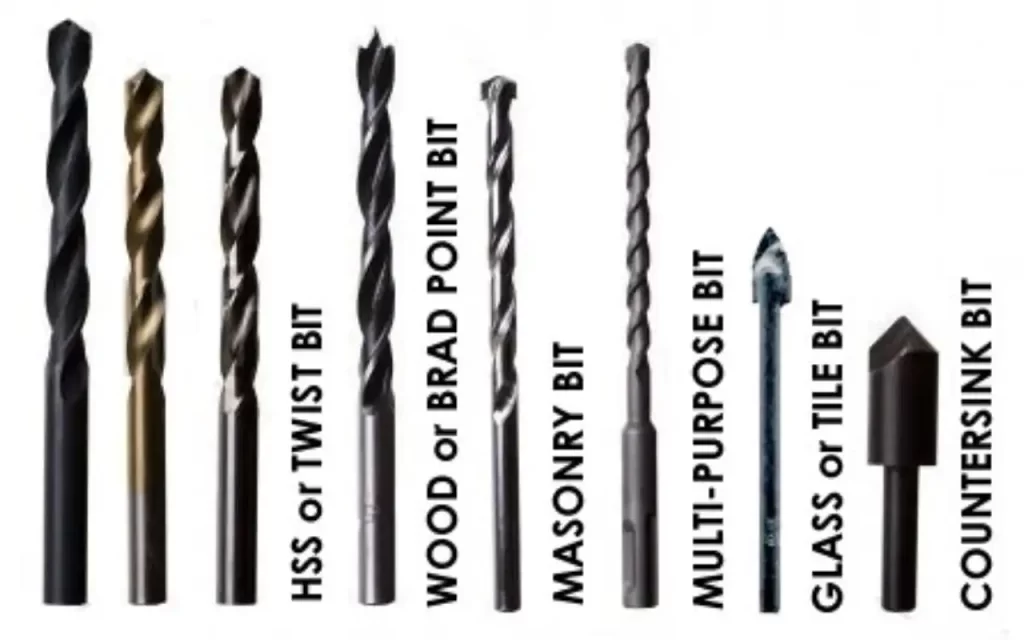
First and foremost, you’ll need to ensure you’re using the right bit. The correct choice of drill bit will make a hole with a clean, smooth edge. This is especially important if you add hardware to your deck, as it will ensure a tight, secure fit. When drilling into a composite material, use a carbide-tipped drill bit.

What makes carbide-tipped drill bits so superior to other types of drill bits?

  • Carbide-tipped drill bits are designed specifically for drilling through hard materials like composite decking. 
  • They’re made of extremely tough material that can withstand high temperatures and wear and tear. 
  • Carbide-tipped drill bits stay sharp longer than traditional drill bits.
  • Carbide-tipped drill bits are less likely to wander off course as you’re drilling, so you’ll end up with clean, precise holes every time. 
  • They come in various sizes and styles to fit any drilling application, so you can find the perfect one for your needs. 

When it comes to drilling holes in Trex decking, carbide-tipped drill bits are a clear choice.

2. Make a pilot hole

Make a pilot hole

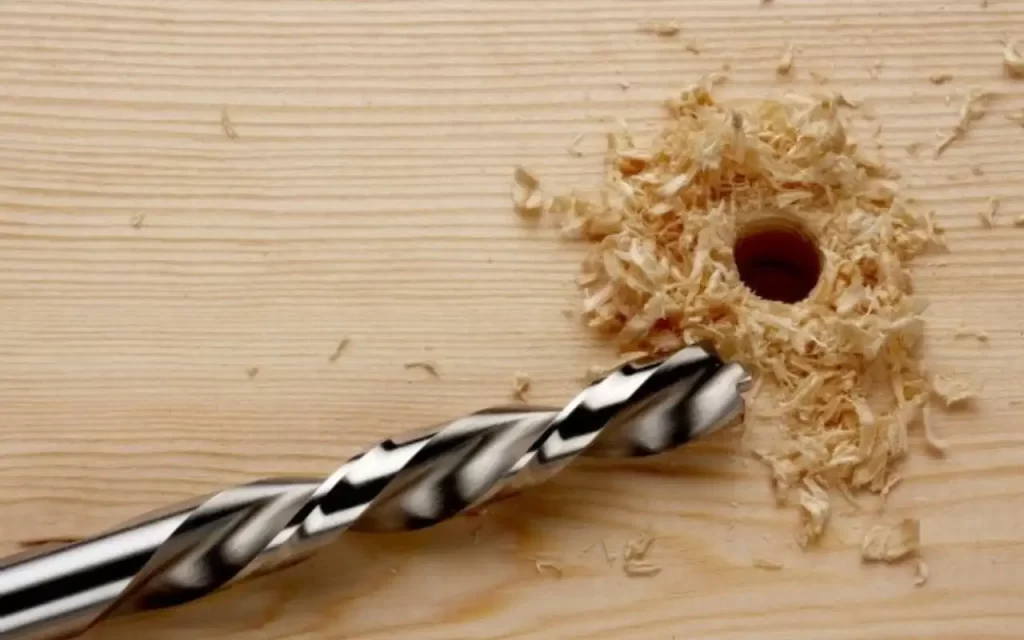
Once you’ve selected the perfect drill bit, it’s time to start drilling. But before you go full bore, it’s important to make a pilot hole first. A pilot hole is a small hole that guides the drill bit as you’re drilling. This helps prevent the drill bit from wandering off course and ruining the look of your deck.

To make a pilot hole, start by positioning the drill bit where you want the hole to be. Then, using a slow and steady motion, begin drilling into the decking. Keep going until you’ve drilled through about half of the thickness of the decking.

3. Drill slowly and steadily

Drill slowly and steadily

Now it’s time to start drilling the hole. Remember to go slowly and steadily, using constant and even pressure. This will help prevent the drill bit from overheating and damaging the Trex decking. So go slowly and carefully.

4. Let the drill do the work

One of the most common mistakes people make when drilling is applying too much pressure. They think they must push down hard to make the hole, but this is not the case. In fact, applying too much pressure can damage the drill bit and the decking.

Let the drill do the work for you. It’s designed to cut through materials quickly and easily, so there’s no need for you to apply extra pressure. Just hold the drill steady and let it do its job.

5. Remove any burrs

Remove any burrs

Once you’ve drilled through the entire thickness of the decking, it’s time to remove the drill bit. But before you do, check to see if there are any burrs (or rough edges) around the hole. If there are, use a file or sandpaper to smooth them down the edges of the hole.

6. Add hardware

Now that you’ve successfully drilled a hole in your Trex decking, it’s time to add the hardware of your choice. This could be anything from cup holders to flower pots. Just screw or bolt the hardware into place, and you’re all set.

Use a Countersink

If you’re going to be attaching screws to the surface of your deck, it’s a good idea to use a countersink. This will create a small hole for the screw to sit in and help prevent the material from cracking.

7. Repeat as necessary

If you want to add more than one hole to your deck, repeat steps 2-6 until you’re satisfied with the results.

Can you Use a Power Drill on Trex Decking?

Can you Use a Power Drill on Trex Decking

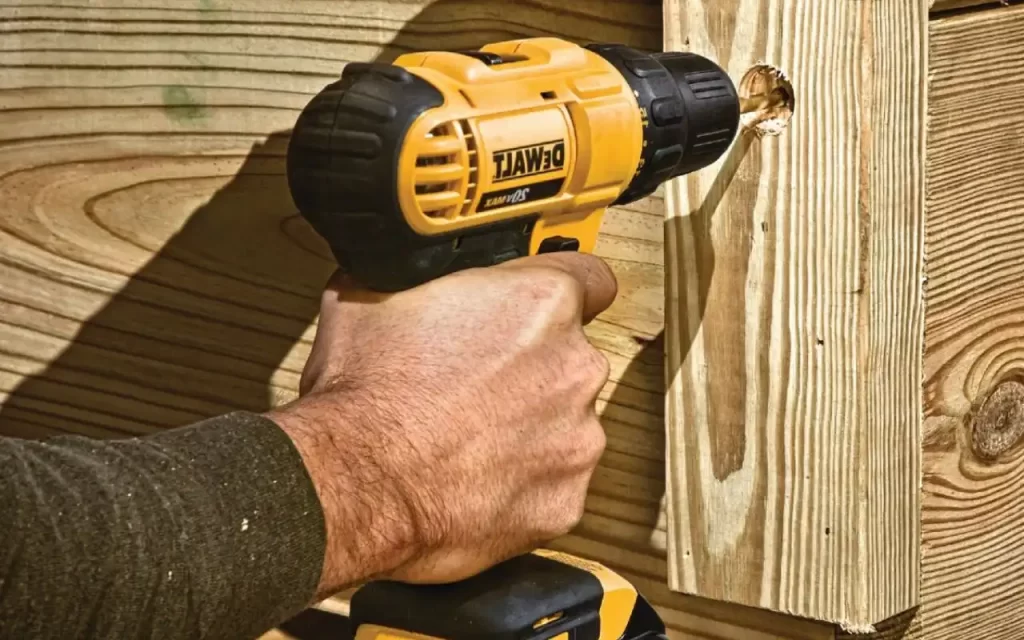
In fact, using a power drill is one of the easiest ways to install Trex decking. Not only does it save you time and effort, but it also ensures a more secure and longer-lasting deck.

Why you should use a power drill?

When you pre-drill holes for your deck screws, you create a smaller surface area for the screw to grip. This not only makes it less likely for the screw to loosen over time but also makes it less likely for the screw to strip the hole. This can cause decking boards to loosen or even break.

In addition, using a power drill allows you to drive the screws in at a consistent depth, reducing the likelihood of board damage. If you’re looking for a fast, easy, and durable way to install your Trex decking, grab a power drill and get to work.

Potential Risks of Power Drill

While a power drill can be a useful tool, it’s important to consider the potential risks before deciding. A power drill can potentially damage your decking, leaving it vulnerable to water damage and rot.

Additionally, a power drill can create noise pollution that can disturb your neighbors. With these risks in mind, you’ll need to weigh the pros and cons of using a power drill on your Trex Decking. Ultimately, only you can decide whether or not using a power drill is the right choice for the job.

What kind of screws should you use with Trex decking?

For traditional Trex decking, it is recommended to use either composite-compatible or stainless steel screws.

Composite-compatible screws are made specifically for composite materials and will not corrode over time like regular wood screws. Stainless steel screws, on the other hand, will not corrode and are highly durable. However, they are considerably more expensive than composite-compatible screws.

Frequently Asked Questions

Can I drill into Trex Decking?

Yes, but it’s important to use the right type of drill bit and to pre-drill any holes before adding screws.

Is it easy to install Trex Decking?

Yes. In fact, using a power drill is one of the easiest ways to install Trex decking. Not only does it save you time and effort, but it also ensures a more secure and longer-lasting deck.

Will using screws damage my Trex Decking?

No, as long as you use the right type of screw. Be sure to choose screws that are specifically designed for use with composite decking. These screws feature a special coating that prevents rust and corrosion, making them ideal for use with Trex decks.

Conclusion

So, the answer to the question: Can you drill into Trex decking? is a definite yes.

With the right tools and materials, it’s easy to do. However, you should always make sure to use quality bits and screws that are designed specifically for composite decking. Taking extra care when drilling can help ensure that your deck remains in good condition for years to come.

Be sure also to take extra precautions when drilling around electrical wiring. If you don’t feel comfortable, it’s best to leave this job to a professional.

With the right tools and materials, drilling into Trex decking is a breeze, so you can get back to enjoying your outdoor living space in no time.

Can You Use Deck Stain on Garden Furniture?

Can You Use Deck Stain on Garden Furniture

Garden furniture is a beautiful addition to any outdoor space, but it can be difficult to keep it looking its best. because it is constantly exposed to the elements. These elements like sun, rain, and snow can take their toll on garden furniture, causing it to fade and wear over time.

When your garden furniture starts to look a little worse for wear, you might be tempted to reach for the deck stain. So, when it comes to choosing a stain for your deck, you want to make sure you select the best possible option. But what about using that deck stain on garden furniture?

Can you really achieve the same level of protection and beauty? The answer may surprise you.In this blog post, we’ll explore your options for staining garden furniture and help you decide whether or not using deck stain is the right choice for you.

What is deck stain? Can you really use it on garden furniture?

What is deck stain? Can you really use it on garden furniture?

Deck stain is a type of protective coating that is applied to decks and other outdoor wood surfaces. It helps to protect the wood from fading, water damage, and other wear and tear.Deck stain is typically made from a mixture of oil and pigment, which gives it its tinted color.

The oil helps to repel water and protect the wood from the elements, while the pigment provides UV protection to help prevent fading. Deck stain is a great way to give your outdoor space a new lease on life.

Why is deck stain not suitable for the garden?

Not all stains are created equal. When it comes to choosing the right stain for your garden furniture, deck stain is not the way to go.

Here are 8 reasons why: 

  • Deck stains are designed to penetrate deep into the wood, which can be damaging to delicate garden furniture. 
  • The pigments in deck stains can bleed and run, leaving unsightly streaks on your furniture. 
  • Deck stains can be difficult to remove, and may require harsh chemicals or sanding to remove. 
  • Deck stains can fade quickly in direct sunlight, making your furniture look old and worn before its time. 
  • Deck stains can be slippery when wet, posing a danger to both you and your furniture. 
  • Deck stains can be toxic, and may release harmful chemicals into the air when applied. 
  • Deck stains may contain harmful VOCs that can damage the garden furniture. 
  • Finally, deck stains simply aren’t designed for garden furniture – they’re meant for decks!

Choosing the wrong stain for your furniture can void warranties, and may even cause irreparable damage. 

What’s the best stain for garden furniture?

What's the best stain for garden furniture?

One of the most important steps in cleaning garden furniture is choosing the right stain. With so many different options on the market, it can be hard to know which stain is best for your needs. But don’t worry – we’re here to help.

Here’s a quick breakdown of the different types of stains available, so you can choose the perfect one for your garden furniture. 

Water-based stains

Water-based stains are typically lower in VOCs (volatile organic compounds), making them a more environmentally friendly option. They’re also easier to clean up since you can simply wash them off with water.

However, water-based stains may not be as durable as oil-based stains, so they may need to be reapplied more frequently. 

Oil-based stains

Oil-based stains are more durable than their water-based counterparts, meaning they’ll last longer before needing to be reapplied. They’re also less likely to be damaged by sunlight or heat. However, oil-based stains can be difficult to remove, and they often have a strong odor. 

If you’re looking for a high-quality finish that will last for years to come, an oil-based stain is a way to go. However, if you’re concerned about environmental impact or ease of cleanup, a water-based stain may be the better choice. 

Whichever type of stain you choose, make sure to follow the manufacturer’s instructions carefully to ensure the best results.

Is it worth staining your old garden furniture?

Is it worth staining your old garden furniture?

You’re walking through your favorite furniture store when you spot it. The perfect piece of furniture to complete your home. But there’s a catch. Its wood stain is slightly off from the rest of your decor. Do you buy it anyway and hope for the best? Or do you keep looking for something that’s a better match?

When it comes to staining your old garden furniture, it can be a tough decision. On one hand, you want your furniture to match the rest of your decor. On the other hand, you don’t want to have to spend hours sanding and staining your old furniture to get the perfect color. So, what’s the verdict? Is it worth staining your old furniture?

Here are a few things to consider:

The type of wood:

The type of wood your furniture is made of will affect how easy it is to stain. Some woods, like pine, are very porous and absorb stain easily. Other woods, like oak, are more difficult to stain evenly. If your furniture is made of difficult-to-stain wood, it might not be worth the effort.

The condition of the wood:

The condition of the wood is the main factor to consider when staining your old garden furniture. If the wood is in good condition and just needs a new coat of stain, it might be worth the effort. However, if the wood is damaged or warped, it might be better to replace it. because it can be difficult to get an even finish.

The color you want:

The color of the stain you want is also important to consider. If you’re looking for a specific color that’s difficult to achieve, it might not be worth the effort. On the other hand, if you’re just looking for a new color that’s similar to the one you have, staining your furniture might be a good option.

When it comes to deciding whether or not to stain your old garden furniture, it’s important to consider all of the factors. The type of wood, the condition of the wood, and the color you want are all important things to keep in mind. Weighing all of these factors will help you decide whether or not staining your furniture is worth the effort.

How often should you re-stain your garden furniture?

https://www.youtube.com/watch?v=BGkSFN6Qol4

When you want your garden to look its best. One way to do that is by making sure your furniture is in tip-top shape. But how often should you re-stain it? Some experts say every year, others claim every two is sufficient. Here’s a breakdown of the pros and cons of each so you can make the best decision for your garden.

If you opt to re-stain your furniture every year, you can be sure it will always look its best. This method requires more work, but it pays off in the long run. Your furniture will be protected from the elements and won’t suffer from wear and tear as quickly.

However, if you don’t have the time or energy to re-stain annually, every two years is probably sufficient. Your furniture may not look quite as good, but it will still be protected from the elements and won’t suffer from too much wear and tear.

Ultimately, the decision is up to you. How often you re-stain your furniture depends on how much time and effort you’re willing to put into it. No matter what option you choose, your garden will still look lovely.

Frequently Asked Question

Q. Are there any drawbacks to staining my furniture?

A. The main drawback of staining your furniture is the time and effort it takes to do it. If you’re not willing to put in the work, your furniture may not look its best. Additionally, if you don’t maintain the furniture properly, the stain can fade or peel over time.

Q. What are some tips for staining my furniture?

A. When staining your furniture, be sure to use a high-quality stain. Also, be sure to follow the directions on the can carefully. If you’re not sure how to apply the stain, ask a professional for help.

Q. Can I stain my furniture myself?

A. Yes, you can stain your furniture yourself. However, it’s important to know what you’re doing before you start. If you’re not sure how to apply the stain, ask a professional for help.

Q. How much does it cost to have my furniture stained?

A. The cost of having your furniture stained depends on a few factors, including the size of the piece and the type of stain you use. Generally, you can expect to pay around $100 to have a large piece of furniture stained.

Conclusion

Deck stain is not furniture stain. You should use a sealant, like polyurethane, on outdoor furniture stains instead of deck stains. If you have an old set of garden furniture that you’re considering staining, it might be worth your time and money to do so. However, make sure to test the new finish in a small, inconspicuous area before applying it to the entire piece. And don’t forget to visit our blog regularly for more helpful tips!

Two Coats of Stain: The Best Way to Protect Your Deck

Two Coats of Stain: The Best Way to Protect Your Deck

If you’re like most homeowners, you take pride in your deck. It’s the perfect spot for hosting barbecues, parties, and family gatherings. But unless you take care to protect it, your deck can quickly become damaged by the elements. That’s why staining your deck is essential. And when it comes to staining, two coats are always better than one.

Two coats of stain will provide twice the protection against sun damage, water damage, and wear and tear. It will also help to keep your deck looking new for longer. Are you confused about how and when to apply a second coat of stain on your deck? If so, you’re not alone.

Many homeowners are unsure about whether they need to apply a second coat and, if so, how long they should wait before doing so. In this article, we’ll provide you with all the information you need to know about applying a second coat of stain to your deck.

So don’t wait any longer and get started today with staining your deck!

When to apply a second coat of stain?

When to apply a second coat of stain?

Deciding when to apply a second coat of stain to your deck can be tricky. On the one hand, you want to make sure that the wood is properly protected from the elements. On the other hand, you don’t want to waste time and money reapplying stains unnecessarily.

So how can you tell when it’s time for a second coat? Here are ten signs to look for:

1. The first coat of stain has worn off.

1. The first coat of stain has worn off.

When you apply the first coat of stain, it’s important to allow it to cure properly before walking or placing furniture on it. However, even with proper curing, the first coat of stain will eventually wear off, and your deck will need to be re-stained.

If you notice that the stain of your deck has faded or that the finish is wearing away, it’s time to apply a second coat to protect your deck. The second coat will refresh the look of your deck and provide it with additional protection. When you apply the second coat, be sure to use the same type of stain as the first coat.

2. The wood is bare in spots.

The wood is bare in spots

Even if the overall finish of your deck looks good, it’s important to check for any areas where the wood is showing through. This is usually due to foot traffic or furniture being placed on the deck after the first coat of the stain

If you see any bare spots, it’s time to apply a second coat of stain to protect your deck. Bare spots on the deck can lead to water damage, so it’s important to address them as soon as possible. Be sure to pay special attention to these areas when applying to the second coat so that you don’t miss any spots.

3. The wood is starting to turn gray.

3. The wood is starting to turn gray.

One of the main reasons why homeowners stain their decks is to protect the wood from turning gray. The sun’s ultraviolet rays can cause the wood to lose its natural color over time and when this happens, the deck can start to look worn and outdated.

If you notice that the wood on your deck is starting to turn gray, it’s a good idea to apply a second coat of stain. This will help to restore the natural color of the wood and protect your deck from further damage. So next time you’re at the store, pick up the second can of stain and get to work!

4. The stain color is faded or patchy.

The stain color is faded or patchy

when you apply a fresh color first coat of stain on your deck, the color should be even and consistent. you enjoy the freshly-stained look of your deck, but over time the color will start to fade. This is due to weather elements.

If you notice that the stain color on your deck is faded or patchy, it’s a good idea to apply a second coat. This will help to even out the color and restore the finish. so don’t wait to re-stain your deck!

5. The wood is cracked or splitting.

The wood is cracked or splitting

As the wood on your deck ages, it can start to crack and split. This is due to exposure to the elements and the natural expansion and contraction of the wood.

If you notice any cracks or splits in the wood, it’s important to address them as soon as possible. Applying a second coat of stain will help to seal the cracks and prevent further damage.

However, be sure to check the cracks and splits carefully to make sure that they are not too deep. If they are, you may need to repair them with wood filler before applying the second coat of stain.

6. The deck is showing signs of wear and tear.

Even if you take good care of your deck, it will eventually start to show signs of wear and tear. This is due to the constant exposure to the sun, rain, snow, and other elements.

If you notice that your deck is starting to show signs of wear and tear, it’s a good idea to apply a second coat of stain. This will help to protect the wood and keep it looking its best.

7. There are signs of mildew or mold growth.

Mold and mildew growth is a fungus that thrives in moist and shady areas. If you notice any signs of mold or mildew growth on your deck, it’s important to address the problem as soon as possible.

Applying a second coat of stain will help to kill the mold and mildew and prevent it from coming back. The second coat will also help to protect the wood from further damage.

8. You want to change the color of your deck.

If you’re tired of the current color of your deck, it’s easy to change it up with a second coat of stain. Simply choose a new color that you like and apply it over the existing stain.

You may need to apply a third coat of stain to achieve the desired color. However, you can always experiment with different colors and shades to find the perfect look for your deck.

9. You want to protect your investment.

Your deck is a big investment, so it’s important to take care of it. Applying a second coat of stain will help to protect the investment of your deck and keep it looking its best for years to come.

It will also help to extend the life of your deck and keep it fresh and new. So if you’re looking to protect your investment, don’t wait to apply a second coat of stain!

10. Water beads on the deck surface instead of soaking in.

Water should soak into the wood rather than sit on top of the deck. If you notice that water is beading on the surface of your deck, it’s a good idea to apply a second coat of stain.

This will help to seal the pores of the wood and prevent water from penetrating the surface. It will also help to extend the life of your deck and keep it looking its best.

So there you have it! These are just a few of the reasons why you might need to apply a second coat of stain to your deck. If you notice any of these issues, don’t wait to re-stain your deck. A second coat will reinforce the wood and keep your deck looking amazing.

What Happens If You Don’t Put Enough Coats of Stain on a Deck?

If you’re planning on staining your deck, you might be tempted to skimp on the number of coats in order to save time and money. However, this can be a costly mistake. Here’s what can happen if you don’t put enough coats of stain on your deck.

Your deck won’t be protected from the elements. exposes the wood to potential damage from ultraviolet rays, rain, and snow. Over time, this can cause the wood to warp, crack, or splinter. In addition, your deck won’t have the same aesthetic appeal as a properly stained deck. If you’re looking for a luxurious and long-lasting outdoor space, skimping on the stain will only give you excellent results.

In short, it’s important to put enough coats of stain on your deck to protect it from the elements and ensure that it looks its best. Otherwise, you may end up having to replace your deck sooner than you would like.

Is It Possible to Finish a Deck in One Day with Two Coats of Stain?

Can you really finish a deck in one day with two coats of stain? The answer, of course, is that it depends. If you have a small deck and you’re working alone, it’s probably not going to happen. But if you have a large deck and you’re working with a team, it’s definitely possible. Here are a few tips to help you get the job done:

  • Use a high-quality stain. This will make a big difference in terms of both coverage and durability.
  • Work in sections. Don’t try to do the entire deck all at once – you’ll just get overwhelmed. Work on small sections and take your time.
  • Be prepared for touch-ups. Even with the best stain in the world, there’s always a chance that you’ll miss a spot or two. Be prepared to do some touch-ups after the initial coat has dried.

When you choose a sunny day to work on your deck. This will help the stain dry more quickly. Once you’re ready to go, apply the first coat of stain evenly across the surface of your deck. Let it sit for about 20 minutes before wiping any excess with a rag. Finally, apply the second coat of stain and let it dry completely overnight. In the morning, your deck will be ready to enjoy!

Frequently Asked Questions:

Can I use a pressure washer to clean my deck before re-staining?

You can use a pressure washer to clean your deck before re-staining. Just be sure to use a low setting to protect your deck from damage. You should also avoid using a pressure washer if the wood is cracked or split.

What type of brush should I use to apply stain?

There are a few different types of brushes that you can use to apply stain, including synthetic brushes, natural bristle brushes, and foam brushes. Synthetic brushes are typically the best choice because they’re less likely to shed bristles. Natural bristle brushes are a good choice for oil-based stains, while foam brushes are best for water-based stains.

Can I use a garden hose to clean my deck before applying the second coat?

Yes, you can use a garden hose to clean your deck before applying a second coat of stain. Just be sure to use a nozzle with a wide spray pattern so that you don’t damage the wood. You should also avoid using a pressure washer because it can damage the wood.

What should I do if I get stains on my clothes?

If you get stains on your clothes, you should immediately remove the clothing and wash them in cold water. You may also want to pretreat the area with a stain remover before washing.

Conclusion:

Applying two coats of stain is the best way to protect your deck from weathering and fading. Depending on the type of wood you have, one or two coats may be necessary to achieve optimal results.

Make sure you allow enough time for each coat to dry before applying the next. By following these simple steps, you can finish your deck in just one day with beautiful results lasting for years. Have any questions? Be sure to visit our blog regularly for more helpful tips.

How Long Does It Take to Paint a Deck?

How long does it take to paint a deck The complete guide

Decks are the perfect place to enjoy the outdoors with family and friends. But over time, they can become stained and discolored. A fresh coat of paint is a great way to revive an old deck, but it can be a daunting task. Before you start painting your deck, you’ll probably want to know how long the project will take.

So how long does it take to paint a deck?

It usually takes about 3 days to paint a deck fully. This includes time for the paint to dry in between coats.

In this blog post, we’ll explore everything you need to know about painting a deck and how to speed up the drying of a painted deck. We’ll also provide a helpful timeline so you can plan your project accordingly.

So pick up your paintbrush, and let’s get started.

What is the Average Time to Paint a Deck?


What is the Average Time It Took a Paint on Deck?

Of course, this varies depending on the size and condition of your deck. If you have a large deck or one that is in need of repair, it may take longer. But in general, 3 days is a good estimate.

The duration it takes to paint a deck is determined by various factors

How long does it take to complete the job? Depending on the condition of your deck and the type of paint you use, the process can take anywhere from a few hours to a few days.

Here are five factors that will affect the amount of time it takes to paint your deck:

The size of your deck


The size of your deck

A large deck may take several days. The large deck needs more time to finish because it will take longer to prep and paint.

If your deck is small, you could probably finish the job in a day. A small size deck is easy to access, and you don’t need to worry about time-consuming prep work.

The condition of your deck

The-condition-of-your-deck-now


The deck conditions are important for the time taken for the project. If your deck is in good condition, it will take less time to prep and paint. The good position of the deck means that the surface is smooth, and there are no big cracks or holes.

On the other hand, if your deck is in bad condition, it will take more time to prep and paint. You’ll likely need to do some repair work before you start painting. This will add to the overall time it takes to complete the project.

The quality of paint you use


The quality of paint you use

The type of paint you use will have the biggest impact on the amount of time it takes to complete the job. If you’re using high-quality paint, it will take longer to apply but will last longer and look better in the end.

If you’re trying to save time, cheaper paint may be a better option. However. Cheap, low-quality paint will chip in and peel quickly, requiring frequent touch-ups. So it is important to decide what kind of quality you want for your deck.

The number of coats of paint you apply


The number of coats of paint you apply on deck

If you’re painting your deck for the first time, you’ll likely need to apply two coats of paint. This will take longer than if you were only applying one coat.

If you’re touching up on an existing paint job, you may only need to apply for one coat. This will obviously be quicker than painting the entire deck.

The climate

The weather can have a big impact on the amount of time it takes to paint a deck. If you’re painting in the summer, the heat will speed up the drying time of the paint. However, if it’s too hot, the paint may blister and peel because the heat can cause problems with painting.

If you’re painting in the winter, the cold temperatures will slow down the drying time of the paint. So it is important to know the climate when you plan to paint your deck.

With these factors in mind, you can get a good idea of how long your deck’s paint job will last. By choosing high-quality materials and caring for your deck, you can enjoy your backyard for years to come!

How to Speed Up the Drying of a Painted Deck?

If you’re like most people, you probably want your deck to look its best. One important part of that is making sure the paint is fresh and up-to-date. But sometimes, waiting for the paint to dry can be a real pain, especially if you’re in a hurry to finish the job. 

There are a few tricks you can use to speed up the drying process. If you’re looking to get your deck painted ASAP, here’s what you need to do:

Hair dryer

If you’re wondering how to speed up the drying of a painted deck, using a hair dryer is a great solution. Not only is it quick and easy, but it’s also effective.

How does a hair dryer work?

When you use a hair dryer to speed up the drying of paint, the heat helps to evaporate the water in the paint. This process is called curing, and it helps the paint to harden and become more durable.

In addition, curing helps to prevent chips, cracks, and peeling. To use a hair dryer for this purpose, set the dryer on low heat and hold it about six inches from the paint’s surface. Move the dryer slowly back and forth until the paint is completely dry.

So if you’re looking for a fast, easy way to get your newly painted deck ready, try using a hair dryer. You’ll be amazed at how quickly it works!

Fan

You can also use a fan to help speed up the drying process. Simply set up a fan so that it’s blowing directly on the surface of the paint. The air movement will help to evaporate the water in the paint, which will help it to dry more quickly.

Dehumidifier

Another option you have is to use a dehumidifier. This can be especially helpful if you’re painting in a humid climate. The dehumidifier will help to remove the moisture from the air, which will, in turn, help the paint to dry more quickly.

Of course, other factors can affect the drying time of paint, such as the type of paint you use and the temperature and humidity of the air. But if you’re looking for a few quick and easy ways to speed up the process, these three methods should do the trick.

Should You Strip Or Sand Your Deck Before Painting It?

A freshly painted deck can make your whole backyard look new again, but the process of painting a deck can be daunting. One of the most important decisions you’ll make is whether to strip or sand the surface before painting.

  • Stripping involves removing the old paint (and sometimes varnish) to the bare wood.

  • Sanding, on the other hand, only involves roughening up the surface of the wood so that the new paint will adhere better. But sanding is more likely to leave behind scratches and imperfections that will show through your new paint job. 

Both stripping and sanding have their pros and cons, so it’s important to weigh your options before deciding which route to take. Ultimately, the best decision will depend on the condition of your deck and your personal preferences.

How Long After Painting the Deck Can I Put Furniture on It?

You’ve just spent an afternoon pressure washing your deck, painting it a beautiful new color, and admiring your hard work. But now the question is: how long do you have to wait before putting your furniture back on the deck? The answer may depend on the type of paint or stain you used.

  • For latex paint, you’ll need to wait at least 24 hours for it to dry completely.
  • For oil-based paint, you have to wait at least 48 hours.

As for stains, the drying time will vary depending on your product; be sure to read the manufacturer’s instructions carefully. In general, though, it’s best to err on the side of caution and give your deck plenty of time to dry before bringing any furniture or other items back onto it.

By taking this simple step, you can help ensure that your deck remains looking its best for years to come.

Frequently Asked Questions

What is the best way to remove paint from a deck?

The best way to remove paint from a deck is to use a pressure washer. This will strip away the old paint and leave the bare wood behind. You can also use a chemical stripper, but be sure to follow the manufacturer’s instructions carefully.

How do I prepare my deck for painting?

Before you begin painting your deck, you’ll need to take some time to prep the surface. This includes cleaning the deck, removing any loose paint or varnish, and sanding the surface. Once you’ve prepped the deck, you can begin painting.

What is the best type of paint to use on a deck?

The best type of paint to use on a deck is latex paint. This type of paint is durable and easy to clean, and it will hold up well to foot traffic and the elements. Oil-based paint can also be used on a deck, but it’s more difficult to clean and isn’t as durable as latex paint

Conclusion

Painted decks can brighten up any outdoor space, but how long does it take to paint a deck so that it will last? We’ve got the answer. In this guide, we’ll walk you through every step of the process, from preparing your deck for painting to ensuring that it’s fully dry.

Plus, we’ll give you tips on how to speed up the drying process by avoiding common mistakes. So whether you’re tackling this project yourself or hiring a professional, we’ve got everything you need to know about painting your deck. Ready to get started?


Deck Screws: How Far to Space Between Them?

Deck Screws How Far to Space Between Them

Building a deck is one of the most gratifying DIY projects you can undertake. Not only will you get to enjoy the fruits of your labor by hosting barbecues and summer soirees, but you’ll also increase the value of your home. Of course, any ambitious home improvement project requires careful planning and execution, and building a deck is no exception.

One of the most important considerations when building a deck is how to space the deck screws.When it comes to deck screws, there’s a lot to consider. How long should they be? What type of head do you need? And, perhaps most importantly, how far apart should you space them?

It might seem like a small detail, but spacing your deck screws correctly is crucial to ensuring a strong and durable deck. So, how can you make sure you’re spacing your deck screws correctly? In this blog post, we’ll give you a few tips about the maintenance of your deck screws and how to space them for optimal results.

So, now let’s get started!

How Much Space Should There Be Between Screws When Attaching The Decking?

How much space should there be between screws when attaching the decking?

It’s one of the most common questions when it comes to deck-building: How much space should be left between screws? After all, a deck is an outdoor space that will be subject to all kinds of weather conditions.

If the screws are too close together, they could rust and break. But if they’re too far apart, the decking could warp or come loose. So what’s the right answer? Unfortunately, there is no single answer that will work for every situation.

As a general rule, you should space deck screws about 2 to 3 inches apart. However, this will vary depending on the type of screw you’re using, as well as the thickness of your decking material.

What Kind of Deck Screws Do You Need?

What Kind of Deck Screws Do You Need?

There’s nothing worse than starting a deck project only to find out you don’t have the right screws. Or, even worse, using the wrong screws and having your deck collapse. Before you start your next project, make sure you know what kind of deck screws you need. 

There are several factors to consider when choosing deck screws, including the type of wood, the thickness of the boards, and the style of the screw head. With so many options on the market, it can be difficult to know where to start. However, by following these simple tips, you can be sure to choose the right screws for your project. 

  • First, take a look at the type of wood you’re using. If you’re working with pressure-treated lumber, you’ll need to use screws that are specifically designed for that type of wood.
  • Second, consider the thickness of your boards. Thicker boards will require longer screws, while thinner boards can use shorter screws.
  • Finally, pay attention to the style of screw head you choose. A flat head screw will sit flush with the surface of your deck, while a pan head screw will protrude slightly. 

With so many factors to consider, choosing the right deck screw can feel like a daunting task. However, by following these simple tips, you can be sure to find the perfect screw for your next project.

Do you Need a Special Drill Bit for Deck Screws?

Do you need a Special Drill Bit for Deck Screws?

Yes, because a drill bit is a tool used to create holes in various materials, including wood, metal, and plastic. It consists of a shaft with a pointed tip that is rotated by a power drill. The tip of the drill bit is usually made of carbon steel or other hard metals, which allows it to penetrate even the toughest materials.

The size and type of drill bit you need will depend on the size and type of screw you’re using, as well as the material you’re drilling into. In general, it’s best to use a bit that is slightly smaller than the diameter of the screw so that the threads can grip the material better.

Drill bits come in a variety of styles and sizes, so it’s important to choose the right one for your project. With a little research, you can find the perfect drill bit for your next deck-building project.

What Factors Influence How Far Apart You Should Space Your Deck Screws?

When you’re building a deck, one of the most important decisions you’ll make is how to space your deck screws. There are a variety of factors that can influence this decision, and it’s important to consider all of them before making a final choice.

Here are seven factors that you should take into account when deciding how far apart to space your deck screws:

1. The type of wood you’re using:

The type of wood you're using:

When it comes to deck screws, the type of wood you use will influence how far apart you should space them. Different woods have different densities, which means they can handle different screw sizes and spacing between them.

Softer woods like cedar and redwood require screws that are spaced closer together. Harder woods like oak and maple can handle screws that are spaced further apart. By taking the time to choose the right type of wood for your deck, you can be sure that your deck will last for years to come.

2. The size of the screws:

 The size of the screws

When you’re planning to build a deck, one of the first things you have to decide is what kind of screws you’re going to use. The size of the screws you select will have a direct impact on how far apart you need to space them.

If you’re using small screws, you’ll need to space them closer together in order to prevent them from pulling out. However, if you’re using large screws, you can space them further apart without affecting their holding power.

So before you start building, be sure to do your homework and choose the right size screws for your project.

3. The thickness of the boards

The thickness of the boards

Thicker boards require longer screws, which means they should be spaced further apart than thinner boards. This is because the longer screws will have a better grip on the thicker boards and will be less likely to pull out further down the line.

Thinner boards can use shorter screws and be spaced closer together. so that they grip the boards better.

4. The climate:

The climate in which your deck is preset has a big influence on how far apart you should space those screws. If you’re in a hot and dry climate, for example, you’ll need to space your screws closer together than if you’re in a cold and wet climate.

The reason for this is simple: heat and moisture can cause wood to expand, putting stress on the screws and potentially causing them to loosen over time. By spacing them closer together, you can help to offset this expansion and keep your deck nice and sturdy for years to come.

So the next time you’re planning a deck project, be sure to take the local climate into account – it just might save you some headaches down the road.

5. The intended use of the deck:

The intended use of the deck will have a big influence on how far apart the screws should be spaced. If you’re planning on using the deck for entertaining, you’ll want to make sure that the screw spacing is closer together so that there’s less chance of someone tripping and falling.

On the other hand, if you’re just using the deck for relaxing, you can space the screws further apart. Whichever way you decide to go, just make sure that you take the time to do it right so that you can enjoy your deck for years to come.

6. Budget:

The budget is always a consideration when planning any home improvement project – after all, no one wants to overspend. But when it comes to deck building, being thrifty with your screw choice could end up costing you more in the long run. With any outdoor structure, you want to be sure that it’s built to last and can withstand the elements.

Choosing the cheapest option might save you a few dollars upfront, but if those screws are prone to rusting or breaking, you’ll end up spending more money in the long run to repair or replace them. So when it comes to deck screws, it’s worth it to invest in a higher-quality product that will last for years to come.

By taking all of these factors into account, you can make sure that you choose the perfect screw spacing for your deck project!

How To Calculate The Number Of Screws Needed?

How to calculate the number of screws needed

To calculate the number of screws you need, start by measuring the size of your deck. Once you have the dimensions, multiply the length by the width to get the square footage. Next, determine how many fasteners you will need per square foot.

It is recommended that you use at least 60 fasteners per square foot. Finally, multiply the number of fasteners by the number of square feet to get the total number of screws you will need for your project. 

With these simple tips, calculating the number of screws needed for your deck is easy. By taking the time to do this important step, you can be sure that your deck will be built to last.

Frequently Asked Question

Q. How long should deck screws be?

A. The length of the screws you need will depend on the thickness of your decking material. For example, if you’re using 1-inch thick boards, you’ll need 2-1/2 inch long screws. If you’re using 2-inch thick boards, you’ll need 3-inch long screws

Q. What is the best type of screw to use for a deck?

A. The best type of screw to use for a deck will depend on the material you’re using. If you’re using pressure-treated lumber, for example, you’ll want to use stainless steel or hot-dipped galvanized screws. These screws are made to resist corrosion, which is important in an outdoor environment

Q. How do I know if my deck screws are too long?

A. If your deck screws are too long, they will protrude through the surface of the wood. This can be dangerous, so it’s important to make sure that the screws are the proper length. To avoid this problem, make sure to measure the thickness of your decking material before you purchase the screws

Q. What is the best way to keep deck screws from rusting?

A. The best way to keep deck screws from rusting is to choose stainless steel or hot-dipped galvanized screw. These screws are made to resist corrosion, which is important in an outdoor environment. You can also protect the screws from rust by coating them with a clear sealant or paint.

Conclusion

Deck screws are an important part of any deck installation. It’s important to know how far apart to space them for the best results. Our blog post on the subject offers six factors that you should take into account when spacing your deck screws. Visit our blog regularly for more helpful tips like this one!