How Long does Decking Stain Take to Dry?

Deck Stain How Long Does it Take to Dry

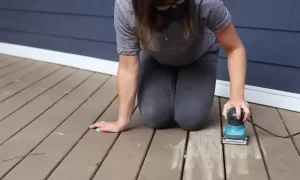
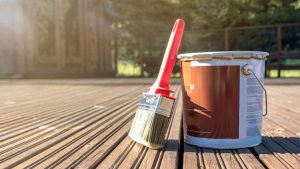
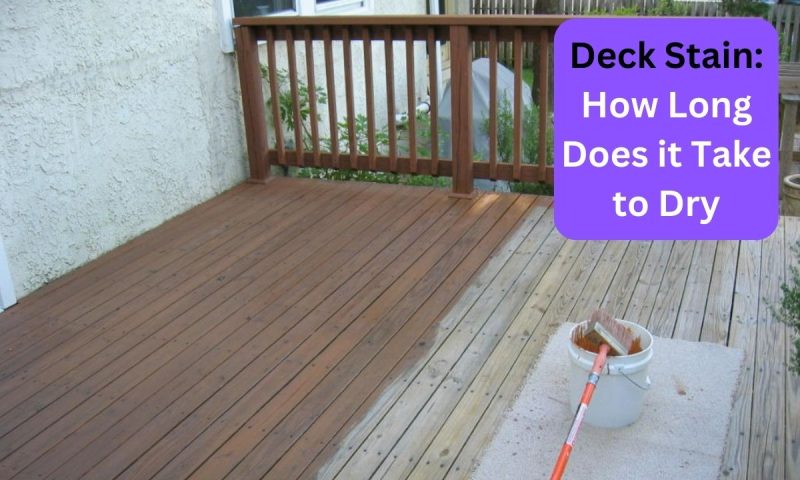
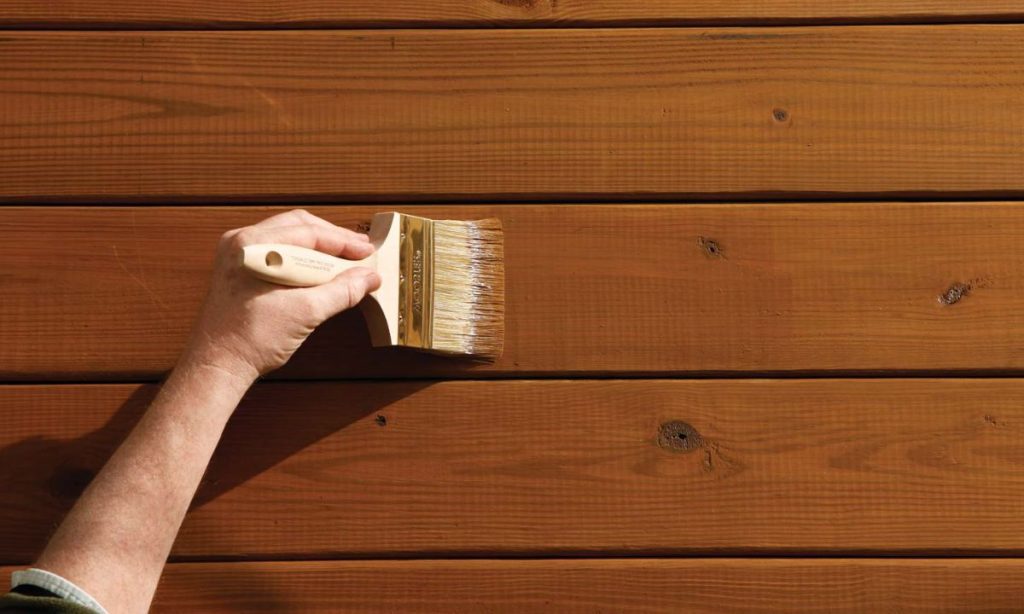
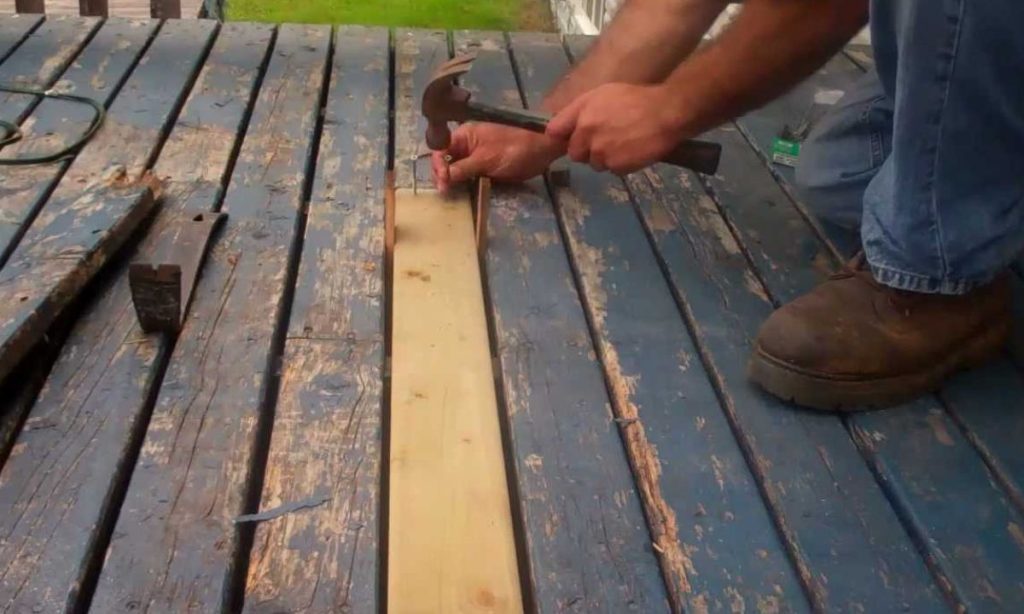
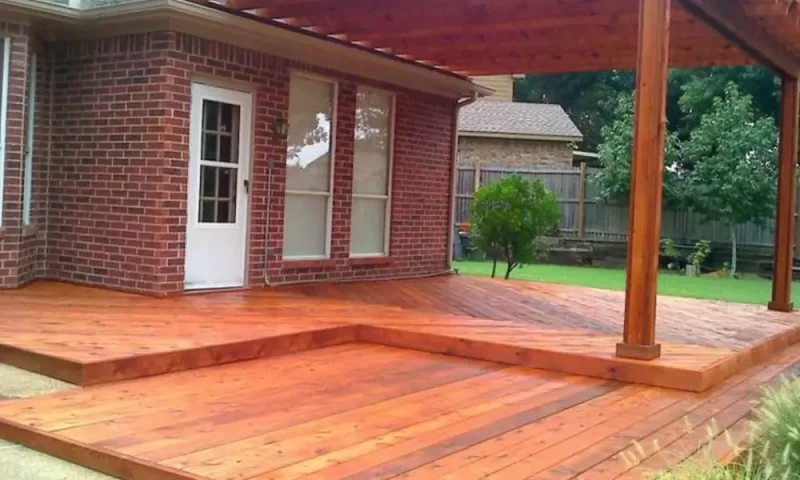
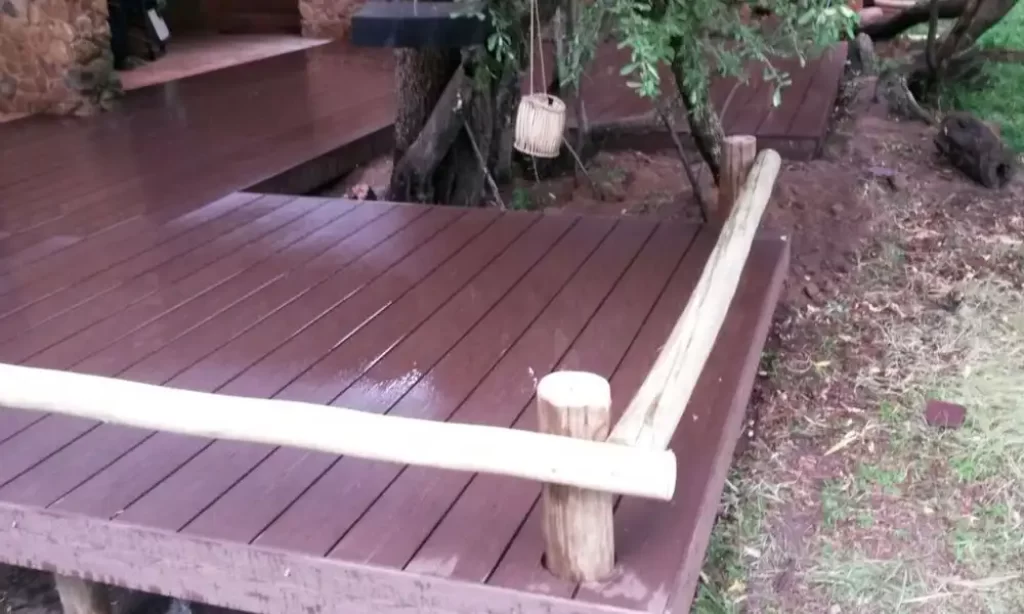
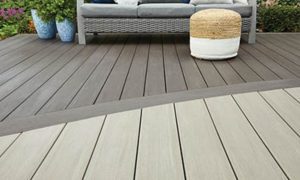
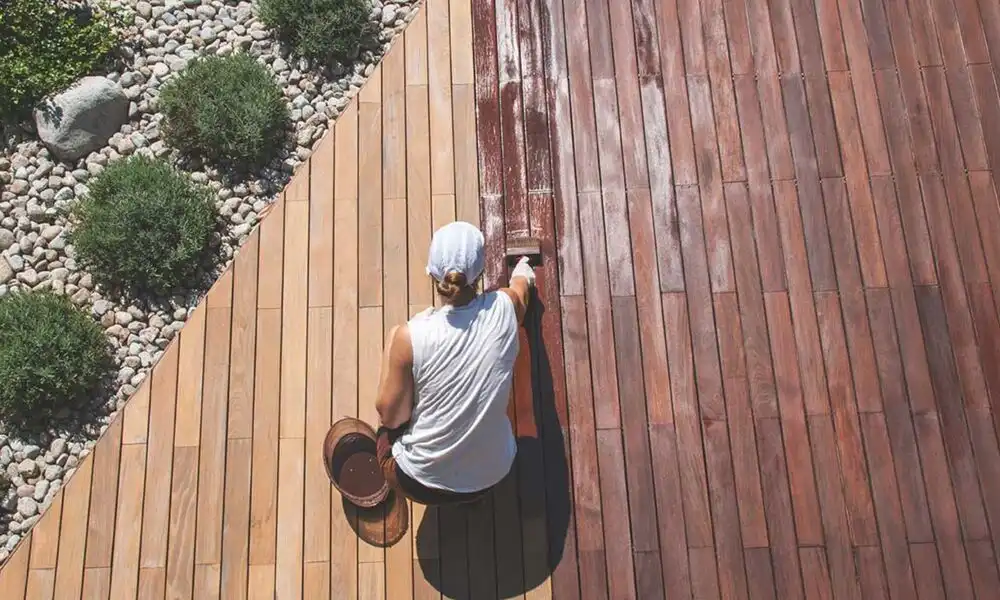
You’re all set to spruce up your outdoor living space with a fresh coat of deck stain. Applying deck stains is a necessary part of maintaining your outdoor space. But before you start, you probably have one burning question: how long does decking stain take to dry?

The answer, unfortunately, is not so simple. It depends on a number of factors. However, there are a few general guidelines you can follow to ensure that your deck stain dries properly. With a little patience and planning, you’ll be able to enjoy your beautiful new deck in no time.

How Long Will It Take for Your Deck Stain to Dry Completely?

How Long Will it Take for Your Deck Stain to Dry Completely?

If you’re about to embark on the journey of staining your deck, you might be wondering how long it will take for the stain to dry.

Dry time for deck stains can range from 4 hours to 3 days.

It all depends on the following factors:

The type of deck stain you’re using

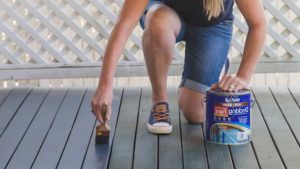
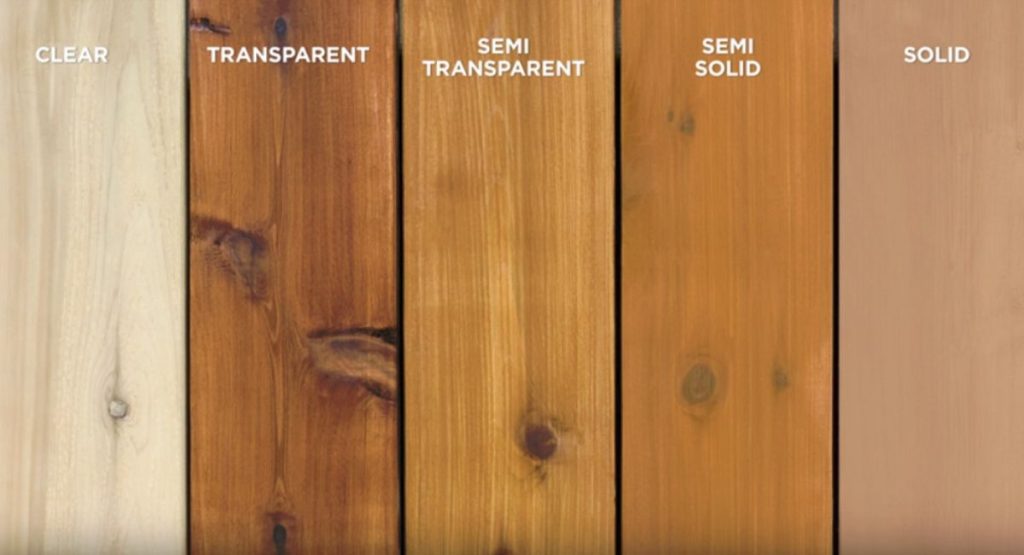
When it comes to staining your deck, the type of stain you use can have a big impact on the drying time. Because there are many different types of deck stains on the market, it’s important to choose the right one for your project.

The two main types of deck stains are oil-based and water-based.
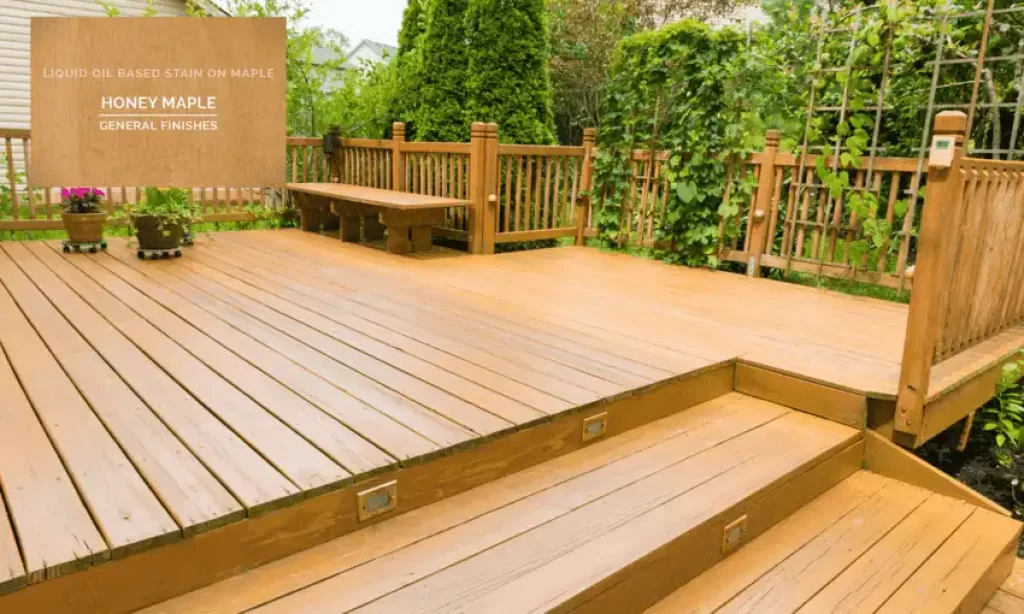
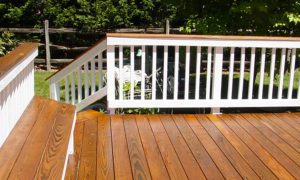
Oil-based stain

Oil-based stain:

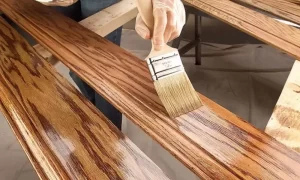
Oil-based stains typically have a longer dry time. This is because they need to be cured before they’re completely dry. The formulation of oil-based stains also makes them more susceptible to temperature changes. This means that if it’s too cold or hot outside, the drying time for your deck stain will be affected. In general, oil-based stains can take anywhere from 12 to 48 hours to dry completely.
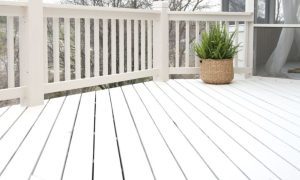
Water-based stain

Water-based stain

Water-based stains, on the other hand, have a shorter dry time. This is because they don’t need to be cured before they’re completely dry. Water-based stains are also less affected by temperature changes. In general, water-based stains can take anywhere from 2 to 8 hours to dry completely.

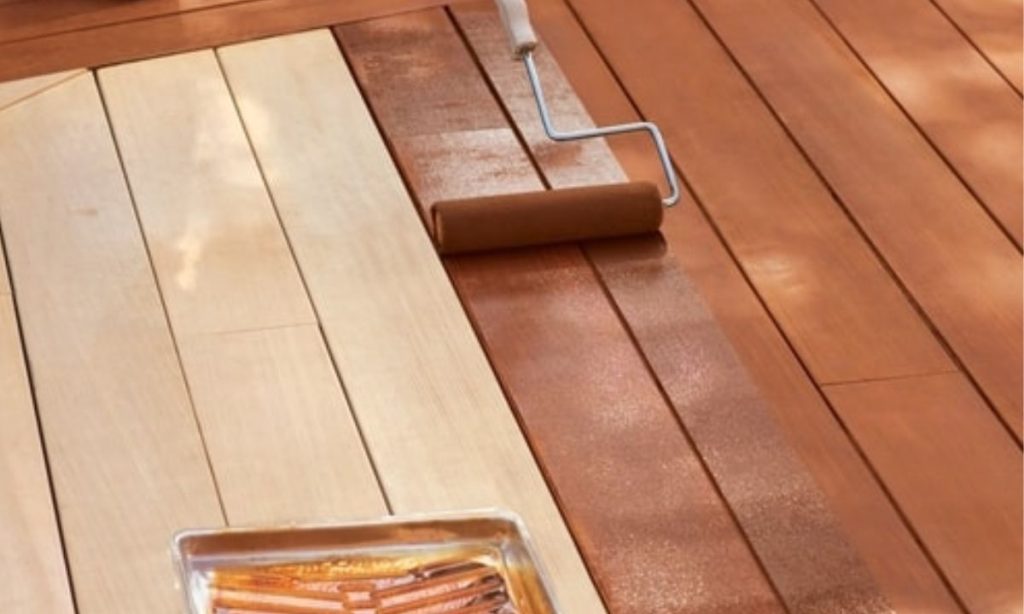
How many coats of stain you’re applying

How many coats of stain you're applying:

The coats of stains you apply to your deck can also impact dry time. If you only apply one coat of stain, it will take less time to dry than if you apply multiple coats. Because the single coat has less product to dry, it will be dry to the touch in a shorter amount of time.

However, if you’re applying multiple coats of stain, it will take longer to dry. This is because each additional coat adds more product that needs to be dried. Multiple coats also require more time in between coats than the previous coat to dry completely.

The weather

As we mentioned before, the temperature can have a big impact on the drying time for your deck stain. If it’s too cold or hot outside, the drying time will be affected.

Generally, it’s best to apply deck stains when the temperature is between 50 and 90 degrees Fahrenheit. If it’s too cold, the stain won’t dry properly due to the low temperature. If it’s too hot, the stain will dry too quickly and won’t have enough time to penetrate the wood. As a result, you won’t get the full benefits of the stain.

The humidity level

Humidity means the amount of moisture in the air. The higher the humidity, the more moisture there is in the air. If it’s too humid, the stain will take longer to dry. This is because the high humidity prevents the water in the stain from evaporating. As a result, the stain will stay wet for a longer period of time.

On the other hand, if it’s too dry, the stain will dry too quickly. This is because there is no moisture in the air to help the water in the stain evaporate. As a result, the stain won’t have enough time to penetrate the wood properly.

The best humidity level for applying deck stains is between 40 and 60 percent.

Amount of ventilation

Ventilation means the movement of air. The amount of ventilation in the area where you’re applying deck stains can also impact drying time. If there’s not enough ventilation, the stain will take a longer period of time to dry. This is because the lack of airflow prevents the water in the stain from evaporating. As a result, the stain will remain wet.

If there’s too much ventilation, the stain will dry too quickly. This is because the increased airflow will help the water in the stain evaporate. Therefore, the stain won’t have enough time to soak into the wood as it should.

The best amount of ventilation for applying deck stains is a moderate amount. This means there should be enough airflow to help the water in the stain evaporate but not so much that the stain dries too quickly.

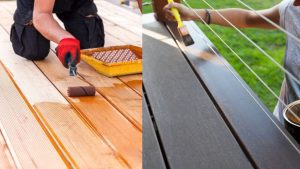
What type of wood you’re staining

The type of wood you’re staining can also affect dry time. If you’re staining softwood, such as cedar or pine, the stain will dry more quickly. This is because softwoods are more absorbent than hardwoods. As a result, the stain will penetrate the wood more quickly and won’t take as long to dry.

If you’re staining hardwood, such as oak or mahogany, the stain will take longer to dry. This is because hardwoods are less absorbent than softwoods. As a result, the stain won’t penetrate the wood as quickly and will take longer to dry.

The thickness of the wood

The thickness of the wood you’re staining can also impact dry time. If you’re staining thin wood, such as veneer or plywood, the stain will dry more quickly. This is because thin wood is more absorbent than thick wood.

If you’re staining thick wood, such as a 2×4, the stain will take longer to dry. This is because thick wood is less absorbent than thin wood. As a result, the stain is not in a position to reach deep into the wood as it can with thinner boards.

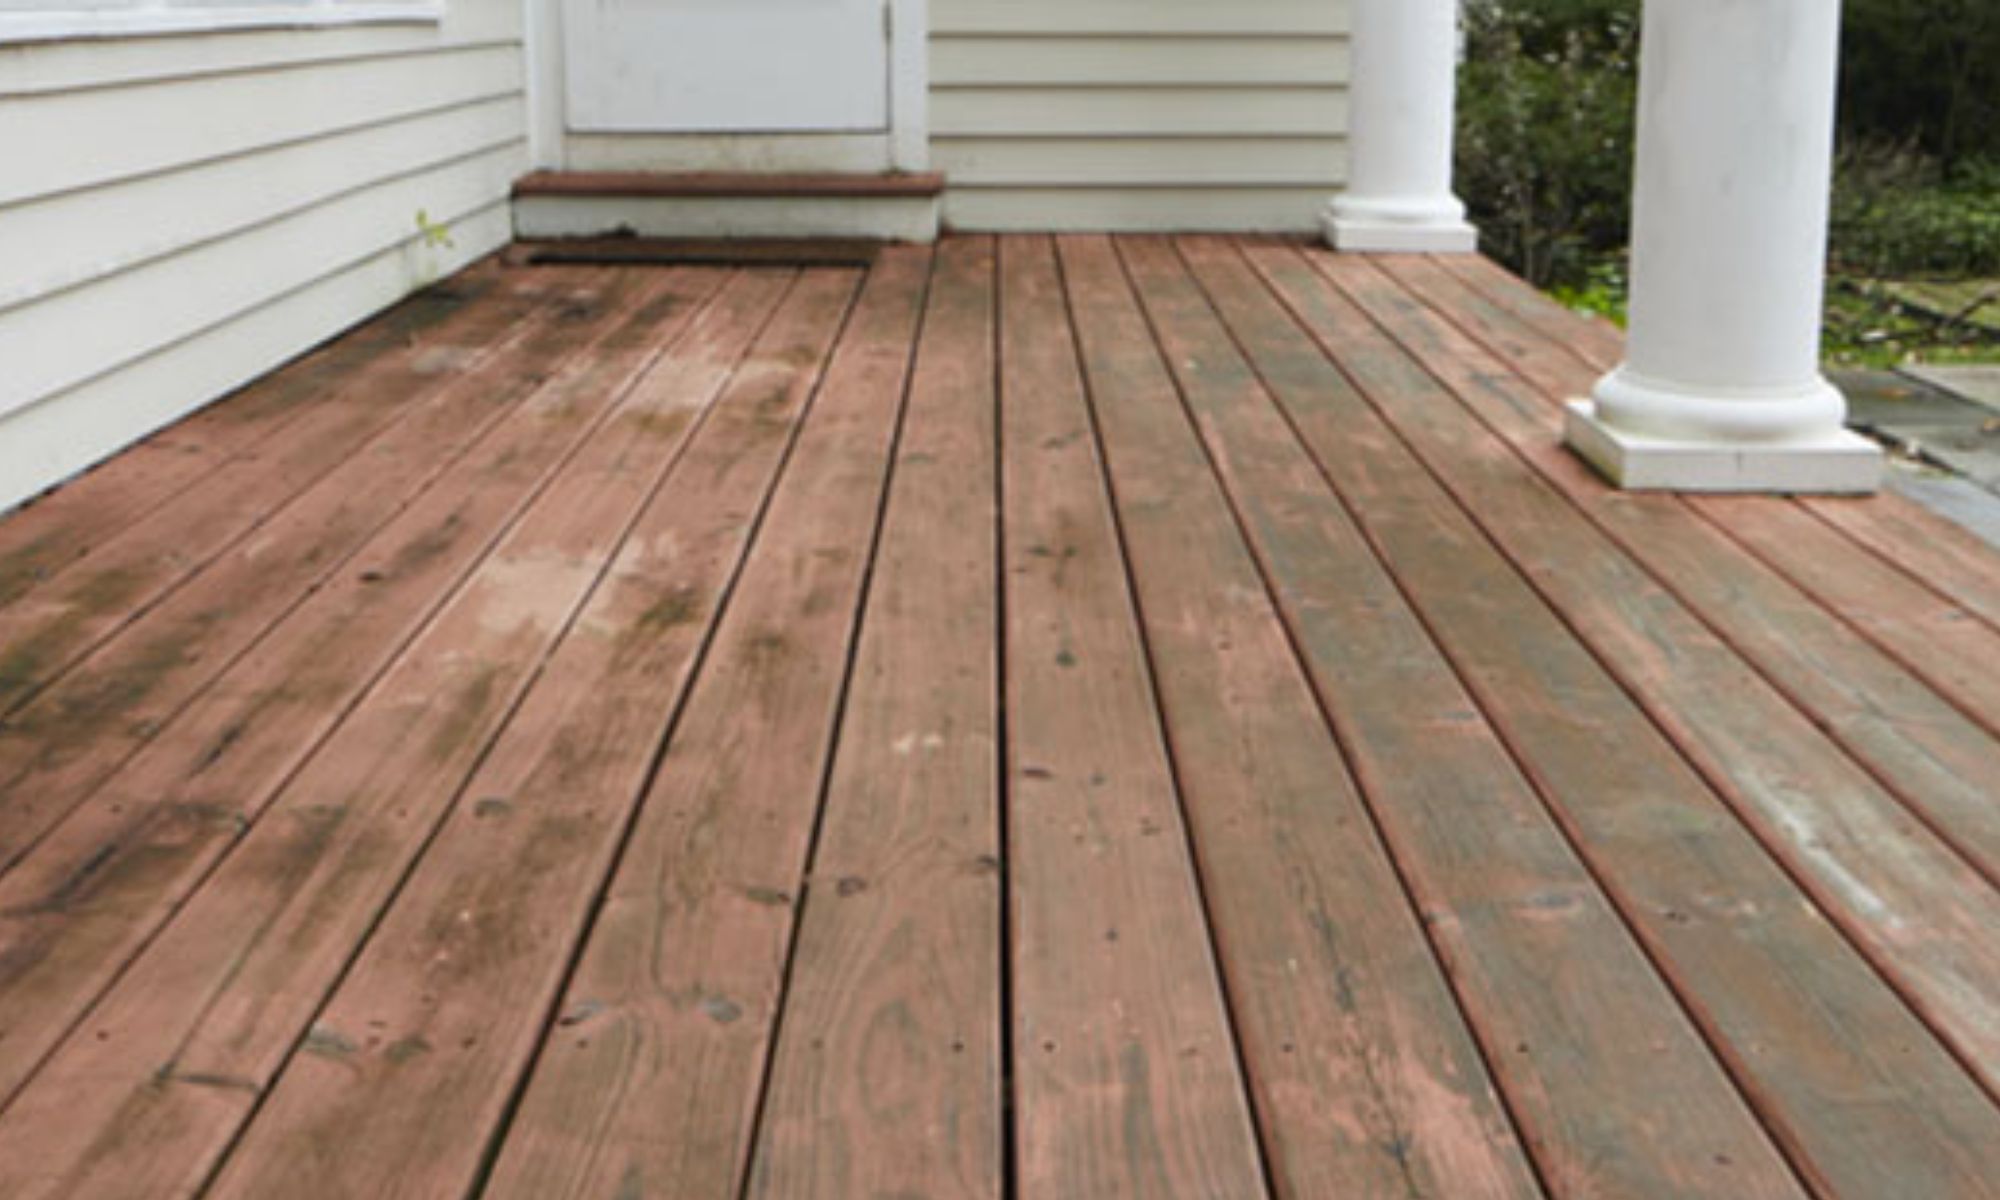
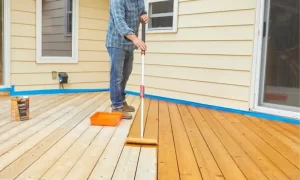
What is the Best Time of Year to Stain the Deck?

What-is-the-Best-Time-of-Year-to-Stain-the-Deck

Summertime is the perfect season for entertaining guests outdoors. If you’re looking to make a good impression, then it’s important to have a deck that’s in tip-top shape. One way to keep your deck looking its best is to stain it on a regular basis.

But what is the best time of year to do this? Many experts believe that fall is the ideal time to stain your deck. The temperatures are cooler, which makes the staining process more comfortable.

Plus, there’s typically less rain during this time of year, so you don’t have to worry about the stain being washed away before it can set. If you want to give your deck a fresh new look, be sure to do it in the fall.

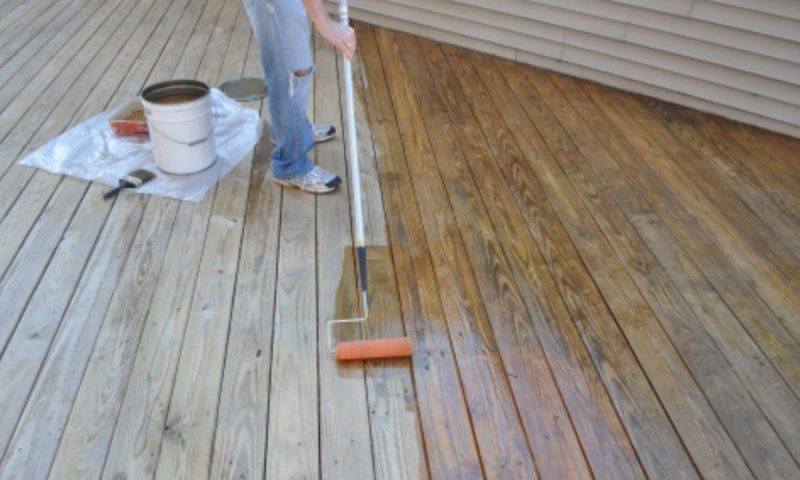
What is The Most Effective Technique for Drying Your Deck Right Now?

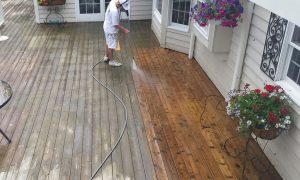
Have you ever walked out onto your deck barefoot and expected the warmth of the wood only to be met with the cold, damp sensation of wet decking? If so, you’re not alone. Many overlook the importance of properly drying their deck before enjoying it for the day.

However, did you know that failing to do so can lead to long-term damage? Wet decks are more susceptible to mold and rot, which can be expensive to repair. So, what’s the best way to dry your deck? The answer may surprise you.

One of the most effective techniques is also one of the simplest:

Allow the sun to do its work

The sun’s rays are powerful enough to quickly dry out wet wood without causing any damage. Because the sunlight will reach all sides of the decking, it will dry evenly and prevent any mold or rot from taking hold. Sunlight has to be direct for this to work, so be sure to clear any debris that may be blocking the sun’s rays.

Once you’ve allowed the sun to do its work, you can enjoy your deck without worry.

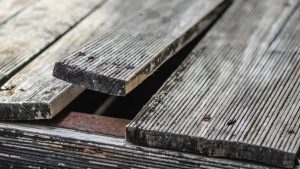
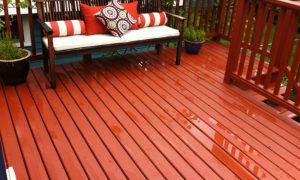
How Long Should You Wait Before Going Out on the Deck After It’s Rained?

Rain on your newly stained deck can cause all sorts of problems. Many people believe it’s okay to go out on the deck as soon as the rain stops, but this couldn’t be further from the truth.

When rainwater seeps into the wood, it can cause the boards to swell and warp. This expansion of the wood can put tremendous strain on the deck’s support and lead to dangerous instability. In addition, wet boards are more slippery than dry ones, increasing the risk of injuries.

For these reasons, wait at least 24 hours after a rainstorm before venturing out onto the deck.

By taking this simple precaution, you can help keep your deck safe and looking its best for years to come.

Frequently Asked Questions

What should I do if it rains before my deck stain has had a chance to dry?

If it rains before your deck stain has had a chance to dry, the best thing to do is to wait until the rain stops. Once the rain has stopped, give the deck a chance to dry off completely before applying the stain. Applying stains to a wet deck can cause all sorts of problems, including swelling and warping of the wood.

Can I use a hairdryer to speed up the drying process?

It’s not a good idea to use a hairdryer to speed up the drying process, as this can cause the stain to bubble and blister. If you need to speed up the drying time, it’s best to use a fan or other form of ventilation.

What should I do if my deck stain is still tacky after 24 hours?

If your deck stain is still tacky after 24 hours, there are a few things you can do to speed up the drying process. First, make sure you’re using a water-based stain, as these dry more quickly than oil-based stains.

Second, apply a thin layer of stain to the deck. Thick coats of stains will take longer to dry than thin ones. Finally, keep the area well-ventilated. Good airflow will help the stain to dry more quickly.

Can I apply a second coat of deck stain if the first one is still tacky?

No, you should not apply a second coat of deck stain if the first one is still tacky. Doing so will trap the tackiness beneath the second coat, making it even harder for the stain to dry.

If you’re not sure whether or not your deck stain is dry, it’s best to err on the side of caution and wait a few extra hours before applying a second coat.

Conclusion: How long does decking stain take to dry?

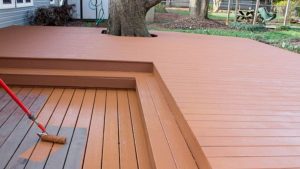
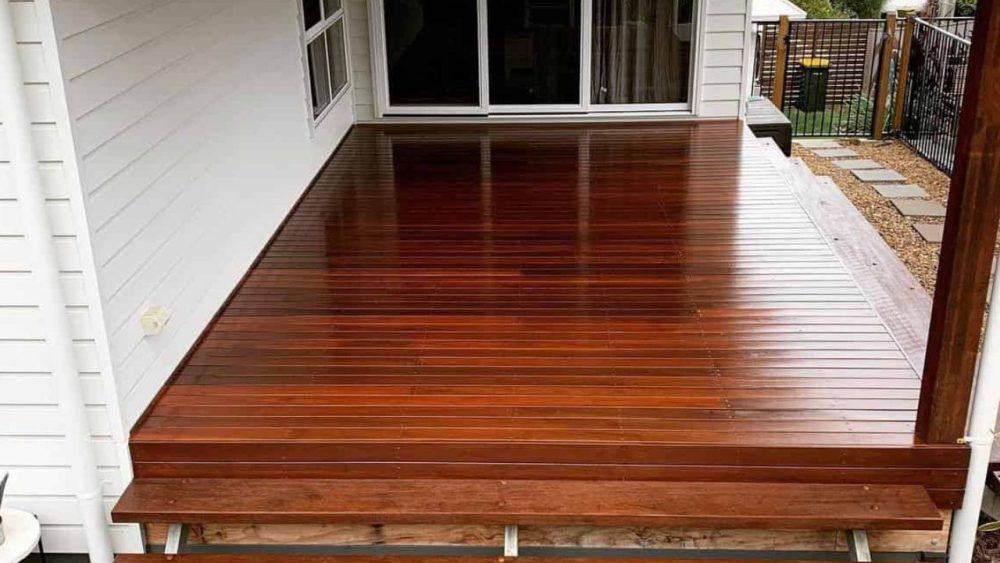
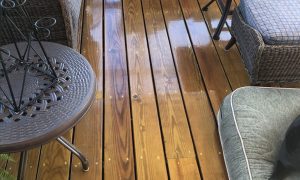
So how long does decking stain take to dry? Deck stain is an important part of preserving your deck and keeping it looking beautiful. Not only does it make your deck look nicer, but it also protects the wood from the elements. The most important thing to remember when staining your deck is to allow at least 4 hours to dry completely before using the deck again.

Depending on the weather and the type of stain you use, it can take anywhere from 4 hours to 3 days for the stain to cure fully. Make sure you check the weather forecast before beginning any project so that you know what kind of conditions to expect.

For more tips on how to properly care for your deck, be sure to visit our blog regularly.


How To Fix A Warped Composite Deck In Under An Hour?

How To Fix A Warped Composite Deck In Under An Hour

Are you sick of looking at your composite deck, warped and cracked from the heat? You’re not alone. Many composite deck owners have the same problem. When you are thinking about how to fix warped composite decking, you might be thinking that you will have to replace the whole thing.

Fear not; there is a way to fix it without having to replace the whole thing! With just a few simple tools and materials, you can have your deck look new in no time. In this article, we will show you how to fix a warped composite deck in under an hour.

So what are you waiting for? Get started today and enjoy your beautiful deck for years to come.

How To Fix A Warped Composite Deck In 7 Easy Ways?

Composite decking is susceptible to warping, but there are a few easy things you can do to fix the problem. Here are 7 easy ways to fix a warped composite deck. With these tips, you’ll be able to enjoy your deck for years to come – warp-free!

1. Inspect and identify the wrapped deck

Inspect-and-identify-the-wrapped-deck


A composite deck can be a beautiful addition to any home, but it’s important to inspect it regularly to make sure that it’s in good condition. Here are some tips on how to identify wrapped composite decking material: 

First, take a close look at the surface of the decking. If you see any cracks or splitting, this is a sign that the material is starting to degrade. Also, look for any areas where the boards seem to be warping or sagging. These are all indications that the decking needs to be replaced.

Another thing to look for is mold or mildew growth. This can be a sign of poor drainage or too much moisture in the decking material, so it’s important to address this issue as soon as possible.

Finally, make sure to check the fasteners and support to ensure that they’re all secure and do not show any signs of wear or tear.

2. Support decking material

Support-the-decking-material


Once you’ve identified the warped or damaged areas, it’s time to take action to fix the problem. The second step is to provide support for the decking material. This can be done by using a few 2x4s or other similar supports placed underneath the decking boards.

If the warping is severe, you may need to use additional support placed closer together to provide more stability. Once the support is in place, check with them regularly to make sure they’re still secure and do not show any signs of wear or tear.

3. Remove the damaged decking boards

Remove the damaged decking board


Once the support is in place, it’s time to remove the damaged decking boards. Be sure to wear gloves and use a pry bar or other similar tool to carefully remove the boards. If they’re severely warped, you may need to cut them into smaller pieces before removing them. You should also remove any nails or screws left behind in the decking boards.

4. Cut replacement decking boards

Cut replacement decking boards


Once the damaged boards have been removed, cut new ones to replace them. Be sure to measure the boards carefully before cutting so that they fit perfectly into the space. It’s also a good idea to leave a little bit of extra material so that you can trim it down as needed.

5. Attaching the new decking boards

Attach-the-new-decking-boards


After the new boards have been cut, it’s time to attach them to the deck. Be sure to use screws or nails that are long enough to penetrate through the supports and into the new boards.

Start by attaching the new boards at the end of the deck and working your way toward the center. If you’re using screws, be sure to countersink them so they’re flush with the surface of the boards.

6. Trim any excess material

Trim-any-excess-material


Once the new boards are in place, use a saw to trim any excess material. Be sure to make the cuts as straight as possible so that the finished product looks clean and professional. Otherwise, your deck will look like it was patched together.

7. Apply a finish to the deck

Apply-a-finish-to-the-deck (1)


Once the new boards are in place and trimmed, it’s time to apply a finish to the deck. This can be done with a sealer, stain, or paint. When you’re finished, your deck will look good as new!

With these seven easy steps, you’ll have your warped composite deck fixed quickly.

What are the 5 Most Prevalent Reasons for Wrapping a Composite Deck?

While composite decks are designed to be durable and long-lasting, they can still be susceptible to warping if they aren’t properly cared for. There are a number of different factors that can contribute to a warped composite deck, and understanding these causes can help you take steps to prevent warp damage in the future.

Here are the top five causes of warped composite decks: 

Poor installation practices

Poor installation practices can contribute to warping. If the boards are not evenly spaced or properly secured, they are more likely to buckle under the weight of furniture or foot traffic. By taking the time to install composite decks correctly, you can prevent them from warping and ensure that they will last for years to come. Make sure you hire a reputable contractor who has experience installing composite decks. 

Incorrect joist spacing

If you’re planning on building a composite deck, you might want to think twice about using incorrect joist spacing. While it might not seem like a big deal, incorrect joist spacing is one of the main reasons why composite decks warp.

By spacing the joists too far apart, you’re essentially giving the deck more opportunities to bend and bow. And once the deck starts warping, it’s only a matter of time before it becomes unusable.

If you want to avoid any headaches down the road, make sure you use the correct joist spacing for your composite deck. Your future self will thank you for it.

Exposure to sunlight

Many people enjoy spending time outdoors on their composite decks, but they may not realize that exposure to sunlight can cause the decks to warp. The heat from the sun’s UV rays causes the materials in the composite decking to expand, which leads to warping and, ultimately, damage to the deck.

To avoid this, it is important to choose a composite decking material that is specifically designed to resist warping from sunlight exposure. Additionally, you can take measures to protect your deck from direct sunlight by adding awnings or shade structures.

By taking these steps, you can ensure that your composite deck will remain in good condition for many years.

Extreme humidity changes

When the temperature and humidity levels fluctuate too much, the composite material can start to warp and buckle. This can cause your deck boards to become uneven and create gaps where water and debris can be collected. Not only is this unsightly, but it can also be dangerous if someone were to trip on a warped board. If you have a composite deck, be sure to monitor temperature and humidity levels to help prevent warping.

Poor drainage

Have you ever noticed how some decks warp and sag over time? Poor drainage is often the culprit. When water collects on the deck’s surface, it can cause the composite material to swell and warp. This cannot only be unsightly, but it can also create a trip hazard.

In addition, water-logged decking is more likely to rot and attract pests. If you’re considering a composite deck for your home, be sure to factor in proper drainage. Otherwise, you may end up with a warped, sagging mess that’s dangerous and unattractive.

Frequently Asked Questions

Can I sand my composite deck?

Yes, you can sand your composite deck. However, it’s important to use coarse-grit sandpaper and take care not to damage the surface of the decking. If you’re not careful, sanding can create divots or gouges in the material.

Can I put furniture on my composite deck?


Yes, you can put furniture on your composite deck. However, it’s important to use furniture pads or coasters to protect the surface of the decking. Furniture that is left directly on the decking can cause scratching or damage.

Can I put rugs on my composite deck?

Yes, you can put rugs on your composite deck. But use rugs that are specifically designed for outdoor use. These rugs will be made of materials that can withstand the elements and won’t cause damage to the decking.

Can I clean my composite deck with bleach?

You should never clean your composite deck with bleach. Bleach is a harsh chemical that can damage the surface of the decking, making it more susceptible to warping. If you need to clean your composite deck, use a garden hose and some mild soap.

Conclusion

Composite decks are a popular option for homeowners because they offer the beauty of wood with less maintenance. However, sometimes these decks can warp, which can be unsightly and dangerous. In this post, we’ve outlined seven easy ways to fix a warped composite deck in under an hour.

So if your deck is looking a little worse for wear, don’t despair – just follow our simple steps and you’ll have it looking good as new in no time! We hope you find this information helpful and that you visit our blog regularly for more useful tips like this.

How Many Coats Of Semi Transparent Stain On Deck?

Semi Transparent Stain on the Deck How Many Coats Apply

The deck is the most important part of the house, and it needs to be taken care of very well. Because it is constantly exposed to the elements. These elements include the sun, rain, snow, and ice. These can all harm the deck if it is not properly cared for.

Deck staining is an important part of maintaining your deck and keeping it looking its best. A semi-transparent stain is a great option for those who want to protect their deck while still allowing the wood grain to show through. But how many coats of semi-transparent stain should you apply to your deck?

If you’re wondering how many layers of semi-transparent stain should be applied to your deck and where they’ll go, this article is for you. We guide you with the number of coats so that your deck looks fabulous.

Let’s get started!

What is a Semi Transparent Stain and How Does it Work on Deck?

What is a Semi Transparent Stain and How Does it Work on Deck?

The word semi means that it is not completely solid like paint, but it is also not completely transparent like a sealer. This allows for a bit of both worlds when it comes to protection and beauty.

Semi Transparent stain is a type of stain that is usually made up of a dye, pigment, and binder.

  • The binder is what helps the stain to adhere to the surface of the wood.
  • The pigment is what gives color to the stain. Pigment stains are made up of finely ground particles of color suspended in a binder. These stains provide good coverage and UV protection.
  • Dye stains are typically made up of a single colorant dissolved in a solvent. This makes them very concentrated and can penetrate deep into the wood grain.

If you apply a semi-transparent stain to your deck for the first time, then you should know the number of coats to apply, as this will ensure that your deck is properly protected.

How Many Coats of Semi Transparent Stain were Applied to the Deck?

How-Many-Coats-of-Semi-Transparent-Stain-were-Applied-to-the-Deck

The number of coats of semi-transparent stain that you should apply to your deck depends on a few factors, which are listed below:

Type of wood that your deck is made of:

If your deck is made of softwood like cedar or pine, you must apply more than one coat of stain to provide adequate protection. These woods are more prone to damage from the elements and need to be protected more.

Softwood actually refers to the fact that the wood has a lower density than hardwoods. This means that it is more porous and will absorb stains more readily. so you will need to apply more coats of semi-transparent stain to provide adequate protection.

If your deck is made of hardwood like mahogany or ipe, you can get away with applying one coat of semi-transparent stain. These woods are denser and will not absorb the stain as readily. This means that you won’t need to apply as many coats to get adequate protection.

The amount of sunlight that your deck gets:

The-amount-of-sunlight-that-your-deck-gets

Sunlight can be a tough enemy for any deck. It can cause the deck’s wood to fade and crack over time. The cracks on the deck are usually filled with dirt and mildew, which can be difficult to clean.

If your deck gets a lot of sunlight, you must apply more coats of semi-transparent stain. Because the more sunlight that hits the deck, the more protection it will need. These more coats of stain help the deck to prevent the sun from damaging the wood.

When your deck is in a shadier location, you’ll need to apply just a few coats of semi-transparent stain.. because in shady areas, wood is not getting direct sunlight, and it’s not as likely to fade or crack.

The climate that you live in:

The-climate-that-you-live-in

If you live in an area with a lot of rainfall, you must apply even more coats to your deck. This is because the rain can wash away the stain and leave your deck unprotected. So you must ensure your deck is prepared for heavy rainfall. Otherwise, your deck will be unprotected, and it can get damaged easily.

If you live in an area with very little rainfall, you can get away with applying single coats of semi-transparent stain. Because the rain is not as likely to wash away the stain, and your deck will not be exposed to the elements as much.

The amount of traffic that your deck sees:

Traffic on your deck can wear down the finish of the stain and leave the wood unprotected. In this case, your deck needs more protection, and you should apply additional coats of semi-transparent stain.

When your deck sees very little traffic, you can get away with applying one coat of semi-transparent stain. Because the finish will not be worn down as quickly, and your deck will not need additional coatings.

If you have a lot of traffic on your deck, you must apply more than one coat of semi-transparent stain. Usually, two coats are sufficient for high-traffic areas. This will help to protect your deck from the wear and tear of foot traffic.

The type of semi-transparent stain that you use:

When you are choosing a semi-transparent stain, you need to consider the type of protection that it will provide. Some stains are better at providing UV protection than others.

If you want a stain that will provide good UV protection, you should choose a semi-transparent stain with a high percentage of pigment. This stain will provide a barrier against the sun’s rays and help prevent your deck from fading. So this stain applies to two coats or more.

If you are not concerned about UV protection, you can choose a semi-transparent stain with a lower percentage of pigment. This stain will not provide as much protection against the sun, so this stain applies to one coat.

What are some Tips for Staining a Deck?

There are some things that you should keep in mind when you are staining your deck. These tips will help you to get the best results possible.

1. Make sure that your deck is clean before you start:

When you stain your deck, you need to ensure it is clean. This means that you need to remove all of the dirt, debris, and leaves from the deck’s surface. You can do this by power washing the deck or using a stiff brush to scrub the surface.

2. Apply the first coat of stain with a brush or roller:

Once you clean the surface of your deck, you are ready to apply the stain. You can do this with a brush or roller. Both of these methods will work.

Apply the first coat of stain evenly across the surface of the deck. Make sure that you do not miss any spots. Otherwise, the stain will not be evenly applied, and it will not look as good.

3. Allow the first coat of stain to dry completely before applying the second coat:

After you apply the first coat of stain, you need to allow it to dry completely before you apply the second coat. Otherwise, the second coat will not adhere properly and cause the stain to peel.

Apply the second coat of stain in the opposite direction of the first coat:

When you apply the second coat of stain, you need to do it in the opposite direction of the first coat. The reason for this is the stain will not pool in any one area. And all areas of the deck will be evenly coated.

4. Allow the stain to dry completely before walking on the deck;

Once you have applied the stain, you need to allow it to dry completely before you walk on the deck. otherwise, you will leave footprints in the wet stain. The footprint will be difficult to remove, and they will mark the deck’s finish.

5. Enjoy your newly stained deck:

If you’ve just finished staining your deck, congratulations! You’ve taken an important step in preserving your outdoor space. Now it’s time to enjoy all that your newly stained deck has to offer. Here are a few ideas to get you started:

Host a barbecue:

What better way to show off your new deck than hosting a summer cookout? Invite your friends and family for some burgers and hot dogs fresh off the grill. Don’t forget the s’mores for dessert!

Have a picnic:

If cooking outdoors isn’t your thing, try having a picnic instead. Spread out a blanket and enjoy a leisurely meal in the sun. Be sure to take in the beautiful view from your new deck.

Relax and unwind:

After a long day, there’s nothing better than kicking back on your deck with a good book or a cold drink. Enjoy the peace and quiet of your own backyard oasis.

No matter how you choose to enjoy it, make sure you take some time to appreciate your newly stained deck!

Frequently Asked Questions:

Q.What is the best time of year to stain my deck?

A. The best time to stain your deck is in the spring or fall. The weather should be mild and there shouldn’t be any rain in the forecast. This will give the stain plenty of time to dry and won’t put unnecessary stress on the wood.

Q.Can I stain my deck myself?

A.Yes, you can stain your deck yourself. However, it is important to follow the directions on the stain carefully and to make sure that you apply it evenly. If you’re not sure how to do this, it’s always best to hire a professional.

Q.What happens if I don’t stain my deck?

A.If you don’t stain your deck, the deck will start to deteriorate. It will become dry and cracked, and it will eventually start to rot. This can cause serious damage to your deck and make it unsafe to use.

Q. Do I need to remove the old stain before I apply a new one?

A. In most cases, you will not need to remove the old stain before you apply a new one. However, if the old stain is peeling or flaking, it’s best to remove it before you apply the new one. This will help to ensure that the new stain adheres properly.

Conclusion:

Applying a semi-transparent stain to a deck can be tricky. When do you stop? How many coats should be applied? What type of finish is desired? These questions need to be answered before starting the staining process. In this post, we provide tips for staining a deck along with an answer to the question, “how many coats of semi transparent stain were applied to the deck?” We hope these tips help you achieve the perfect finish on your next project! Be sure to visit our blog regularly for more helpful advice and information.

What Color Deck Goes With A Red Brick House?

How to Choose a Deck Stain Color For Red Brick House in 10 Steps

Who says your home has to be boring? If you’re looking for a way to add some personality and curb appeal, why not start with your deck? A fresh coat of stain can really make your outdoor space pop.

But with so many colors to choose from, how do you decide? If you have a red brick house and you Trying to find the right deck stain color for your red brick house? Look no further! This article will give you all the information you need to choose the perfect shade for your home. 

For starters, it’s important to keep in mind that a red brick house will have a different appearance than a traditional wood frame house. The bricks will add an extra layer of warmth and depth to the overall look of your deck. 

So what are you waiting for? Give your deck the stained look it deserves!

10 Things to Consider When Choosing a Deck Stain Color For a Red Brick House:

Most people take pride in their homes and want them to look good both on the inside and the outside. One way to achieve this is by choosing the right deck stain color for your red brick house.

However, with so many different colors and shades to choose from, it can be a daunting task. But don’t worry, we’re here to help. Here are 10 things to consider when choosing a deck stain color for your red brick house:

1. The current color of your brick house

The climate in your area

When choosing a deck stain color for a red brick house, it’s important to focus on the current color of your brick. If you like the look of your brick, you might want to choose a deck stain color that will complement it.

if your brick is dark red, you might want to choose a dark brown or black stain. If your brick is light red, you might want to choose a lighter stain, like tan or beige.

2. Consider the overall look you’re going for red brick house

2. Consider the overall look you're going for red brick house

Most people choose a deck stain color based on the colors they like, but there’s more to it than that if you want your deck to look its best. You also need to consider the overall look you’re going for with your house.

A red brick house, for example, would look great with a dark stain that brings out the red in the bricks. If you want your deck to stand out, you could go for a lighter stain that will contrast with the bricks.

No matter what look you’re going for, there are deck stain colors that can help you achieve it. So when you’re choosing a deck stain, don’t just think about the colors you like. Think about the overall look of your house and choose a color that will complement it.

3. The amount of sunlight your deck gets

The amount of sunlight your deck gets

When there are so many stain colors to choose from, how do you know which one is right for your home? One important factor to consider is the amount of sunlight your deck gets.

If your deck gets a lot of direct sunlight, you’ll want to choose a lighter stain color to prevent the space from looking too hot and sunny. A dark stain color can also be a good choice for a sunny deck, as it will help to absorb some of the heat.

If your deck is in a shady spot, you’ll have more leeway when it comes to choosing a dark stain color. A dark stain color can help to make a shaded deck feel cozy and inviting, while a light stain color can help to brighten up the space.

It doesn’t matter what your personal style, there’s a deck stain color that’s perfect for your red brick house.

4. The climate in your area

The climate in your area

Choosing the right deck stain color for a red brick house can be tricky, but it’s so important in order to create curb appeal that makes your house stand out for all the right reasons.

The climate in your area will play a large role in what deck stain colors will work best for you. If you live in a cold climate, you’ll want to choose a deck stain that won’t chip or peel when exposed to freezing temperatures. Similarly, if you live in a hot and humid climate, you’ll want to choose a deck stain that can withstand those conditions.

Keep these things in mind when choosing a deck stain color for your red brick house and you’re sure to make a great choice that will last for years to come.

5. The type of wood your deck is made of

From a first glance, it may appear difficult to choose a deck stain color for a red brick house. However, by taking into account the type of wood your deck is made of, you can narrow down your options and find the perfect color to complement your home.

If your deck is made of cedar, you may want to choose a stain with a reddish tint to accentuate the natural hue of the wood. Alternatively, if your deck is made of pressure-treated lumber, you may want to opt for a clear or neutral stain to show off the grain of the wood.

There is a stain color for every type of wood, no matter what your deck is made of. By choosing the right color, you can bring out its best features and create a beautiful outdoor space..

6. The finish you want for your deck

When choosing a deck stain color for a red brick house, you’ll need to decide which type of finish you want for your deck. If you want a long-lasting finish that will cover up most of the wood grain, a solid stain is a good choice. If you want a finish that will highlight the wood grain and add some character to your deck, a semi-transparent stain is a good choice.

There is a stain color, no matter what type of finish you want for your deck, that will help you achieve the look you’re going for.

7. Consider the age of your deck

Consider the age of your deck

We spend a lot of time agonizing over the perfect deck stain color for our red brick house. We want something that will complement the bricks and make the deck look great. But what we don’t realize is that the age of our deck plays a big role in choosing the right color.

If you have an older deck, you’ll want to choose a stain color that will help to mask any wear and tear. A dark stain color can help to hide scratches and stains, while a light stain color can help to make your deck look new again.

A new deck can handle a dark stain color much better than an older deck. So if you have a new deck, don’t be afraid to experiment with dark stain color. It’s a great way to set your deck apart from the others.

8. The style of your house

The style of your house should also be taken into consideration when choosing a deck stain color. If you have a more traditional home, you might want to go for a classic light brown or tan shade. On the other hand, if you have a more modern home, you might want to experiment with bolder colors like red or black.

Therefore, regardless of the style of home you have, there is a deck stain color that will suit it perfectly.

9. Your personal style preferences

There are many factors to consider when choosing a deck stain color. However, personal preference should be at the top of the list. With so many options available, it can be tough to choose.

But by focusing on what you like, you can narrow down your choices and find the perfect color for your home. So don’t be afraid to experiment until you find the perfect match for your red brick house!

10. Your budget

Your home is your castle – and your deck is your moat. So when it comes to choosing a deck stain color, you want to make sure it’s one that will make heads turn (for all the right reasons). But with so many colors to choose from, how do you decide? The first step is to consider your budget.

If you’re working with a limited budget, you’ll want to choose a more economical option like a solid stain. But if money is no object, then you can go for a more luxurious option like a semi-transparent stain.

Whatever route you choose, make sure you take the time to test out different colors before making your final decision. After all, this is the castle we’re talking about!

Conclusion:

So, whether you’re looking for a cool or warm deck stain color to enhance your red brick house, keep the following ten things in mind. By taking into account all of these factors, you’re sure to make a decision that will leave both you and your home exterior looking fabulous. Have you chosen a deck stain color yet? If not, be sure to check out our latest post on how to choose the perfect hue for your home.

What Color Deck Goes With A Red Brick House? (18 Ideas to Inspire)

What Goes With a Red Brick House? Wood Decks in Different Colors!

A red brick house is a classic and timeless choice for many homeowners. The rich, warm hue of the bricks adds character and charm to any neighborhood.

On the other hand, the deck can be a major design element of a house. The deck adds visual interest and creates an inviting outdoor space for you to enjoy. But what deck color deck goes with a red brick house?

The deck color you choose can make a significant impact on the overall aesthetic of your home. To help you, we’ve compiled a list of 18 ideas for deck colors that will complement your red brick house.

So, read on to find the perfect color for your deck.

18 Wood Deck Colors That Will Make Your Red Brick House Pop

The right shade of deck stain can make your red brick house pop! Here are 18 wood deck colors to help you achieve your desired look.

1. Natural cedar deck with a red brick house

Natural cedar is a classic choice that complements the warm tones of red brick.

The natural color of cedar blends beautifully with the red brick, creating a cohesive and timeless look. This combination also adds warmth and texture to your outdoor space.

Natural cedar deck with a red brick house

In addition, cedar is a natural and durable wood that can withstand harsh weather conditions. It also requires minimal maintenance, making it a practical and stylish choice for your deck.

2. Honey maple deck with a red brick house

Honey maple is a lighter wood that contrasts with the rich color of red brick. The golden tones of honey maple create an elegant and upscale look, perfect for a statement deck.

This color also pairs well with neutral exterior colors, creating a cohesive and inviting outdoor space.

A Honey Maple wood deck is the perfect addition to any red brick house

You can also opt for a honey maple stain on composite decking for a more modern and trendy look. This will give you the same warm tones but with added durability and easy maintenance.

3. Driftwood grey deck with a red brick house

Consider driftwood gray of Lowes deck paint if you prefer a more subtle and muted look.

This color adds a cool and contemporary touch to the warm hues of red brick. It also complements exterior elements, such as gray siding or white trim.

Driftwood gray is the perfect color for a red brick house

Driftwood gray is versatile and can be paired with various furniture styles and colors. You can add pops of color with outdoor pillows and plants to create a personalized and inviting space. This color also looks great in both traditional and modern deck designs.

4. Ocean blue deck with a red brick house

For a bold and striking look, opt for an ocean-blue deck.

This vibrant color contrasts beautifully with the warm tones of red brick, creating a focal point in your outdoor space. It also adds a fun and playful touch to your home’s exterior.

Ocean blue is the perfect color to complement a wood deck on a red brick house.

Ocean blue is also popular for pool decks, as it complements the water and adds a tropical feel to your backyard. This bright and cheerful color will make your red brick house stand out in the best way possible.

5. Black cherry deck with a red brick house

Consider the black cherry of Home Depot deck paint if you want a darker and more dramatic option.

This deep red color adds richness and depth to your outdoor space, creating a sophisticated and luxurious feel. It also pairs well with dark colors, such as navy or charcoal.

A black cherry color would look great on a red brick house.

Black cherry is also popular for modern and contemporary homes, adding an edgy and sleek touch to the exterior. It’s a bold color choice will make your red brick house stand out.

6. Red brick house with a mahogany deck

In the USA, mahogany is a popular deck choice due to its rich color and durability.

This reddish-brown wood complements the warm tones of red brick, creating a cohesive yet distinctive look. The natural beauty of mahogany will also add elegance and charm to your outdoor space.

A red brick home makes an excellent setting for a lovely mahogany

Additionally, mahogany is resistant to rot and insect damage, making it a practical choice for a deck.

It also requires minimal maintenance, making it perfect for homeowners who want a beautiful yet low-maintenance deck.

7. Walnut deck with white railings

Walnut is a medium-to-dark wood that adds warmth and depth to your outdoor space.

This rich color complements the deep reds of brick, creating a classic and timeless look. It also pairs well with white railings, adding a touch of contrast and sophistication.

Red bricks and walnut color go together like *chocolate and peanut butter*

When choosing walnut non slip deck paint, choose lighter furniture and accessories to balance the dark wood. This will create a balanced and inviting outdoor space.

No matter the style of your home, a walnut deck with white railings will add charm and character to your exterior.

8. Espresso deck and red brick house

For a modern and sleek look, consider an espresso-colored deck.

This dark and rich color adds drama and sophistication to your outdoor space. It also contrasts beautifully with the warm tones of red brick, creating an eye-catching focal point.

Pair your espresso deck with modern, minimalist furniture for a chic, stylish look. You can also add pops of color with throw pillows or outdoor rugs to create a more welcoming and inviting space.

Plus, it’s easy to maintain and will always look great. So, if you’re looking for the perfect color for your red brick house, look no further than deep, rich espresso. It’s sure to give your home the curb appeal it deserves.

9. Slate grey deck with white trim

Slate gray is a classic, versatile color that pairs well with red brick.

This boat deck paint adds depth and dimension to your outdoor space without overpowering the warm tones of the brick. It also complements various exterior color schemes, making it a safe yet stylish choice for your deck.

Pair your slate gray deck with white trim and accents for a cohesive look. This will create a classic, elegant aesthetic that will never go out of style. No matter the size or style of your deck, slate gray will add a touch of sophistication and charm.

10. Moss green deck with red brick

Consider a moss-green deck for your red brick house for a unique and unexpected look.

This earthy, natural color adds a touch of whimsy to your outdoor space. It also complements the warm tones of red brick, creating a cohesive and inviting look.

Pair your moss-green deck with natural wood accents, such as furniture or planters, for a cohesive and organic feel. You can also add pops of color with outdoor cushions to create a personalized and welcoming space.

11. Sunflower yellow deck and red brick house

For a fun and vibrant outdoor space, consider a sunflower-yellow deck.

This bold color adds a cheerful touch to your exterior and complements the warm hues of red brick. The contrast of the bright yellow against the brick creates a stunning visual effect.

Pair your sunflower-yellow deck with white furniture and accents for a modern look. You can also add colorful throw pillows or outdoor rugs to create a playful and inviting space.

For a unique twist, consider painting your deck’s railings in a coordinating color, such as navy blue or forest green. This will add additional interest and personality to your outdoor space.

12. Lavender deck for a cozy and inviting space

If you want a cozy and inviting outdoor space, consider lavender boat deck paint. This soft, soothing color adds whimsy to your red brick house. It also creates a tranquil and calming atmosphere in your outdoor space.

Pair your lavender deck with lighter purple and pink accents for a cohesive look. You can also add greenery and natural wood elements to create a relaxing and inviting oasis in your backyard. This color choice is perfect for creating a peaceful and serene outdoor space.

13. Bronze deck for a touch of luxury

The bronze color is known for its luxurious and sophisticated look. Historically, bronze has been used for decorative purposes and is now popular for outdoor decks.

This warm, metallic hue adds elegance and glamour to your red brick house.

The decks with bronze hues have a unique and striking appearance. The metallic sheen adds visual interest to your outdoor space, making it an eye-catching focal point.

The furniture and accessories for a bronze deck should be simple and understated to let the color shine.

14. Paprika deck for a bold and vibrant look

Paprika is not a traditional deck color but can add a bold and unexpected touch to your red brick house. This vibrant red-orange color is often used for accents, but it can also make a statement as the main color of your deck.

For a harmonious look, you can see the paprika deck with beigey-tan or white furniture. The combination creates an energetic, cheerful outdoor space that stands out from the neutral-colored decks.

Companies like Benjamin Moore, Sherwin-Williams and Behr have an array of paprika shades so that you can choose the perfect one for your outdoor space.

15. Turquoise deck for a tropical vibe

The lively turquoise color reminds me of vacations, beaches and tropical places. A turquoise deck can complement a coastal-style home with a red brick exterior.

It creates a fun and relaxing atmosphere, perfect for outdoor gatherings and summer evenings. This color also works well with natural wood tones and white accents, adding depth to the overall look.

You can also incorporate tropical-themed accessories to complete the vibe. The furniture and accessories should be simple, letting the deck’s vibrant color shine.

16. Copper deck and red bricks

Copper is another metallic color that adds warmth and character to your outdoor space. It has a rustic charm that complements the natural elements of red brick.

This color creates a cozy and inviting atmosphere in your backyard, perfect for entertaining guests or enjoying quiet evenings.

To complete the look, add natural wood furniture and accents. You can also incorporate copper elements, such as outdoor lighting or planters, to tie everything together. This combination of warm tones will create a harmonious and inviting outdoor space.

17. Silver deck for a modern and sleek look

Consider a silver deck for your red brick house if you prefer a more modern and edgy style. This cool-toned metallic color adds a contemporary touch to your outdoor space. It also creates a visual contrast against the warm tones of the brick, making your deck stand out.

When it comes to furniture and accessories, opt for clean lines and minimalistic designs. This will enhance the sleek look of the silver deck and create a cohesive and modern vibe. Add pops of color with outdoor pillows or rugs for a touch of personality.

18. Red brick house and a Gold deck

Last but not least, we have the classic and timeless gold deck. This opulent color adds a touch of luxury to your red brick house. The gold tones complement the warm hues of red brick, creating a cohesive and elegant look.

Add plush cushions, outdoor curtains, and other lavish elements to complete the luxurious feel. This will elevate your outdoor space and create a high-end aesthetic. Consider incorporating natural elements like wood accents or greenery to balance out the opulence of the gold deck.

What color should I paint my deck if my house is red brick?

The color of your deck depends on your personal preference and desired aesthetic. Some popular options for red brick houses include moss green, sunflower yellow, lavender, bronze, paprika, turquoise, copper, silver, and gold.

Is red brick warm or cool?

Red brick tends to have warm undertones due to its earthy hue. This makes it a versatile color that pairs well with warm and cool tones.

What colors go well with red brick house?

Colors that complement red brick include shades of green, yellow, purple, orange, and metallics like bronze and gold. Neutral tones like white, beige, and grey can also pair well with red brick.

Should deck match house color?

While matching your deck to your house color can create a cohesive look, it is not necessary. You can also opt for contrasting colors or complementary hues to create visual interest in your outdoor space. Ultimately, the color of your deck should reflect your personal style and enhance the overall aesthetic of your home.

What color should the front door be on a red brick house?

You can opt for bold colors like navy blue, bright red, or teal to make your front door stand out against the red brick. Alternatively, you can choose a neutral color like black or white to create a classic and timeless look. Ultimately, the front door color should complement your home’s exterior and reflect your style.

Conclusion

Historically, red brick houses have been a popular choice for homeowners due to their durable and timeless appearance. With its rich, earthy tones, pairing the right color deck with a red brick house can elevate its curb appeal even further.

So, what color deck goes with a red brick house? We have explored 18 ideas, from classic to bold, to help you make the best decision for your home. From rich browns to warm greys, many colors can complement the red brick facade of your home.

Your home’s overall style and architecture can also influence your choice of deck color. Whether you want a tropical twist or a modern touch, there is a deck color that will suit your red brick house perfectly. So get creative and make your outdoor space an extension of your unique personality and style.

13 Deck Staining Ideas with Colors to Wow Your Guests

Deck Staining Ideas with Colors Which Color is Right for You

Imagine your deck as a blank canvas, just waiting for a splash of color to transform it into a masterpiece that wows your guests. The right hues can infuse life into every corner, like an artist adding strokes of brilliance to a painting.

Every shade tells a unique story. So, get ready to don your creative hat and explore 13 stunning deck staining ideas with colors that’ll bring all eyes to the floor and leave your friends speechless.

So why not try something new this year and give your deck the makeover it deserves? No matter your style, there’s a deck-staining idea out there for you. So get creative and make your outdoor space look amazing this season.

13 Deck Staining Ideas with Colors that Add  Texture, Style, and Vibrancy to Your Outdoor Space


Looking to add a little personality to your deck? Staining is a great way to do that. There are tons of different colors and techniques you can use to achieve the look you want.

Here are just 13 deck staining ideas with colors to get you started now.

1. A light, natural stain

A light, natural stain wood deck

Looking for a way to add some personality to your outdoor space? A lighter natural stain is an excellent deck staining color idea. This stain will allow you to show off your creative side while still protecting your deck from the elements. It brings out the natural beauty of the wood grain and gives your deck a warm, inviting look.

Plus, it’s a great way to add curb appeal to your home. It’s easy to maintain and won’t show dirt or grime as easily as a darker stain. If you want your deck to look natural, go for a lighter stain. You and your friends will be glad you did.

2. A dark, dramatic stain

A dark, dramatic stain

If you’re looking for a more dramatic look, why not try a dark stain? The dark, dramatic stain color is perfect for your deck if you want to add a touch of luxury and sophistication. This vibrant color will make your outdoor area feel more welcoming while concealing any blemishes.

When you have a small deck, a dark stain can also help to make it appear larger and more spacious. If you entertain often, a darker stain will help mask any spills. Dark stains can give your deck a rich, comfortable feel that is perfect for entertaining. And because they absorb more heat than lighter stains, they can also help to keep your deck cooler in the summer months.

Whether you want to enhance your deck’s appearance or create a more functional and practical space, a dark stain is always a good option.

3. A bright and bold stain

A bright and bold stain

The bright and bold stain color is a preferable choice for your deck. The bright stain color can liven up your backyard and make it an inviting space for entertaining, relaxing, and spending time with family and friends.

Bold stain color will also help to hide any dirt or grime that may accumulate on your deck over time. When choosing a stain color for your deck, be sure to consider the overall style of your home and yard.

This combination will provide a dramatic contrast to a more subdued exterior, or it can complement an already vibrant palette. With so many options to choose from, it’s easy to find the perfect shade to give your deck a look you’ve always wanted.

4. A two-tone stain

A two-tone stain

For a unique twist, try staining your deck in two different colors. You can use two different colors to create a contrast or choose shades that complement each other. This is a great way to add some interest to your space.

Two-tone staining can also be used to highlight certain features of your deck. For example, you could use a darker stain on the handrails and a lighter stain on the floorboards. Or you could use one color for the main area of the deck and another for the border. This combo will give your deck a stylish and modern look.

There are endless possibilities when it comes to two-tone staining. So get creative and see what you can come up with.

5. A whitewash

A whitewash deck

A whitewash is a type of stain that is white in color. A whitewash stain color is a preferable choice for your deck because it makes it look cleaner and brighter. It is also a good way to cover up any dirt or grime that may have built up over time.

If you have ever seen a deck that has been left to nature, you know that it can get pretty grimy. But with a whitewash stain, you can easily brighten it up and make it look new again. It will help to keep the wood from fading and prevent it from splintering.

If you are looking for an easy way to add some pizzazz to your outdoor space, consider trying whitewashes. You won’t be disappointed

6. Gray wash:

A gray wash deck

A gray wash stain color is a preferable choice for your deck because it is versatile and easy to maintain. You can use a gray wash stain to create a classic look or a modern aesthetic, depending on your preferences.

Plus, a gray wash stain is low-maintenance and easy to touch up, so you can keep your deck looking its best for years to come. If you’re looking for a stain color that will give you maximum flexibility and style, choosing a gray wash is the way to go.

7. Black stain:

A black stain Deck

The black stain is an outstanding choice for your deck. Whether you’re looking to add curb appeal to your home or simply want a stunning backdrop for your outdoor entertaining space, a black-stained deck will turn heads.

Not only does a black stain provide a sleek and modern look, but it’s also incredibly versatile. Whether you pair it with bright white furniture or opt for a more muted color palette, a black-stained deck will make a statement.

If you want your deck to attract attention, black is the way to go!

8. A clear coat

A clear coat wood deck

You may wonder why you should choose a clear coat for your deck. After all, there are so many options on the market. However, a clear coat has many advantages that make it the best choice for your deck.

First of all, a clear coat stain will protect your deck from rain and sun damage. It will also help to prevent fading and wear and tear. In addition, a clear coat is easy to apply and can be done in just a few hours.

So if you are looking for a durable, long-lasting option for your deck, a clear coat is an outstanding choice.

9. A solid color stain:

A solid color stain wood deck

A solid color stain is a good choice for your deck. This will make your deck look more polished and professional. A solid color will also make your deck easier to clean. You will not have to worry about dirt and debris building up in crevices or between planks.

It’s incredibly versatile – you can use it as a basis for any number of design schemes. If you have a small deck, a solid color can make it look larger. If you have a large deck, a solid color can make it look more cohesive.

Choose a color that complements the existing colors of your home and outdoor furniture. With a little bit of planning, you can create a beautiful and functional outdoor space that you and your family will enjoy for years to come.

 10. A rustic finish:

You’re ready to take the plunge and build the deck of your dreams. You’ve already picked the perfect spot in your backyard, and you can just imagine yourself entertaining guests or relaxing in the sun.

But before you start construction, you must decide on a finish for your deck. A rustic finish is a good option for a classic look that will complement your backyard. It also has the added benefit of being easy to maintain.

To complete the rustic look, add some greenery with plants or flowers with a rustic finish; you can enjoy your deck for years to come without worrying about it losing its beauty.  

11. A glossy finish

A glossy finish wood deck

 Have you ever gone to a friend’s house and seen their beautiful deck, only to look closer and see that the finish is dull and faded? You can avoid this mistake by ensuring your deck has a glossy finish.

A glossy finish will not only make your deck look more attractive, but it will also help to protect it from the elements. The sun can cause wood to fade and crack, but a glossy finish will reflect the light and help to keep your deck looking new.

In addition, a glossy finish will make your deck more slip-resistant, which is important for safety. If you want your deck to look its best, be sure to give it a high-quality, glossy finish.

12. A matte finish

A matte finish is a good stain finish for your deck because of its natural look and feel. Many people are put off by the glossy, plastic look of some finishes, and a matte finish gives your deck a more natural look.

It also eliminates the problem of fingerprints and smudges marring the surface of your deck. A matte finish is also more durable than a glossy finish, and it won’t peel or chip as easily.

So if you’re looking for a stained finish that will give your deck a natural look and feel, go with a matte finish.

13. A textured finish:

A textured finish is the best way to achieve a natural look for your deck. It can also help to disguise any imperfections in the wood and give it a more uniform appearance. A textured finish is also a good choice if you plan to stain your deck.

Stains can be difficult to apply evenly, but a textured finish will help to spread the stain evenly and give you a more consistent finish. When applied properly, a textured finish can also help to protect your deck from UV damage and fading.

Frequently Asked Questions about Deck Staining Ideas with Colors

Should a deck be lighter or darker?

The answer to this question depends on the look you are trying to achieve. If you want your deck to look more polished and professional, a darker stain might be the best option. If you want your deck to have a more natural look, a lighter stain might be the best choice. Ultimately, it is up to you to decide what look you want for your deck.

Is it better to seal or stain a deck?

There are pros and cons to both sealing and staining a deck. Sealing a deck will help to protect it from the elements and make it easier to clean, but it can be difficult to apply evenly. Staining a deck will give it more color and personality, but it will likely fade over time.

How often should a deck be stained?

A deck should be stained every one to three years, depending on its location and how much foot traffic it gets. A deck that is in a shady area or doesn’t get much sun may not need to be stained as often as one that is in a sunny spot. If a deck is in a high-traffic area, it may need to be stained more often.

At what temperature should you stain a new deck?

To ensure that your stain will penetrate the wood and achieve the desired look, it is important to follow the manufacturer’s instructions on temperature. Depending on the type of stain you are using, the ideal temperature range for staining a new deck is between 50-80 degrees Fahrenheit. If it is too cold, the stain may not penetrate the wood properly. If it is too hot, the stain may dry too quickly and not achieve the desired results.

Concluding Remarks about Deck Staining Ideas with Colors

And there you have it, folks – 13 dazzling deck staining ideas with colors that will make your backyard the star of the neighborhood show! It’s like having a box of crayons, and all you have to do is pick the brightest ones to transform your outdoor space into an enchanting utopia.

The key takeaways are simple, really: first, choose modern deck paint colors that speak to your personal flair; second, don’t be afraid to experiment with bold contrasts; and lastly, remember to let your creativity soar like a fearless eagle. You can get ideas by exploring deck painting ideas and pictures from google.

So go on, give these stunning inspirations about house and deck color combinations a shot, and watch as your guests’ jaws drop in amazement – they simply won’t know where to look first. The stage is set, the curtain is raised, and it’s time to bring your deck’s starring performance to life in vivid, awe-inspiring color.

How To Paint A Deck?10 Ways To Do It Quickly

How To Paint A Deck10 Ways To Do It Quickly

A fresh coat of paint can quickly brighten up a dreary deck, making it the perfect place to relax and enjoy the outdoors. But painting a deck is no small task. There are a few important things to keep in mind if you want to get the job done quickly and efficiently.

First, make sure you have all the necessary supplies on hand before you start. Second, choose a day when the weather is cooperating; painting in direct sunlight is not ideal. Finally, take your time and be careful of drips and smudges.

With a little bit of planning and effort, you can have a beautifully painted deck that will last for years to come.

10 Ways to Quickly Paint Your Deck Without Spending Hours:

Who wants to spend hours painting their deck when they could be doing something more fun – like, well, pretty much anything else? If you’re looking for a way to quickly paint your deck without all the hassle, we’ve got just the thing.

Check out our top 10 ways to quickly paint your deck:

1. Choose the right paint:

Choose the right paint

You want to paint your deck quickly, so you need to choose the right paint. But what is the right paint? It depends on the type of deck you have and the look you’re going for.

If you have a pressure-treated deck, you’ll need to use a different kind of paint than if you have a natural wood deck. If you want a solid color, you’ll need to use a different sort of paint than if you want a stained finish.

A high-quality exterior paint will go a long way in ensuring your deck looks great and lasts for many years. Make sure to pick a paint that is specifically designed for outdoor use and can withstand the elements.

2. Gather your materials.:

In addition to the actual paint, you will need a few other supplies to get the job done right.

These include:

  • Paintbrush
  • Paint roller
  • Painter’s tape
  • Drop cloths
  • Sandpaper

3. Prep the deck area

To avoid taking a long time to paint the deck, prep the area beforehand. This may seem like a daunting task, but fortunately, there are a few easy steps you can follow to get the job done efficiently.

  • Start by removing any furniture or debris from the deck area.
  • Sweep the surface clean of dirt and debris.
  • Once the deck surface is clean, use a hose or power washer to remove any remaining dirt and grime.
  • Allow the surface to dry completely before proceeding with painting.

By following these simple steps, you’ll be able to prep your deck area in no time, ensuring a hassle-free painting job.

4. Tape off areas you don’t want to be painted on the deck

Tape off areas you don’t want to be painted on the deck

In order to achieve a picture-perfect paint job on your deck, it is essential to take the time to tape off any areas ( using painter tape ) you don’t want to be painted such as bricks, fireplaces, and stone pavers.

Although this step may seem like a tedious hassle, it is well worth the effort in order to avoid any costly mistakes. By taking a few simple precautions, you can ensure that your deck will be looking its best in no time.

So grab a roll of tape and get started!

5. Apply a primer

A fresh coat of paint can do wonders for a dull, drab deck. But before you start painting, it’s important to apply a primer. A primer will help the paint to adhere better and will also make the job go faster. So if you’re looking for a quick way to liven up your outdoor space, a primer is the way to go.

6. Paint the railing first

Paint the railing first in deck

Have you ever wanted to paint your deck quickly? Maybe you’ve put it off because you don’t know where to start. Well, we have the solution for you: start by painting the railing! These punchy little informative hints will explain why this is the most effective method to do things swiftly and effectively.

By painting the railing first, you’ll be able to cover a lot of ground quickly and get a nice consistent coat of paint. Plus, it’ll look great when you’re finished! So what are you waiting for? Get out there and start painting those railings!

7. Tools for painting different areas of the deck

Tools for painting different areas of the deck

Not all decks are created equal, so it stands to reason that not all painting jobs will be the same either. Depending on the size and shape of your deck, you may need to use different tools to get the job done right.

Use a paint roller

For the large flat surfaces, such as the deck floor, use a paint roller. This will help you apply an even coat of paint and will save you time.

Use a paintbrush for tight spaces

For areas that are harder to reach or where the paint roller can’t fit, use a paintbrush. This includes painting around the spindles on a railing or in between cracks on a deck board.

8. Let the first coat of paint dry before applying a second

If you need to paint your deck immediately, you’ll allow the first coat of paint to dry before applying a second. This may seem like common sense, but you’d be surprised how many people try to speed up the process by painting over wet paint.

Not only will this cause the paint to take longer to dry, but it can also lead to streaks and an uneven finish. So if you want to get the job done quickly, be sure to let the first coat of paint dry completely before adding a second layer.

9. Add a sealant

If you’re like most people, your deck is one of your favorite places to spend time. It’s the perfect spot to relax and entertain guests. But over time, sun and rain can take their toll on your deck, leaving it dull and faded. That’s where a sealant comes in.

By adding a sealant to your deck, you can restore its original beauty and extend its life. Not only that, but a sealant will also make it easier to paint your deck. So if you’re looking for a quick and easy way to improve your deck, add a sealant today. You and your guests will be glad you did!

10. Enjoy your newly upgraded deck

When the sealant is dry, it’s time to enjoy your newly upgraded deck! Here are two tips to help you make the most of this summer:

Invite friends over for a barbecue

What could be better than enjoying some fresh air and good company on your newly painted deck? Just don’t forget the hamburgers and hot dogs!

Add some comfy furniture

Add some comfy furniture
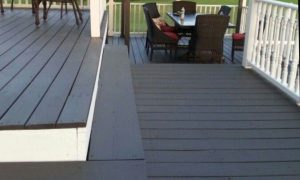
Once you have a few coats of paint on your deck, it’s time to start thinking about furniture. After all, what’s the point of having a beautiful outdoor space if you can’t relax in it? Make sure to choose furniture that will withstand the elements so you can enjoy your deck for years to come.

With these 10 tips, you can quickly and easily paint your deck in no time!

Conclusion:

Although we have provided you with ten ways to quickly and easily paint your deck, it is important to note that the preparation work is just as essential as the painting itself. By taking the time to clean and prime your deck before you start painting, you will be able to achieve a beautiful finish that will last for years. We hope you found this post helpful, and please visit our blog regularly for more tips on how to make your home look its best.

How To Paint Your Old Deck? 7 Deck Restore Paint Guidance

How To Paint an Old Deck Without Making a Mess

Before you write this off as another of those never-ending home improvement projects, know that paint can be your best friend on an old deck. A fresh coat of paint can give new life to an old and weathered deck without costing you a fortune or taking up all your free time.

Plus, with some planning and the right supplies, you can avoid making a big mess. So if you’re ready to give your deck a makeover, read on for tips on painting an old deck without making a mess.

With a little bit of effort, you’ll have that old deck looking like new in no time.

Why is it Necessary to Scrape off the Previous Paint from the Deck?

Why is it Necessary to Scrape off the Previous Paint from the Deck?

A freshly painted deck is the perfect place to enjoy a summer BBQ with friends, but before you can enjoy your new deck, you have to scrape off the old paint. It might seem like a hassle, but scraping off the old paint is essential for a smooth, even finish.

Here’s why:

  • New paint adheres best to a clean surface.
  • Old paint can chip and flake, ruining your new paint job.
  • Scraping off the old paint allows you to inspect your deck for any repairs that need to be made before you start painting.

So save yourself time and money by taking the time to scrape off the old paint before you apply new paint to your deck.

How to Paint an Old Deck in 7 Easy Steps?

Ready to get rid of that old, peeling deck? Just follow these seven easy steps, and you’ll have a fresh, new deck in no time – without calling in a professional (and spending a fortune).

So break out the paintbrushes, and let’s get started!

1. Prepare the surface of your old deck

The process of getting your deck ready for a new paint job includes cleaning and sanding the surface of the deck.

What are the most effective methods for cleaning an old deck?

You can also clean the surface with a pressure washer. Power washing is a fast and effective way to remove built-up dirt and grime from the old deck.

However, it can also damage the deck if not done correctly. Power washers use high-powered streams of water to blast away debris. This can be tough on delicate surfaces like wood, so it’s important to be careful when using one.

If you decide to power wash your deck, be sure to use a gentle setting and hold the wand at least six inches away from the surface of the wood.

How to Sand an Old Deck?

How to Sand an Old Deck

Sanding is a more traditional way of preparing your old deck for painting. It involves using coarse sandpaper to scrub away dirt and stains. The downside of sanding is that it’s very labor-intensive.

Sanding also runs the risk of damaging the wood if you’re not careful, so be sure to spend time on your knees. if you’re planning on painting your old deck, sanding will give you a smooth surface to work with.

2. Apply a primer

Apply a primer wood Deck

Did you know that applying a primer before painting your deck is actually essential? Here’s why: 

A primer helps to create a smooth surface for the paint to adhere to. Without a primer, the paint would sit on top of the rough wood and eventually chip off. By using a primer, you’re ensuring that the paint will last much longer. 

In addition, a primer helps to block out stains and discoloration from the wood. This is especially important if you want a light color on your deck. By using a primer, you can avoid using multiple coats of paint to achieve the desired color. 

So next time you go to paint your deck, don’t forget the primer! It may seem like an unnecessary step, but it’s actually essential for getting a good finish.

3. Choose your paint

Be sure to select a paint that is specifically designed for outdoor use. This will prevent the paint from peeling or fading over time.

How to pick an ideal paint for an old deck?

What type of paint should you use on the old deck? There are two options: oil-based or latex. Latex paint is cheaper and easier to clean up, but it doesn’t last as long as oil-based paint. If you’re looking for a long-lasting paint job, oil-based paint is the way to go.

What color should you choose? If you want your deck to really stand out, go for a bright color like red or yellow. If you want something more low-key, a light blue or green will do the trick.

With these things in mind, you’ll be ready to choose the right paint for your old deck.

4. Paint the surface of your deck

Here’s how to paint an old deck correctly.

Gather supplies

The first thing you’ll need is to gather your supplies. Good quality paint, some painter’s tape, and a few brushes are all you’ll need to get started. Don’t forget the drop cloths!

Painting the old deck

Once you have your supplies ready, it’s time to get started. Begin by taping off any areas that you don’t want to be painted. Now you’re ready to start painting! Begin with a light coat, then build to heavier coats until you’re satisfied with the coverage.

Now that you know how to paint your old deck like a pro, there’s no excuse not to try it! So what are you waiting for? Grab those supplies and get started!

5. Let the paint dry

After you finish painting, it’s important to let the paint dry completely before walking on it or placing any furniture. This usually takes about 24 hours. After the paint has dried, you should proceed to the next stage.

6. Apply a sealant (optional)

To help protect your investment, it is important to apply a sealant to your old deck after painting.

Here’s why: 

  • Sealants help to lock in the color of your paint job, so it will stay looking fresh for longer.
  • They also provide an extra layer of protection against weathering, so your deck will be better able to withstand sun, rain, and snow.
  • Sealants can help to prevent mildew and mold from taking hold, keeping your deck looking clean and new for years to come. 

So don’t neglect your old deck – with a little TLC, it can be the pride and joy of your home once again. And when you’re ready to repaint, remember to apply a sealant for the best results.

7. Enjoy your new deck!

Enjoy your new deck!

Here are magically tips to help you enjoy your newly painted deck:

Add some furniture and accessories:

Once the sealant is dry, it’s time to add some furniture and accessories to make the deck more inviting. Add a table and chairs for dining, a chaise lounge for relaxing, and some potted plants for a splash of color.

Don’t forget the lighting:

Deck lights not only add a bit of ambiance, but they also help keep the deck safe at night. Add string lights or lanterns around the deck’s perimeter or install solar lights along the steps.

Following these simple tips, you can enjoy your newly painted deck for years!

Final thought:

Painting an old deck doesn’t have to be a daunting task. By following these seven simple steps and using the right tools, you can have your deck painted in no time – without making a mess. Be sure to visit our blog regularly for more tips on home improvement projects, both big and small.

How To Remove The Peeling Paint From Deck Without Chemicals?

How To Remove The Peeling Paint From Deck Without Chemicals

A deck is a perfect place to enjoy the outdoors, but over time, the elements can take their toll on the wood, causing the paint to peel. Most people believe that removing peeling paint from a deck is a difficult and time-consuming task.

However, with the right tools and techniques, it can be a relatively easy process. By taking the time to remove the peeling paint, you can prevent further damage to the deck and improve its appearance.

Additionally, removing peeling paint will also help to extend the life of the deck. With just a few simple steps, you can take care of your deck and keep it looking its best.

Why not begin today? but, before you begin, you should be aware of the facts presented here. 

Why is the Paint Peeling from the Deck?

You may wonder to yourself, “Why is the paint peeling from my deck?” We have the answer for you. There are three most common reasons for peeling paint:

Poor quality paint used:

Poor quality paint used

Poor quality paint is often the culprit. Inferior paint products are more prone to cracking and peeling, especially when exposed to sunlight and extreme weather conditions

That’s why it’s important to use high-quality deck paint that is specifically designed to withstand the elements. With proper preparation and a quality paint job, you can keep your deck looking great for years to come.

Incorrect primer used:

Incorrect primer used wood deckOne of the biggest mistakes people make when painting their deck is using the wrong primer. A lot of people use exterior paint without a primer, thinking it will save them time and money. But that paint won’t adhere correctly to the surface of your deck and will start to peel eventually.

It’s important to use a quality primer specifically designed for decks before you start painting. With the right primer, your paint will last much longer and will resist peeling and flaking. 

No sealant is applied before painting:

It’s every homeowner’s nightmare. You just spent hours – maybe even days – painstakingly painting your deck, and now the paint is already peeling.

So what went wrong? According to experts, one of the most common mistakes is not applying a sealant before painting. Without a sealant, moisture can seep into the wood and cause the paint to blister and peel.

So if you’re planning on painting your deck, make sure to apply a sealant first. It may take an extra step, but it could save you a lot of time and effort in the long run.

How to Remove the Peeling Paint from Your Deck without Chemicals? 9 ways

There are 9 ways to remove peeling paint from a deck, which are as follows:

  • Power washing
  • Puffy knife
  • Heat gun
  • Sanding
  • White vinegar
  • Baking soda
  • Lemon juice
  • Paint stripper
  • Wire brushes

How to Remove the Peeling Paint from the Deck by using a Power Washer?

power washing wood deck

If you have a deck, this can be especially problematic since it’s such a visible part of your home. Peeling paint can also be dangerous, as it can create tripping hazards. Thankfully, there is a relatively easy way to remove peeling paint from your deck – by using a power washer.

With just 3 simple steps, you can have your deck looking new in no time. Here’s what you need to do:

Take the items off of the deck:

First, remove any furniture or other objects from your deck. You don’t want them to get damaged by the power washer.

Use power washer:

Next, attach the power washer to a water source and turn it on. Start at one end of the deck and hold the nozzle about six inches from the surface. Work your way across the entire surface, being careful not to apply too much pressure or get too close, as this could damage the wood.

Let the deck dry:

Once you’re finished, let the deck dry completely before putting any furniture back in place or applying new paint or stain.

By following these simple steps, you can quickly and easily remove peeling paint from your deck – and keep it looking its best for years to come.

How to Remove the Peeling Paint from the Deck by using a Puffy Knife?

How to Remove the Peeling Paint from the Deck by using a Puffy Knife

If your deck is starting to look more like an eyesore than a place to enjoy the outdoors, it may be time to give it a facelift. Peeling paint is not only unsightly, but it can also lead to further damage if left unaddressed. The good news is that removing peeling paint is relatively easy, and can be done in just a few simple steps.

Start by using a puffy knife to scrape away any loose paint. Be sure to work in small sections so that you don’t miss any spots. Once all of the loose paint has been removed, use clean water to rinse away any remaining debris.

Once you’re finished, your deck will be looking good as new – just in time for summer entertaining!

How to Remove the Peeling Paint from the Deck by using a Heat Gun?

How to Remove the Peeling Paint from the Deck by using a Heat Gun?

When the paint on your deck is peeling, it can give your guests the wrong impression. Not to worry – with a little elbow grease and a heat gun, you can have your deck looking like new in no time.

Here’s a step-by-step guide on how to remove peeling paint from your deck:

Cleaning the deck:

Start by cleaning the deck surface with a garden hose. This will remove any dirt or debris that could prevent the heat gun from working properly.

Use the heat gun:

Next, heat up your heat gun to about 1000 degrees Fahrenheit. Slowly move the gun over the surface of the deck for peeling the paint, being careful not to stay in one spot for too long because this could damage the surface of the deck.

Scrape away the paint:

Once the paint is heated, use a paint scraper to remove the paint from the surface of the deck. Working in small sections is a good idea since it helps you to avoid missing any areas.

How do you Remove Peeling Paint from the Deck by Sanding?

How do you Remove Peeling Paint from the Deck by Sanding

If your deck is looking a little worse for wear, there’s no need to call in the professionals – with a little elbow grease, you can remove peeling paint and have You’ll have your deck looking brand new in a short time!

Here’s how:

Get everything you’ll need:

To start, you’ll need to gather your supplies. You’ll need a sander, sandpaper, painter’s tape, and a drop cloth. Once you have everything you need, it’s time to get started.

Sand the deck:

First, use the painter’s tape to protect any areas that you don’t want to sand – like your deck rails. Then, start sanding! Work in small portions and use even strokes until all of the peeling paint is gone.

Use a vacuum:

Once you’re finished sanding, use a vacuum to clean up any dust. Then, give your deck a good sweep before applying a fresh coat of paint or stain.

With only a tiny amount of effort, you can make your deck look newly built.

How does the Peeling Paint from the Deck be Removed by using a Paint Stripper?

How does the Peeling Paint from the Deck be Removed by using a Paint Stripper

Have you ever walked onto your deck only to be greeted by peeling paint? It’s not a pretty sight. The good news is that there’s a simple approach to removing the peeling paint from your deck. All you need is a stripper.

A stripper is a solution that dissolves the bond between the paint and the surface, making it easy to scrape off. stripping off the old paint also gives you a chance to inspect the deck for any damage and make any repairs before you repaint.

So, if your deck is in need of an update, don’t hesitate to reach for the stripper. It’s the quickest and easiest way to remove peeling paint.

How can you Remove Peeling Paint from my Deck using White Vinegar?

How can you Remove Peeling Paint from my Deck using White Vinegar

White vinegar can be an effective and safe way to remove peeling paint from your deck. Vinegar is a weak acid that can break down the paint, making it easy to scrape off.

In addition, vinegar is non-toxic and will not harm your plants or animals. To remove peeling paint from your deck with vinegar, simply apply the vinegar to the affected area with a brush or spray bottle and let it sit for a few minutes.

Then, use a screwdriver to scrape off the loosened paint. Repeat this process until all of the peeling paint has been removed. You may need to apply additional coats of vinegar to stubborn areas.

Once all of the peeling paint has been removed, you can repaint your deck or enjoy its Natural look.

Using Baking Soda to Remove Peeling Paint from a Deck:

Using Baking Soda to Remove Peeling Paint from a Deck

Do you have an old deck that’s in dire need of a makeover? If so, you’re probably wondering how to go about removing the peeling paint without using chemicals. While harsh chemicals might be tempting, they can actually do more harm than good.

Instead, try using a natural solution like baking soda. Baking soda is not only gentle on the environment, but it’s also incredibly effective at removing peeling paint. Just mix together a paste of baking soda and water and apply it to the affected areas.

Let it sit for a few minutes before scrubbing gently with a brush. You’ll be amazed at how quickly the peeling paint comes off, revealing the fresh wood beneath.

The next time you require to give your deck a makeover, don’t use harsh chemicals; try baking soda instead.

Peeling Paint Removal Product that is Environmentally friendly:

Using lemon juice:

Looking to spruce up your deck without spending a fortune? You may be surprised to learn that you can use lemon juice to remove the peeling paint from your deck. Not only is this method inexpensive, but it’s also environmentally friendly.

Plus, the acidic nature of lemon juice can help to break down the paint, making it easier to remove. Simply apply the lemon juice to the affected areas with a brush or spray bottle and let it sit for several minutes.

Then, use a scraper to remove the paint. You may need to repeat this process a few times for heavily peeling areas. With a little work, you can easily give your deck a fresh new look.

Using boiling water:

Using boiling water

You’re staring at your deck, and all you can see is the peeling paint. It’s unpleasant, and it needs to go. But you don’t want to use harsh chemicals, and you don’t want to spend hours scraping away at the paint. So what’s the solution? Boiling water.

That’s right – boiling water can help to remove the peeling paint from your deck quickly and easily. All you need to do is boil a pot of water and pour it over the affected areas. The heat will loosen the paint, making it easy to scrape away.

Plus, there’s no need for harsh chemicals or hours of elbow grease. So if you’re looking for a quick and easy way to remove peeling paint from your deck, boiling water is the answer.

Using wire brushes:

Peeling paint is not only unattractive, but it can also lead to more serious problems like wood rot. Wire brushes are an effective way to remove peeling paint and prepare the surface for repainting.

Wire brushes come in a variety of sizes and shapes, so it’s important to choose the right one for the job. For example, a round wire brush is ideal for removing paint from corners and edges, while a flat wire brush is better suited for larger surfaces.

Using a wire brush is relatively simple; just be sure to wear gloves and a dust mask to protect yourself from potential hazards. With a little time and effort, you can give your deck a fresh new look that will last for years to come.

Conclusion:

Peeling paint can not only be a source of frustration, but it can also pose a safety hazard. It’s important to remove the peeling paint as soon as possible, but you don’t have to use harsh chemicals to do it. There are several ways to remove the peeling paint from your deck without using any harsh chemicals. We’ve outlined nine different methods for you below. Be sure to visit our blog regularly for more tips like this!

Painting Cracks Between Deck Boards: 8 Reviving Techniques

Paint Cracks Between Deck Boards: Causes and Solutions.

Have you ever looked at your deck and noticed small paint cracks between the boards? You might think that it’s just normal wear and tear in the deck, but the truth is that those cracks are caused by a build-up of paint.

Over time, paint can start to chip and flake, leaving behind tiny cracks that allow moisture to seep in. This moisture can then cause the wood to warp and rot, ruining your deck. The good news is that there is an easy way to fix this problem.

Here’s what you need to know about paint cracking on deck boards – and how to fix it once and for all.

8 ways to prevent paint cracks between deck boards

Here’s how to avoid your deck paint from cracking.

1. Inspect the deck boards for any loose boards or nails

Inspect the deck boards for any loose boards or nails

When it comes to decks, there’s nothing worse than peeling paint and cracked boards. But with a little bit of preventative maintenance, you can keep your deck looking great for years to come.

Inspect the deck boards for any loose boards or nails, and make sure to tighten or replace them as needed. This will help to prevent the paint from cracking between deck boards.

2. Sand down the surface of the deck

Sand down the surface of the deck

A freshly painted deck is the perfect way to enjoy the outdoors, but all too often, the paint job doesn’t last. One of the main reasons for this is that people don’t take the time to properly prepare the surface before they start painting. In particular, it’s important to sand down the deck boards in order to prevent the paint from cracking.

By taking this one simple step, you can drastically extend the lifespan of your paint job and enjoy your deck for years to come. So next time you’re getting ready to break out the paintbrush, make sure you give your deck a good sanding first. Your efforts will be well worth it in the end.

3. Clean the deck boards regularly

Clean the deck boards regularly

Another way to prevent paint from cracking is to clean the deck boards regularly. This will help to remove any dirt or debris such as leaves or twigs that could also cause the paint to crack.

One of the best ways to clean deck boards is with a power washer. But if you don’t have one, you can also use a garden hose and some elbow grease. Just make sure to let the boards dry completely before you start painting.

4. Use the correct painting tool to paint the deck boards

Use the correct painting tool to paint the deck boards

One of the most common mistakes people make when painting their deck is using the wrong type of paint brush. This can cause the paint to crack and flake, which ruins the appearance of your deck.

To avoid this problem, make sure you use a high-quality paintbrush designed for painting decks. These brushes are usually made of synthetic materials and have stiff bristles that help to evenly distribute the paint.

5. Paint in the direction of the grain

Paint in the direction of the grain

When you’re painting your deck, it’s important to paint in the direction of the grain. This will help to prevent the paint from cracking and flaking as it dries.

To find the direction of the grain, simply run your hand along the surface of the wood. You should be able to feel which way the grain is running. Once you’ve found it, start painting in long, even strokes in that direction.

6. check the deck regularly for any signs of wear and tear

check the deck regularly for any signs of wear and tear

Don’t let your home be the one on the block with an eyesore of a deck. A deck can be a great addition to any home, especially during the summer months when everyone wants to spend time outdoors.

But a deck is only as good as its upkeep. Regularly checking for any signs of wear and tear is essential to prevent paint from cracking between deck boards. By taking these simple steps, you can ensure that your deck will be an asset to your home for years to come.

So what are you waiting for? Get out there and start enjoying your deck!

7. Apply a fresh coat of paint every few years

Apply a fresh coat of paint every few years

A fresh coat of paint is like a breath of fresh air for your home. Not only does it revive the color and beauty of your home, but it also protects it from the elements. Over time, paint can crack and peel, allowing moisture and pests to penetrate the wood beneath.

By applying a fresh coat of paint every few years, you can help to prevent this damage and keep your home looking its best. So don’t wait until the paint starts to chip – schedule a painting session today and enjoy the satisfaction of a job well done.

8. Use a deck sealer after painting

Use a deck sealer after painting

Your deck is an important part of your home. So when it comes time to repaint, you want to make sure the job is done right in order to protect your investment and enjoy your deck for years to come.

A crucial step that is often overlooked is using a deck sealer after painting. Deck sealer creates a barrier between the paint and the wood, preventing cracks and peeling caused by weathering.

Not only does this save you time and money in the long run, but it also gives you peace of mind knowing that your deck is well-protected. So next time you’re painting your deck, don’t forget the deck sealer!

What factor causes paint cracks between the deck board?

There are a few different reasons why deck board paint can crack between deck boards.

1. Inadequate preparation of deck

Paint is not only for aesthetic value but it also protects the deck against elements. When paint cracks, it leads to the deterioration of the deck. Inadequate preparation of the deck board is one of the main reasons why paint cracks.

If you don’t sand the board, the paint will not properly adhere to the surface and will eventually crack. This is because there is no smooth surface for the paint to grab onto.

Also, if the deck is not clean before painting, debris and dirt will get caught under the paint and cause it to crack.

In order to avoid this, make sure to properly prepare your deck boards before painting!

2. Choosing the wrong type of paint

It’s summertime and you’re feeling motivated to finally tackle that project you’ve been putting off all winter – painting your deck. You head to the store with a spring in your step, ready to buy the supplies you need to achieve your vision. But then you’re faced with a daunting array of choices and suddenly feel overwhelmed.

What type of paint should you use? latex? oil-based? What color will best complement your outdoor space? And will it be able to stand up to the elements? With so many questions swirling around in your head, it’s easy to make a mistake.

But choosing the wrong type of paint for your deck can have costly consequences – like cracks forming between your deck boards. So before you make a purchase, brush up on your knowledge so you can avoid this potential pitfall. With the right type of paint, your deck will be looking good as new in no time!

3. Applying paint in hot or cold weather

Although paint is designed to withstand different weather conditions, extreme temperatures can still cause problems.

Hot weather

When the paint is applied in hot weather, the paint can crack between deck boards. This is because the heat causes the boards to expand at different rates, causing the paint to break and allowing moisture to seep in and damage the wood

Cold weather

Conversely, painting in cold weather can also cause the paint to crack. This is because the paint will freeze before it has a chance to properly dry, causing it to break and flake off and leaving your deck susceptible to moisture damage.

To avoid this, make sure to check the weather forecast before you start painting. If it’s going to be hot or cold, try to schedule your project for a different time.

4. Not using a primer

You want your deck to look its best – a place where you can relax and enjoy the outdoors. But if you don’t use a primer before painting, you’ll be in for a nasty surprise. The paint will crack and flake, ruining the deck’s appearance.

Worse still, the deck will become a breeding ground for mold and mildew. Not using a primer is a false economy: in the long run, it will cost you more time and money to maintain the deck.

So do yourself a favor and use a primer. It’s the best way to protect your investment and keep your deck looking great for years to come.

5. Applying too much or too little paint

It’s happened to the best of us. We’re painting our deck, enjoying the process and the results, when suddenly we notice that the paint is cracking. We might be discouraged, but don’t despair! In most cases, this problem can be easily fixed by simply adjusting the amount of paint we’re using.

Too much paint

Applying too much paint is one common cause of cracking. When there’s too much paint on the brush, it’s easy to overload the deck boards and cause the paint to crack as it dries.

Too little paint

If we don’t apply enough paint, the surface will be uneven and the paint will also crack and flake as it dries. When we don’t use enough paint, we also run the risk of the wood becoming damaged as it’s not properly protected from wear and tear.

The best way to avoid these problems is to find the right balance – not too much, not too little.

6. Not allowing the paint to dry completely

Have you ever looked at a paint job and wondered why the paint is cracking? It’s likely due to the painter not allowing the paint to dry completely before adding a second coat. This causes the paint to crack between deck boards, which is not only unsightly but also leads to peeling and chipping down the road.

A good rule of thumb is to wait 24-48 hours after applying the first coat of paint before adding a second coat. This will give the first coat time to dry completely and create a smooth surface for the second coat.

So, if you’re planning on painting your deck, make sure to give the first coat plenty of time to dry!

Conclusion:

Preventing paint cracks between deck boards can be done in a number of ways, and we’ve outlined eight of the best methods for you. By following these simple tips, your deck will look great all season long with very little effort on your part! Be sure to visit our blog regularly for more helpful hints like this one.