How Long Should a Composite Deck Last?

Composite Decking How Long Does it Really Last

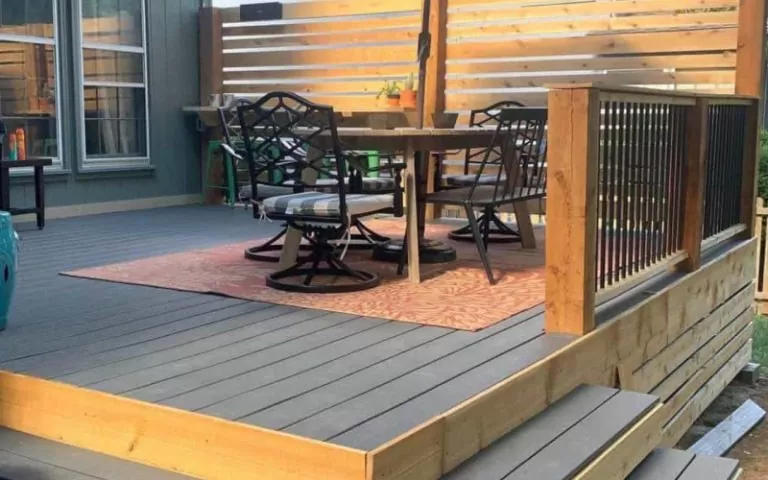
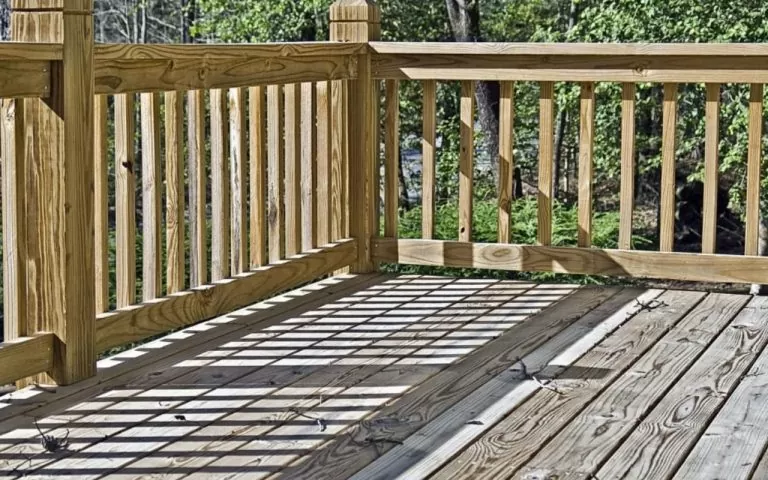
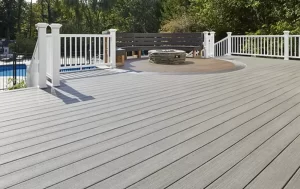
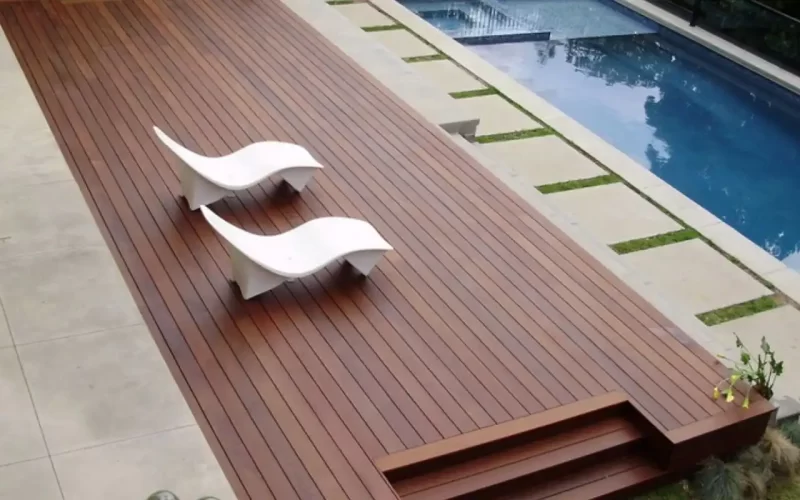
Looking for a decking material that will last longer than wood without maintenance? Composite decking is your solution. A composite deck increases the value of your home while providing a long-lasting solution for your decking needs. With composite decking, you’ll never have to worry about rotting boards or splinters in your feet.

Composite decking is made from recycled materials and waste wood, making it an eco-friendly choice. It also requires less care than traditional wood decking, saving time and money in the long run.

But how long does a composite deck last?

In this article, we’ll explore how composite decking compares to wood in terms of lifespan, durability, and maintenance. We’ll also provide some tips on how to extend the life of your composite deck. So whether you’re looking for a material that will last longer than wood or you’re just interested in learning more about composite decking, read on.

How Many Years Will Your Composite Deck Last?

Composite decking is becoming increasingly popular because it offers all of these benefits. But one question remains – how long will it last? 

How Many Years Will Your Composite Deck Last?
                                                                     How Many Years Composite Deck Last?

Here’s the thing:

Composite decking is made to withstand the elements. It’s manufactured using a blend of wood fibers and plastic, so it’s strong and durable. In fact, composite decking is rated to last 20-30 years.

But that’s not all. It also has a lower lifetime cost than wood, so you’ll save money in the long run.  Here are a few more reasons to choose composite deckingÛ”

Why is Composite Decking a Better Choice?

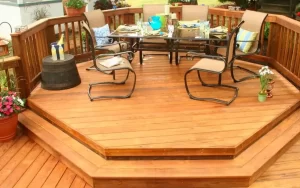
The traditional deck is a great addition to any home. But what if you could have a deck that required less maintenance and looked better than a traditional wood deck? A composite deck might be the answer.

Why is Composite Decking a Better Choice
                                                       Why Composite Decking is a Better Choice

Here are 10 reasons why a composite deck is a better choice than a traditional wood deck: 

  1. Composite decks are made from recycled materials so that you can feel good about your purchase. 
  2. They require less maintenance than traditional decks – no more sanding, staining, or painting۔ 
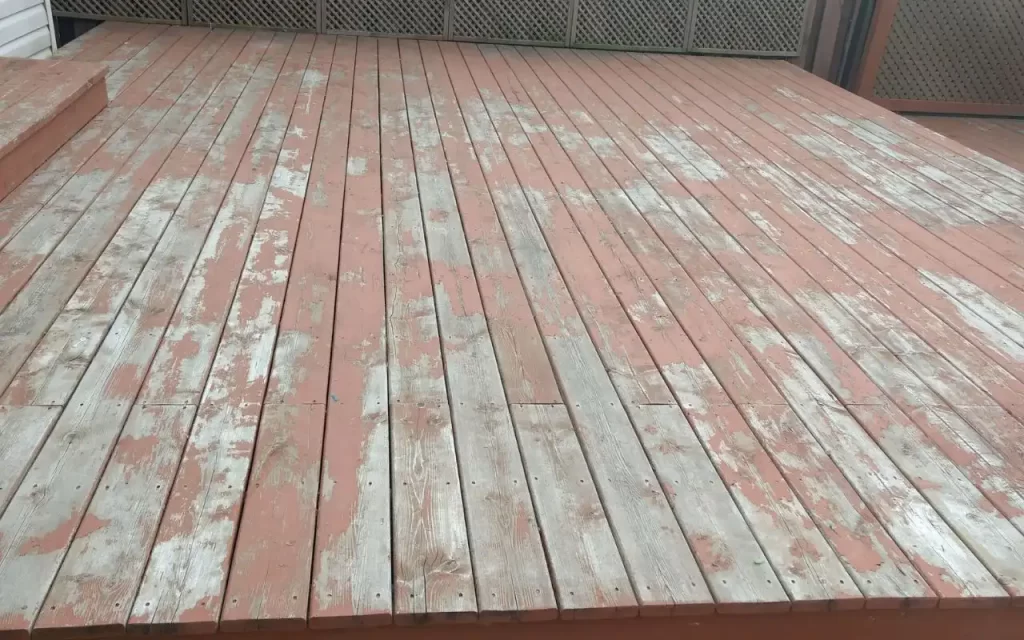
  3. Composite decks are more durable than wood decks, and they won’t crack, warp, or rot. 
  4. Composite decks are available in various colors and styles so that you can find the perfect look for your home. 
  5. They’re also splinter-free to enjoy your deck barefoot or with flip-flops۔ 
  6. Composite decks are slip-resistant, making them safer for kids and pets. 
  7. With a composite deck, you’ll never have to worry about termites or other wood-destroying pests. 
  8. Composite decks are fire-resistant, so you can relax knowing your deck is safe. 
  9. They’re also easy to clean. Just soap and water will do the trick. 
  10. Best of all, composite decks add value to your home – so when it’s time to sell, you’ll get a higher return on your investment.

What Can You Do to Extend the Life of A Composite Deck?

Looking to enjoy your composite deck for many years to come? Check out these 8 tips on how to extend its life: 

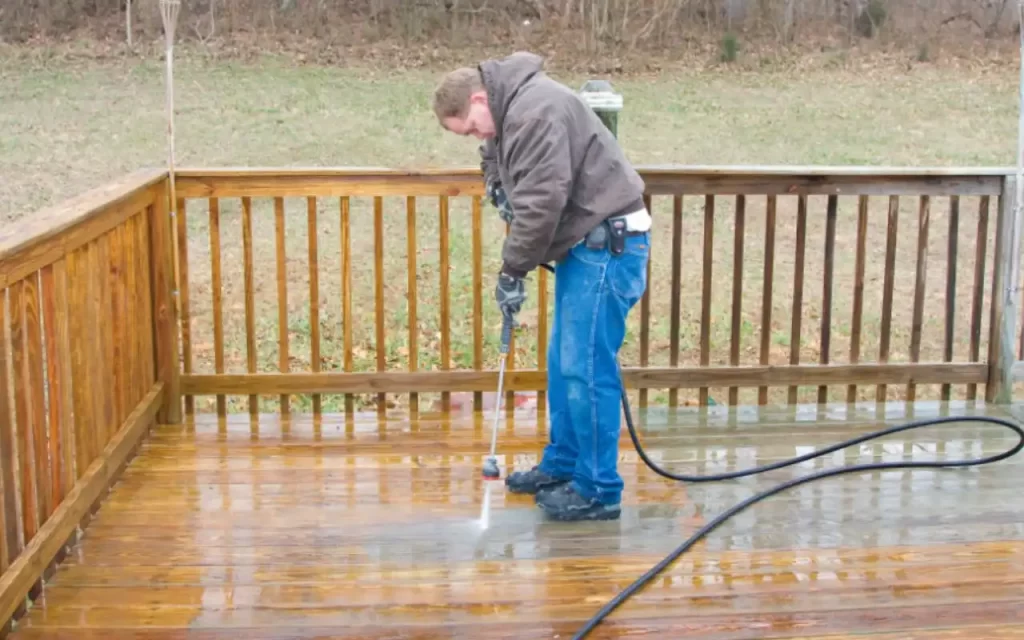
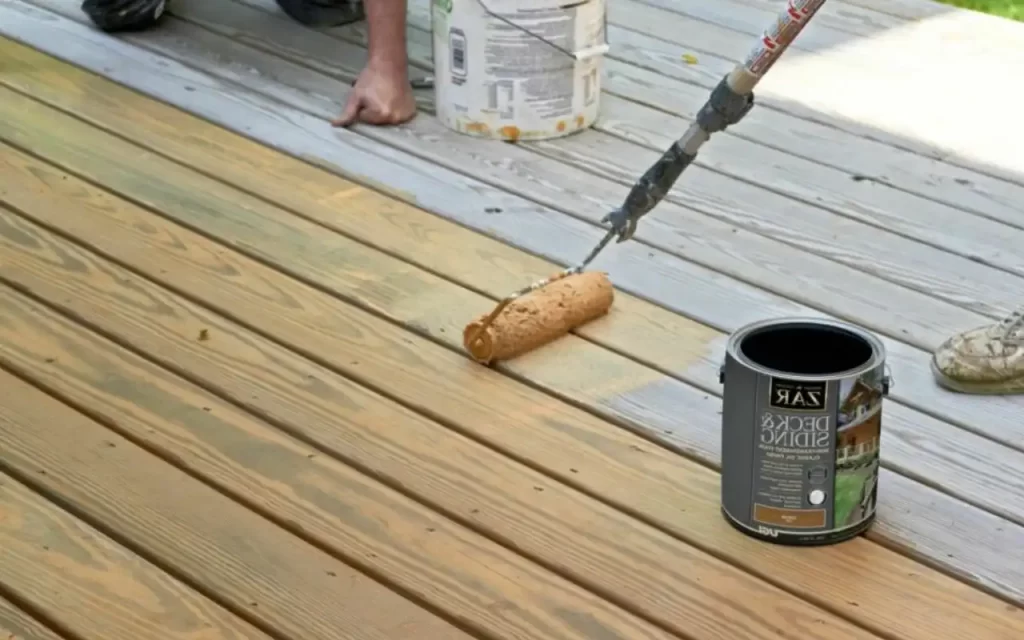
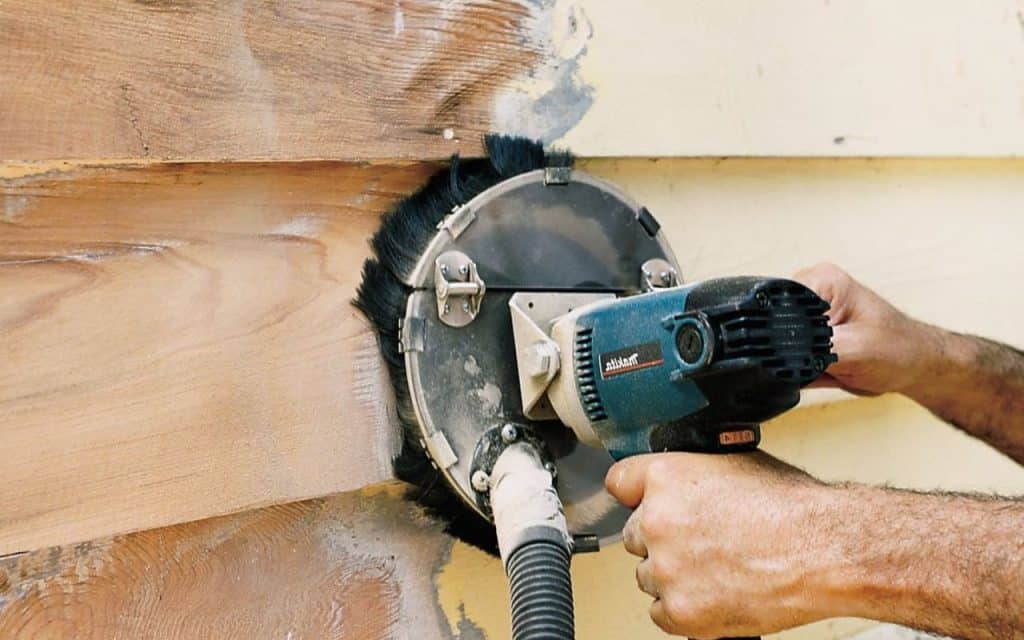
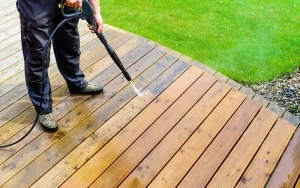
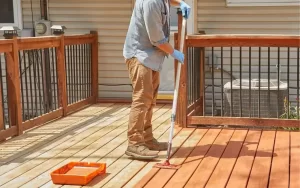
1. Give your deck a good power wash regularly

power wash deck
                                                                                    Power Wash Deck

Regular power washing can help remove dirt, grime, and other buildups that can damage the wood. By keeping your deck clean and free of debris, you can help to ensure that it will last for years to come. So next time you think about deck maintenance, remember to give it a good power wash.

2. Protect your deck from the elements

Protect the deck from elements
                                                                   Protect the deck from elements

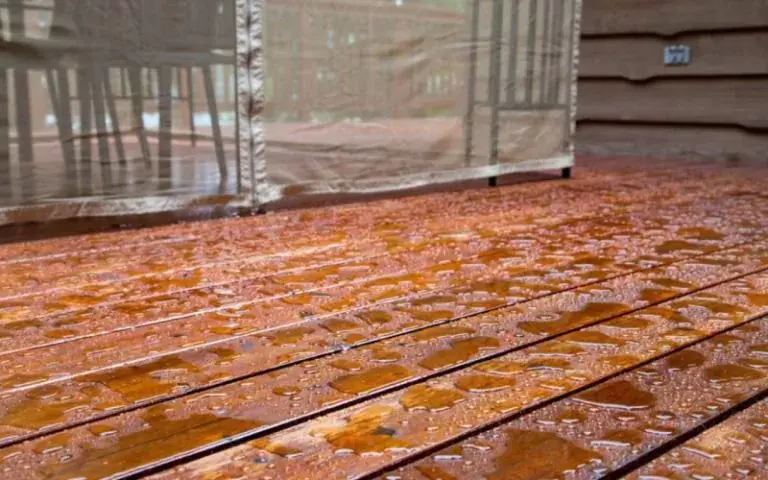
Composite decks are durable, but they can still be susceptible to damage from the wind and rain. Covering your deck when bad weather is forecast can help protect it from the elements and keep it looking good longer. So next time you’re expecting a storm, be sure to take some time to cover your deck. Otherwise, your deck might not make it through the season.

3. Keep your deck clean clean

In addition to power washing, sweep your deck regularly to remove dirt, leaves, and other debris. If you have trees nearby, you may also want to hose off your deck occasionally. This will prevent sap or bird droppings from staining the surface.

3. Keep your deck clean clean

When cleaning your deck, be sure to use a gentle cleanser and a soft brush to avoid damaging the wood. So your deck will look good and last longer.

4. Be careful with furniture over deck

If you’re not careful with your furniture, you could end up doing serious damage to your composite deck. Composite decks are a mixture of wood and plastic, making them long-lasting and easy to care for.

Be-careful-with-furniture-composite-deck
                                                           Be-careful-with-furniture-composite-deck

However, they can be scratched or damaged by heavy furniture. So before you drag that chair across the deck, think about how you can protect your investment.

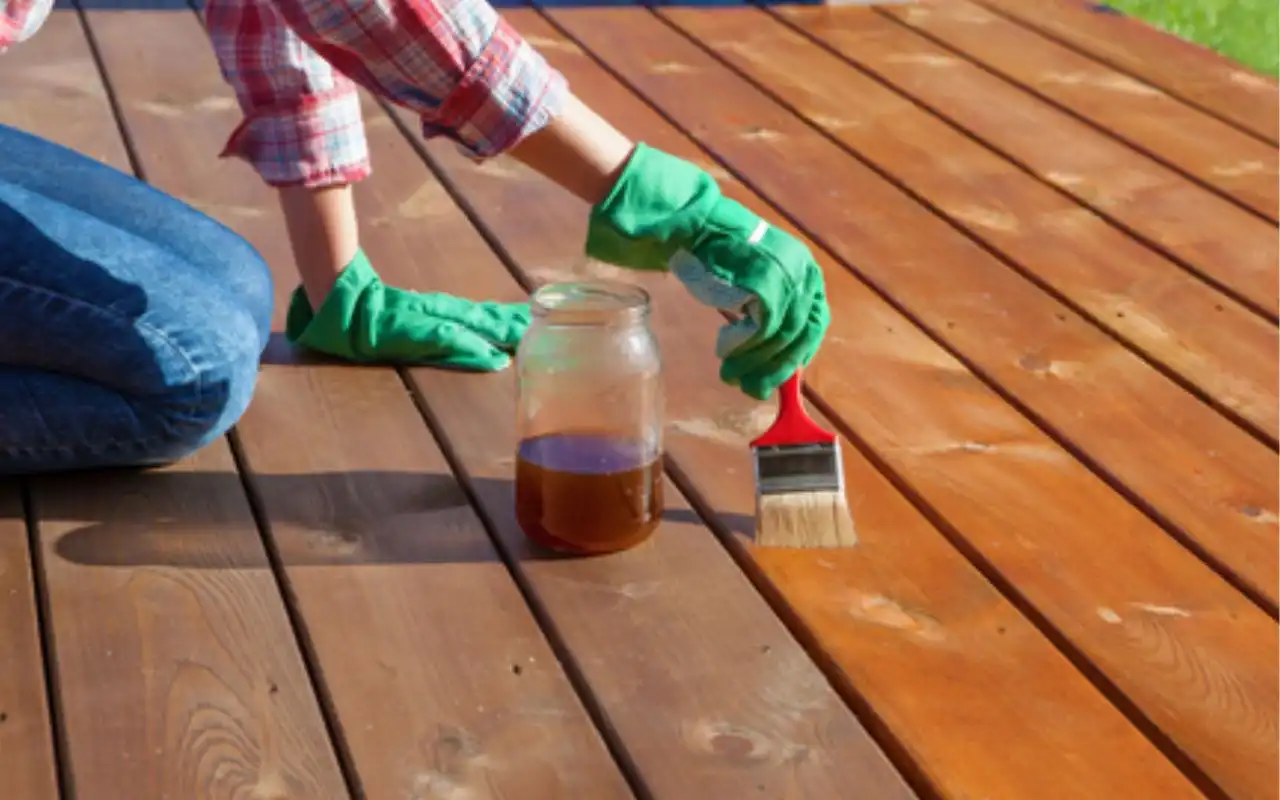
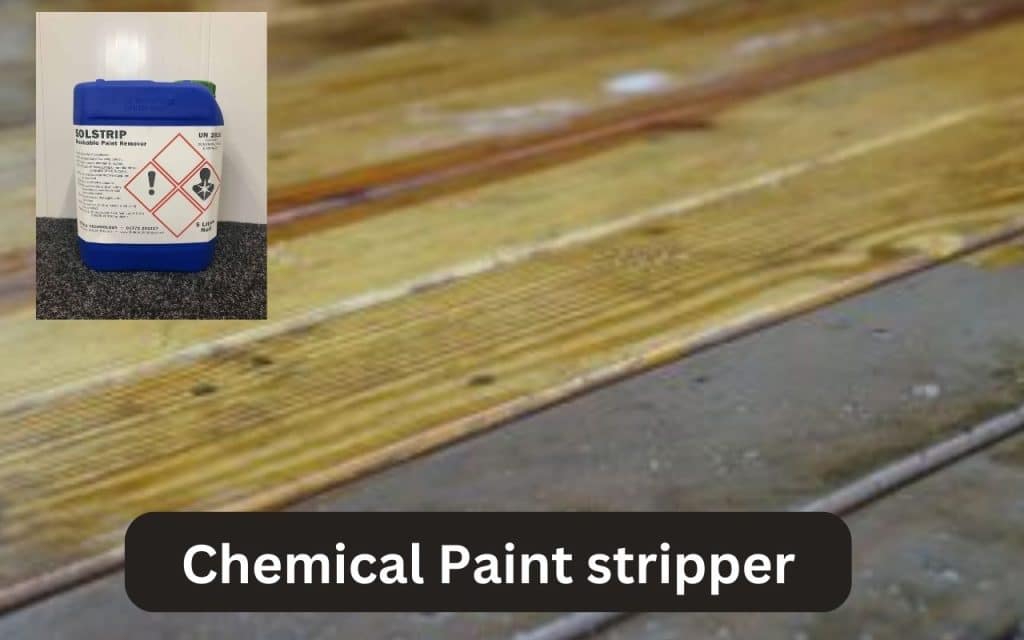
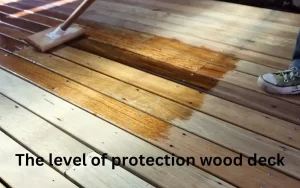
5. Don’t use harsh chemicals to clean your deck

If your deck is made of composite materials, you might inadvertently damage it whenever you reach for the hose. That’s because many composite decks are sensitive to harsh chemicals, including those in some household cleaners. Harsh chemicals are more acidic in nature and will break down the composition of the deck, leading to costly repairs down the road.

Don’t use harsh chemicals for deck cleaning
                                                        Don’t use harsh chemicals for deck cleaning

When these chemicals come into contact with the surface of a composite deck, they can break down the material, causing it to become discolored and dingy. Over time, this damage can shorten the lifespan of your deck and make it more difficult to maintain.

So next time you reach for the hose, think twice about using harsh chemicals on your composite deck. Your deck will thank you for that.

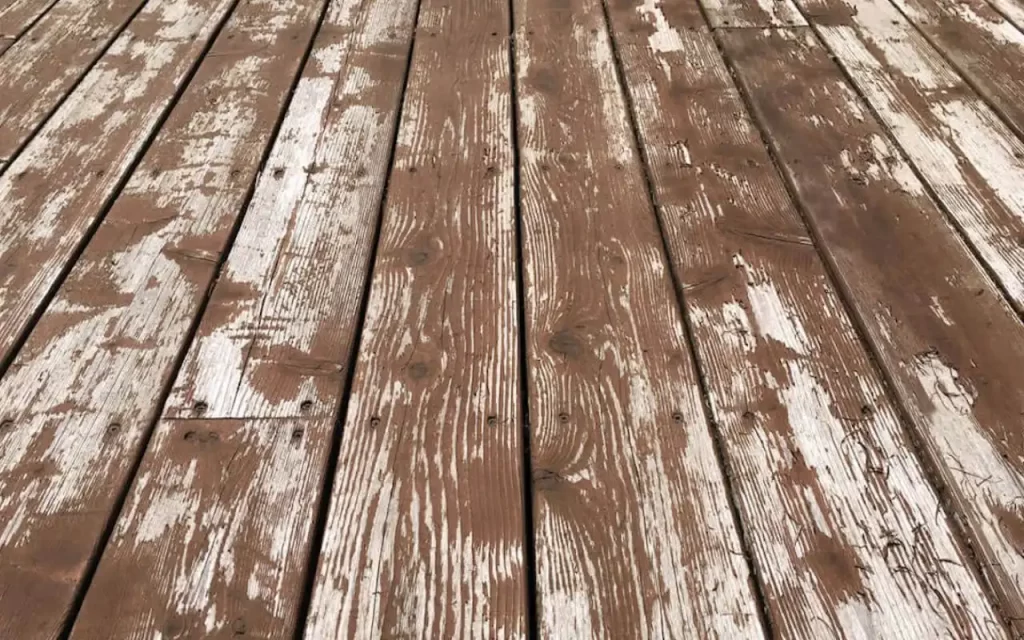
6. Fix any damage to your deck

Fix any damage to your deck
                                                                           Fix any damage to your deck

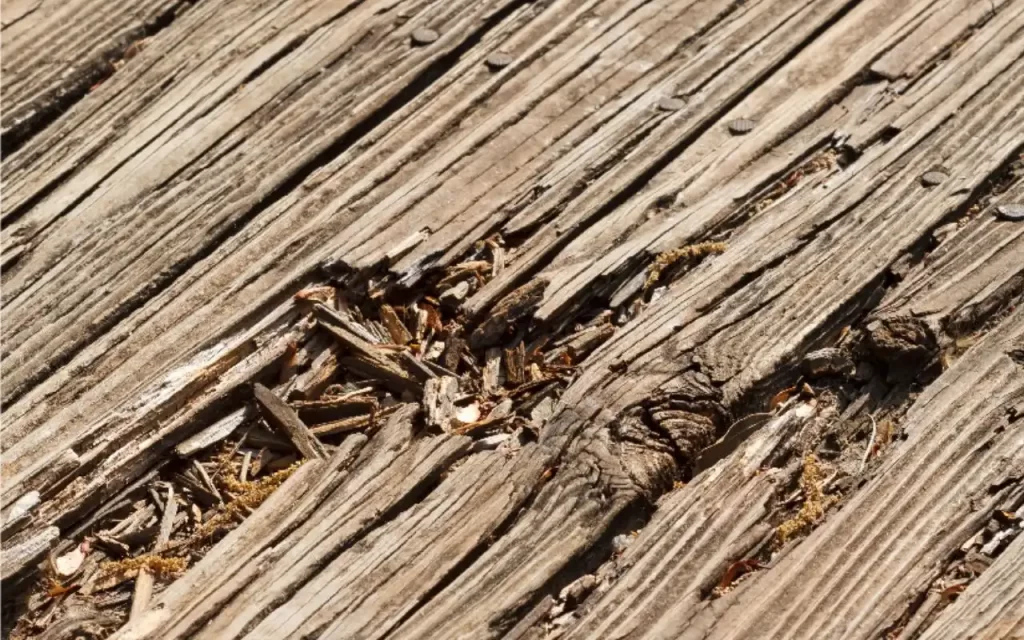
While composite decks are tough, they’re not invincible. If you notice any damage, such as cracks, splits, or loose boards, take care of it immediately. This will help you prevent further damage and extend the life of your deck.

7. Store materials properly

If you’re storing any materials on your deck (lumber, grilling supplies, etc.), be sure to keep them off the ground and away from the edge of the deck. This will prevent them from scratching or damaging the surface of your deck.

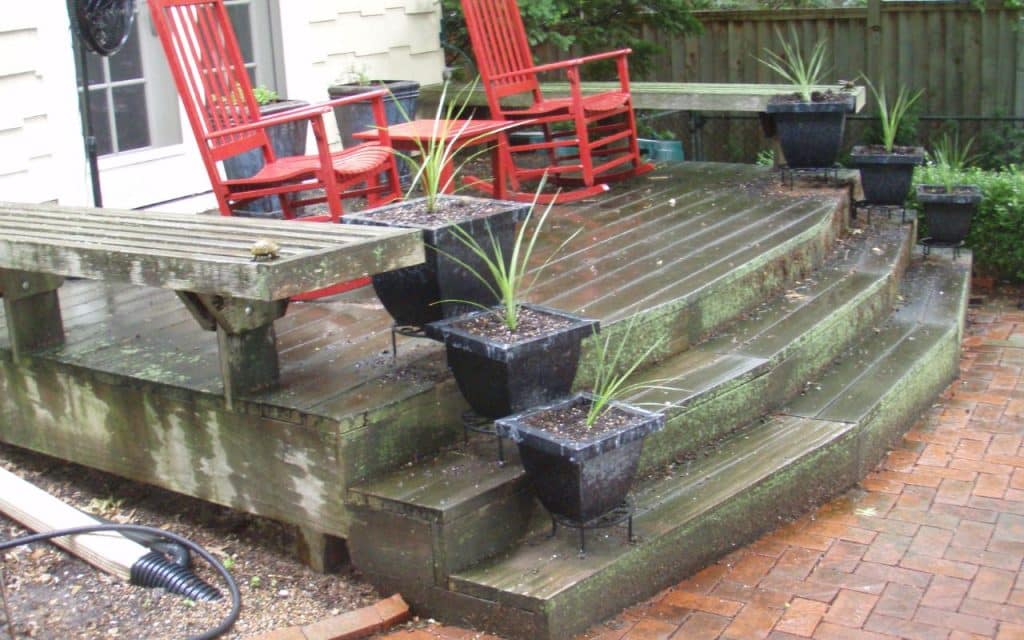
8. Don’t let it grow mold or mildew

Don’t let mold or mildew ruin your composite deck. Taking a few simple steps to prevent and remove mold will extend the life of your deck and make it look great for years to come. Composite decks are still susceptible to mold and mildew growth, especially in humid climates.

Mold and mildew not only damage the appearance of your deck but can also lead to premature decay. To prevent mold and mildew growth on your composite deck, sweep the deck regularly to remove debris, dirt, and leaves.

If you live in a humid climate, consider installing a dehumidifier to keep the air dry. If mold or mildew grows on your deck, don’t worry. There are plenty of effective cleaners on the market that will safely remove mold and mildew without damaging your deck.

With a little care and attention, you can keep your composite deck looking new for years to come.

9. Protect your deck from the sun

When sunlight directly hits composite decking, it causes the material to heat up. This can cause the color of your deck to fade over time.

To protect your deck from the sun, add shade with an umbrella or pergola. This will help keep your deck cooler and prevent the color from fading. If you don’t have space for a shade structure, you can try adding some plants to the area around your deck. This will provide natural shade and can make your deck more comfortable to spend time on.

Frequently Asked Questions

Can I stain or paint my composite deck?

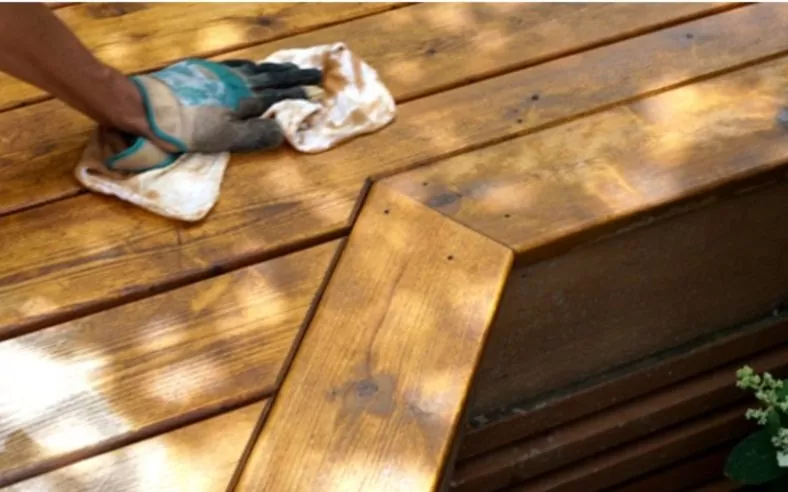
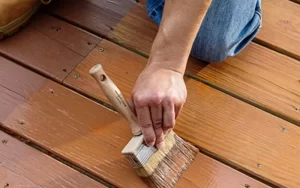
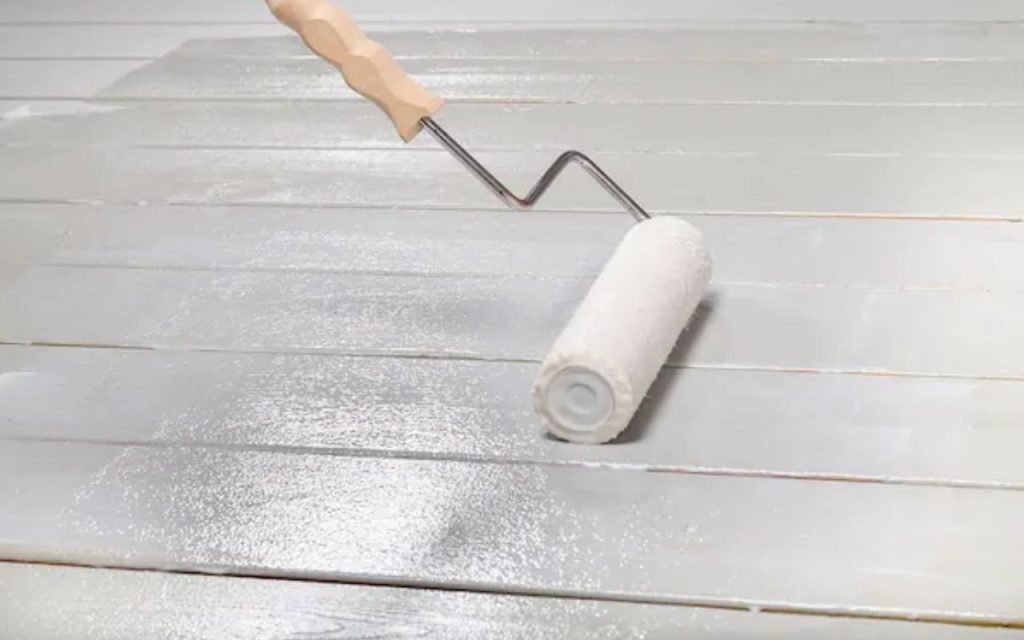
You can, but it’s not necessary. Composite decks are designed to be low-maintenance and don’t require painting or staining as wood decks do. If you do decide to paint or stain your deck, be sure to use a product that is specifically designed for composite decks.

Is composite decking worth the cost?

Composite decking is an investment that can add value to your home. Thanks to its low-maintenance design and durable construction, composite decks can last for years with little effort on your part. In addition, composite decks can increase the resale value of your home, making them a wise investment for any homeowner.

Is composite decking fire-resistant?

Yes, composite decking is fire-resistant. However, it’s important to note that no material is completely fireproof. For the best protection, be sure to keep your composite deck clear of any flammable materials, such as leaves or mulch.

Can I put a hot tub on my composite deck?

Yes, you can put a hot tub on your composite deck. However, it’s important to take precautions to protect your deck from the heat of the tub. You can do this by placing a mat under the tub or using composite decking to withstand high temperatures.

Conclusion

So how long does a composite deck last? Although composite decking is built to last, there are a few things you can do to ensure it does.

By following our tips for maintaining your composite deck, you’ll be able to keep it looking beautiful and performing well for years. Be sure to visit our blog regularly for more helpful advice and information on all things home improvement.

How to Remove Paint from Deck Without Chemicals?

How to Remove Paint from Deck Without Chemicals

Have you ever looked at your deck and thought, “Ugh, that paint is old and faded”? Over time, exposure to the sun and weather can take a toll on even the best quality paint, leaving it dull and worn.

Are you looking to give your deck a fresh start? Removing old paint is a great way to do that. But it can also be a daunting task. How do you know what kind of paint removal method to use? What’s the best way to apply it? And how do you deal with all the fumes? Don’t worry; we’re here to help.

In this blog post, we’ll share our top tips and tricks for removing deck paint. We’ll cover everything about your deck and the quick and easy ways you can make it look new again. So read on for our tips on how to remove decking paint like a pro.

How to Remove Decking Paint Using Natural Methods?

Whether your deck looks a little worse for wear or you’re ready for a change, removing paint from your deck can be a big project. If you’re planning to refinish your deck, you’ll need to remove any existing paint first. But instead of reaching for harsh chemicals, why not try one of these natural methods?

Boiling water

Removing deck paint with boiling water

Over time, decks can become faded and worn. One way to refresh a deck is to remove the old paint and stain. This can be a daunting task, but with a little elbow grease and some boiling water, it’s easy!

First, scrape off as much of the old paint as possible. Next, fill a large pot with water and bring it to a boil. Then, working in small sections, pour the boiling water onto the deck and scrub with a brush. The heat will loosen the paint, making it easy to remove.

Finally, rinse the deck with a hose and let it dry. This simple process will leave your deck looking new again.

Vinegar and baking soda

Removing deck paint with Vinegar and baking soda

If boiling water doesn’t trick, try vinegar and baking soda paste. Vinegar and baking soda are two inexpensive and effective options. Vinegar is a strong acid that can help to dissolve paint, while baking soda is a mild abrasive that can loosen paint from surfaces.

To remove paint from your deck using these household staples, mix equal parts vinegar and baking soda together to form a paste. Then, apply the paste to the paint using a brush or sponge and let it sit for several minutes.

Once the paint has had a chance to soften, you should be able to scrape it away easily with a putty knife. With a little elbow grease, you’ll have your deck ready for its new coat of paint in no time – and without breaking the bank.

Lime juice

Removing deck paint with Lime juice

Lime juice is a natural paint stripper that’s been used for centuries. It’s easy to find, relatively inexpensive, and gentle enough to use on most surfaces without damaging them.

To remove the paint with lime juice, apply it to the surface with a brush or spray bottle and let it sit for about 15 minutes. The acid in the juice will break down the paint, making it easy to scrape off. Be sure to wear gloves and eye protection, as lime juice can be corrosive.

So next time you tackle a painting project, reach for the lime juice and say goodbye to those old, peeling layers of paint. With a little elbow grease, you’ll have a brand-new deck.

Dried Citrus Peel

Removing Deck Paint with Dried Citrus Peel

Dried citrus peel is not only a delicious and zesty way to flavor your food, but it can also be used for various household purposes, like removing old paint from the deck.

That’s right – this natural ingredient can be a safe and effective way to strip away old paint without harsh chemicals or expensive cleaners.

Simply boil the peel in water, then use a brush to scrub the paint. The natural acids in the peel will break down the paint, making it easy to remove. Plus, you’ll be left with a fresh and citrusy smell. So don’t throw out those peels. Put them to good use and breathe new life into your old deck.

Pressure Washer

Removing deck paint with Pressure Washer

If you are not satisfied, use the above method to remove the paint from your deck and want to go for a more powerful method. This method is not gentle to your deck or the environment but will do the job quickly.

So, Remove paint from your deck using a pressure washer. The pressure washer technique can remove old paint quickly and easily, with minimal environmental impact.

Here’s how it works:

First, the old paint is loosened with a high-pressure stream of water. Then, a powerful blast of air removes the paint from the surface of the deck. The entire process takes just a few minutes, and there is no need for harsh chemicals or heavy equipment.

So if you’re looking for a natural way to remove old paint from your deck, the pressure washer technique is the way to go.

How to Remove the Old Paint from Deck by Using a Chemical Method?

Different types of chemicals available in the market can be used to remove the old paint from the deck. But before using any chemical, it is important to test it on a small area to ensure that it does not damage the deck.

One of the most commonly used chemicals for removing old paint from the deck is the paint stripper. It is a strong chemical that can dissolve the paint quickly.

Here is a guide you can use as a stripper to remove the paint from your deck:

What You’ll Need

Before you start removing paint from your deck, it’s important to gather the right supplies. Here’s what you’ll need:

  • Paint stripper
  • Scraper
  • Paintbrush
  • Goggles
  • Rubber gloves

Step 1: Remove Furniture and Accessories

The first step in removing paint from your deck is to clear away any furniture or accessories. This includes grills, tables, chairs, umbrellas, and planters. Once everything is cleared away, you’ll have a better view of the entire deck and can start prepping for paint removal.

Step 2: Apply the Paint Stripper

Next, it’s time to apply the paint stripper. Be sure to read the instructions on the product label before applying. In most cases, you’ll need to apply the stripper with a paintbrush or roller and then wait for it to work its magic.

After the stripper has had time to work, use a scraper to remove any remaining paint. You might need to apply a second coat of stripper if the first coat didn’t completely remove the paint.

Step 3: Rinse the Deck

Once you’ve removed all the paint, it’s time to rinse the deck. Use a garden hose to spray down the entire surface. This will remove any residue from the stripper and prep the deck for painting.

Step 4: Let the Deck Dry

After rinsing, let the deck dry completely before moving on to the next step. Depending on the weather, this could take a few hours or even a day.

Step 5: Apply a Fresh Coat of Paint

Now that the deck is prepped and ready, it’s time to apply a fresh coat of paint. Choose a high-quality exterior paint in the color of your choice. Then, follow the instructions on the can for the best results.

With these tips, you can remove deck paint like a pro in no time. So start today and enjoy your newly updated space.

Frequently Asked Questions

How long does it take for the paint stripper to work?

The paint stripper typically takes about 20-30 minutes to work. In most cases, you’ll need to apply the stripper with a paintbrush or roller and then wait for it to work its magic. Once the stripper has had time to work, use a scraper to remove any remaining paint.


Can I paint over a peeling deck?

Yes, you can paint over a peeling deck. However, removing all the loose and flaking paint first is important. This can be done with a paint stripper or a pressure washer. Once the old paint is removed, you can apply a fresh coat of paint. Be sure to choose a high-quality exterior paint and follow the instructions on the can for the best results.

What is the best time of year to paint a deck?

The best time of year to paint a deck is spring or fall. This is because the weather is typically milder during these times of the year, which can help the paint to dry and cure properly.

How often should I repaint my deck?

In most cases, you’ll need to repaint your deck every 3-5 years. However, this can vary depending on the type of paint you use and the conditions of the deck. If you live in an area with harsh weather conditions, you may need to repaint more frequently.

Conclusion

So how to remove decking paint? Whether tackling a small paint job or trying to strip years of paint from your deck, it’s important to do it right. By following the tips and tricks in this post, you’ll be able to remove that old paint without damaging your decking material. Be sure to visit our blog regularly for more helpful advice on all things home improvement.

Deck Staining: How Often is Necessary to Stain a Deck?

Deck Staining How Often is Necessary to Stain a Deck


Like most people, you probably spend a lot of time and effort maintaining the perfect lawn. But what about your deck? When was the last time you took the time to give it a little TLC? If it’s been a while, it might be time to consider deck staining.

Not only will this give your deck a fresh new look, but it will also help to protect it from the elements. But how often should you stain your deck? The answer may surprise you. In this blog, we’ll explore how often you should stain your deck, what type of stain to use, and more.

Read on to learn everything you need to know about deck staining.

7 Reasons Why You Should Stain Your Deck Regularly?

Doing regular maintenance for your deck is essential to keep it looking its best and to extend the life of the wood. One of the most important maintenance tasks to undertake is staining, which not only protects your investment but can drastically improve the look and value of your home.

Here are seven reasons why you should stain your deck regularly:

1. Preserve the Deck’s Beauty and Aesthetics

Regular staining helps maintain the appearance of your deck, enhancing the wood’s natural grain and color. It allows you to keep your outdoor living space looking fresh and inviting.

Prevent Fading and Discoloration

Staining every 2-3 years counteracts the effects of sunlight and weather on the wood, preventing fading and discoloration that can detract from its appearance.

Enhance Wood Grain

A well-maintained stain brings out the natural beauty of the wood grain, showcasing its unique patterns and characteristics.

2. Protect the Wood from Moisture Damage

Staining acts as a barrier against moisture, which can cause warping, rot, and decay if left unchecked.

Prevent Warping and Swelling

A protective stain keeps moisture from penetrating the wood, reducing the risk of warping and swelling that can lead to structural damage.

Reduce Mold and Mildew Growth

Stain inhibits the growth of mold and mildew by limiting the amount of moisture the wood can absorb.

3. Increase the Lifespan of Your Deck

Regular staining extends the life of your deck by protecting it from the elements and maintaining its structural integrity.

Minimize Cracking and Splitting

Staining helps preserve the wood’s elasticity, making it less prone to cracking and splitting over time.

Slow Down the Aging Process

By shielding the wood from damaging factors like sunlight and moisture, staining slows the natural aging process, prolonging the deck’s lifespan.

4. Improve Safety and Prevent Injuries

A well-maintained deck with an even, slip-resistant surface reduces the risk of accidents and injuries.

Reduce Slip Hazards

A quality stain can provide a slip-resistant surface, minimizing the risk of falls during wet weather conditions.

Prevent Splintering

Regular staining prevents the wood from drying out and splintering, which can cause painful injuries.

5. Save Money on Repairs and Replacement

Investing in routine staining can help you avoid costly repairs or even deck replacement in the long run.

Avoid Expensive Repairs

By maintaining the structural integrity of your deck, regular staining helps prevent damage that would require costly repairs.

Delay Deck Replacement

Extending the lifespan of your deck through staining means you won’t need to replace it as soon, saving you money in the long run.

Maintain Property Value

A well-maintained deck adds value to your property, making it more attractive to potential buyers.

Boost Curb Appeal

A beautifully stained deck enhances the overall appearance of your home, increasing its curb appeal.

Increase Resale Value

Homebuyers appreciate a well-maintained deck, which can translate into a higher resale value for your property.

7. Simplify Maintenance and Cleaning

Regular staining makes general maintenance and cleaning easier, as a well-protected deck is less prone to dirt buildup and staining.

Easier Dirt Removal

A deck with a protective stain is easier to clean, as dirt and debris are less likely to become embedded in the wood.

Minimize Staining and Discoloration

By preventing moisture absorption and providing a barrier against spills, staining helps resist discoloration and staining from spills and other sources.

How Often Do You Need to Stain a Deck? 11 Must-Know Tips for a Dazzling, Durable Deck

Staining a deck is an important part of basic maintenance and upkeep. Not only does staining help to protect the wood from sun damage, it also helps to enhance its aesthetics. Here are 11 must-know tips for keeping your deck looking dazzling and durable:

1. Determine the right staining frequency

Understand the factors affecting your deck’s staining requirements, such as climate, wood type, and exposure to sunlight. This will help you establish an appropriate staining schedule.

2. Choose the ideal stain type

Select a stain type that complements your deck’s wood and enhances its natural beauty. Consider factors like opacity, durability, and ease of application when making your decision.

3. Prioritize surface preparation

Properly prepare your deck’s surface by cleaning it thoroughly, removing any debris, and sanding if necessary. This ensures better stain adherence and long-lasting results.

4. Apply the stain correctly

Follow the manufacturer’s instructions for proper stain application, including recommended tools, techniques, and drying times. This will help you achieve a professional-looking finish.

5. Maintain your deck regularly

Perform routine maintenance tasks, such as sweeping, cleaning, and inspecting for damage. This helps prolong the life of your deck and reduces the need for frequent staining.

6. Protect your deck from harsh weather

Take measures to shield your deck from extreme weather conditions, like applying a water-repellent sealer or using furniture covers. This will minimize wear and tear on the stain.

7. Monitor sunlight exposure

Be mindful of your deck’s exposure to direct sunlight, as UV rays can cause the stain to fade more quickly. Consider adding shade structures to reduce sun damage.

8. Address stains and discoloration promptly

Treat any stains or discoloration on your deck immediately to prevent them from becoming permanent. Use appropriate cleaning solutions and techniques for the best results.

9. Inspect your deck for signs of wear

Regularly check your deck for signs of wear, like fading, peeling, or cracking. This will help you determine when it’s time to re-stain your deck.

10. Consult a professional if needed

If you’re unsure about any aspect of the staining process, consult a professional for guidance. They can offer expert advice and ensure your deck is properly maintained.

11. Keep a staining schedule

Establish a consistent staining schedule based on your deck’s specific needs. This will help you stay on track with maintenance tasks and keep your deck looking its best.

What Type of Stain Should You Use?

There are three main types of deck stains: solid and semi-transparent, and transparent, and each has its own set of benefits.

Solid Stain:


Solid Stain deck

As the name suggests, solid stain provides a completely opaque wood coverage. This means it will cover any stains, cracks, or blemishes on your deck. Solid stain is also great for decks that see a lot of wear and tear – like those exposed to direct sunlight or high foot traffic.

Semi-Transparent Stain:


Semi-Transparent Stain deck

Semi-transparent stain provides a less opaque wood coverage, allowing some of the natural grain and color to show through. This type of stain is best for decks that are in good condition – with only minor imperfections.

Transparent stain:


Transparent stain deck

Transparent stain is the thinnest of all stains and allows the most natural color and grain of the wood to show through. This type of stain is best for brand-new decks or those in excellent condition.

Read the label carefully before applying, no matter what type of stain you choose. Some stains require special prep work or can only be used on certain types of wood. By reading the label, you can be sure that you’re using the right type of stain for your deck – and that it will last for years to come!

Should you Strip your Deck before Staining it?

Decks are an extension of your home and provide a comfortable area to enjoy the outdoors. If you have a deck, you may wonder if you should strip it before staining it. While there are several pros and cons to consider, stripping your deck before staining it is generally the best option.

Not only will stripping remove any dirt, grime, or mildew accumulated on the surface, but it will also provide a smooth canvas for the stain to adhere to. In addition, stripping will help to ensure that the stain evenly covers the entire deck.

With all of these factors in mind, Stripping your deck before staining it is generally the best option for achieving optimal results.

How Can You Make Sure That Your Deck is Properly Stained?


How Can You Make Sure That Your Deck is Properly Stained?

Your deck is an important part of your home – it’s where you entertain guests, enjoy the outdoors, and make great memories. But what good is a deck if it’s not properly stained? A poorly stained deck can be an eyesore, and it can also be dangerous.

Here are three tips to make sure that your deck is properly stained:

1. Choose the right stain:

There are a variety of stains on the market, so it’s important to do your research and find the right one for your needs. If you have a wooden deck, you’ll want to choose a stain that will protect the wood from weathering and wear.

2. Apply the stain evenly:

Once you’ve chosen the right stain, it’s important to apply it evenly. Using a brush or roller to apply the stain in long, even strokes. Avoid applying too much or too little stain, which can lead to an uneven finish.

3. Allow the stain to dry completely:

After you’ve applied the stain, it’s important to give it time to dry completely. This process can take anywhere from a few hours to a few days, depending on the stain you’re using. Once the stain is dry, you can enjoy your beautiful, well-protected deck for years.

What Kind of Weather Conditions is Ideal for Deck Staining?


What Kind of Weather Conditions are Ideal for Deck Staining?

The best time to stain your deck is when the weather is not too hot and not too cold. If it is too hot, the stain will dry too quickly and not absorb the wood. If it is too cold, the stain will not dry and will be difficult to apply evenly.

The ideal temperature for staining a deck is between 70 and 80 degrees Fahrenheit.

In addition, the forecast must call for several days of dry weather. This will ensure the stain has plenty of time to dry and cure before bad weather sets in. Once you have found a few days with ideal weather conditions, clean your deck thoroughly before applying the stain. This will help the stain adhere better and give you a more even finish.

Frequently Asked Questions:

Q. Can I do anything to make my deck stain last longer?

A. Yes! There are a few things you can do to extend the life of your deck stain, including:

  • Choosing a high-quality stain
  • Staining in the spring or fall
  • Giving the stain ample time to dry and cure
  • Applying a sealer after the stain has dried

Q. What are the best deck stains?

A. The best deck stains are specifically designed for outdoor use. These stains are typically more durable and longer lasting than those meant for indoor use only. When choosing a deck stain, read the label carefully to ensure that it is appropriate for your needs.

Q. Can I stain my deck myself?

A. Yes! Staining a deck is a relatively easy DIY project. However, if you have never stained a deck before, it might be a good idea to hire a professional to do the job for you. This will ensure that the job is done correctly and that your deck is properly protected.

Q. What is the best way to remove deck stains?

A. If you need to remove an old deck stain, there are a few different ways you can do it. You can either use a power washer or a chemical stripper. Whichever method you choose, be sure to follow the instructions carefully to avoid damaging your deck.

Conclusion

Deck staining is a necessary evil for most homeowners. Staying on your deck regularly is important to protect it from the elements and keep it looking nice. 

However, many people don’t know how often they should stain their deck or what type of stain to use. In this blog post, we will answer those questions and provide you with some tips on how to make sure your deck is properly stained. Be sure to visit our blog regularly for more helpful home improvement tips.


How Often Do You Need to Re-stain Your Deck to Keep it Looking Good?

How Often Do You Need to Re-stain Your Deck to Keep it Looking Good

Love your deck. It’s the perfect place to entertain guests or relax after a long day. Your deck is an extension of your home, and you want to keep it looking its best. But over time, the elements can take their toll, leaving your deck needs a little TLC. That’s where a fresh coat of re-stains your deck.

Deck maintenance isn’t difficult, but it is important to keep up with it to maintain the look and integrity of your deck. With proper care and attention, your deck will be a beautiful and functional part of your home for years.

But how often do you need to re-stain your deck? The frequency you need to restrain your deck depends on a few factors. We will explain these factors and give you some guidelines for staining your deck.

So don’t wait too long to re-stain your deck, or you may start to see these problems.

When to Re-stain a Deck for Maximum Longevity?

When to Re-stain a Deck for Maximum Longevity?

There’s nothing like relaxing on a deck on a beautiful summer day. But if your deck looks weathered and worn, it can spoil the whole experience. So how often should you retain your deck to keep it looking its best?

Well, that depends on a few factors. The type of wood your deck is made of will affect how often it needs to be re-stained – cedar and redwood, for example, can last up to 5 years between staining, while pressure-treated lumber may only last 1-3 years. Also, if your deck is in a shady location or experiences a lot of foot traffic, it must be re-stained more frequently.

Generally speaking, you should plan on re-staining your deck every 2-3 years. By taking care of it regularly, you can keep your deck looking new for years. So pick up that brush and get to work! Your deck will thank you for that.

10 Warning Signs that Demand You to Restain Your Deck:

It’s that time of year again. The weather is warming up, and you can finally start spending more time outside. But before you invite your friends over for a barbecue, there’s one important task you need to take care of first: inspecting your deck.

Over the winter, your deck may have experienced some wear and tear, and it’s important to ensure it’s still in good condition before using it.

Here are 10 warning signs that indicate it’s time to restain your deck:

1. The color is faded or worn:

1. The color is faded or worn:

A fresh coat of stain can make even the most worn deck look new. If your deck looks faded or worn, it may be time to consider restaining. Not only will this improve the appearance of your deck, but it will also protect the wood from weathering and wear.

When choosing a stain color, consider both the existing colors in your backyard and the style of your home. A dark stain can give your deck a more dramatic look, while a light stain can help to brighten up a small space.

Whatever color you choose, test it on a small area of the deck first to see how it looks in different lighting conditions. With a little effort, you can easily transform your outdoor space with a new coat of deck stain.

2. There are cracks or splits in the wood:

2. There are cracks or splits in the wood:

Like most people, you take pride in your home and work hard to keep it looking its best. That’s why it’s frustrating when you notice cracks or splits in your deck. Not only is this an eyesore, but it’s also a sign that your deck needs maintenance.

But neglecting deck maintenance can lead to serious consequences – not only will it spoil the look of your outdoor space, but it can also cause dangerous splits and cracks in the wood.

Restaining your deck is a relatively easy process that can help restore its beauty and prolong its life. In addition, restaining your deck can also be a great way to add value to your home. So if you’re looking for a way to improve your curb appeal, don’t overlook the importance of re-staining your deck.

3. The finish is peeling or flaking:

3. The finish is peeling or flaking:

Is your deck looking a little worse for wear? If the stain or finish is peeling or flaking, it’s time to give it a new coat. Restaining your deck is easy to give your outdoor space a fresh look. Plus, it’s a great opportunity to customize the color and style of your deck to match your home’s exterior.

Whether you’re looking for a natural wood look or something bolder and more vibrant, a stain or finish is perfect for you. So don’t wait any longer – get started on restaining your deck today!

4. There’s mold or mildew present:

4. There's mold or mildew present:

How do you know when it’s time to re-stain your deck? One tell-tale sign is the presence of mold or mildew.

Mold and mildew are fungi that grow in moist, shady environments. They can cause discoloration, premature aging of wood surfaces, and deterioration of the wood itself. If left unchecked, mold and mildew can destroy a deck.

Fortunately, they are relatively easy to spot. If you see black, green, or brown patches on your deck, it’s time to break out the stain and sealer. Restaining and resealing your deck regularly can protect it from mold, mildew, and other damage. So don’t wait until your deck shows signs of wear – take proactive steps to keep it looking its best.

5. You can see bare wood:

Your deck is one of your favorite places to relax and enjoy the outdoors. But over time, harsh weather and constant foot traffic can take a toll on your deck’s finish. One way to tell if your deck needs to be refinished is by checking for bare wood.

Bare wood is susceptible to damage from moisture, sun, and dirt, so it’s important to Stain your deck as soon as you see bare wood. If you can see bare wood on your deck, it’s a sign that the stain has worn away, and it’s time to give your deck a new coat.

By staining your deck regularly, you can help protect it from the elements and extend its lifespan. So when you see bare wood on your deck, don’t wait to refinish it. Get started today and enjoy your beautiful, like-new deck for years.

6. The wood is dry or brittle:

6. The wood is dry or brittle:

One of the biggest signs that your deck is due for some TLC is when the wood starts to dry out and become brittle. This usually happens when the previous stain has worn off or wasn’t applied properly.

Wood exposed to direct sunlight and harsh weather conditions will suffer from premature aging, so it’s important to give it some extra love with a fresh coat of stain. Not only will this help your deck look nicer, but it will also protect the wood from further damage. 

Regular staining and maintenance will help to extend the life of your deck and ensure that it remains a beautiful and functional space for years to come. Don’t let a little neglect ruin your outdoor oasis- call a professional deck staining company today.

7. There are insects present:

When you see a wasp crawling around on your deck, it’s not just a nuisance insect- it’s a sign that your deck needs some TLC. That’s because wasps are attracted to the smell of wood stains, and they’ll often build their nests in areas that have been recently stained.

If you don’t want your deck to become a wasp magnet, it’s important to keep up with regular staining and maintenance. By keeping your deck clean and stain-free, you can help to discourage wasps and other insects from taking up residence.

So next time you see a wasp on your deck, take it as a sign that it’s time to break out the brush and give your deck a fresh coat of stain.

8. Water beads on the deck surface:

When you notice something strange: water beads on the surface of the wood instead of soaking in, you may not realize it, but this is a sign that your deck needs some maintenance.

When water beads on the surface of the wood, it means that the finish has worn away and the wood is no longer protected from the elements. Over time, this can lead to cracking, warping, and other damage. When you notice water beading on your deck, give it some attention. 

So, next time you see water beads on your deck, don’t reach for a towel – reach for a can of stain instead.

9. The stain is patchy:

Determining when your deck needs to be re-stained can be tricky. You don’t want to wait too long and end up with a patchy, dull surface. But you also don’t want to waste time and money on unnecessary work. So how can you tell when it’s time to re-stain your deck? One telltale sign is when the stain starts to look patchy.

This usually happens because the original coat of stain has worn away in high-traffic areas, exposing the bare wood beneath. If you catch the problem early, you may be able to simply spot-treat the affected areas. But if the stain is evenly faded across the entire surface, it’s probably time for a full restaining job.

9. The nails are popping up:

If you start seeing nails poking through the surface of your deck, that means the boards are shrinking (due to age or moisture) and causing them to loosen. This is a major safety hazard, so be sure to take care of it right away by restaining your deck and resetting any loose nails.

10. It just looks old:

Even if there aren’t any specific signs that indicate it’s time to re-stain, sometimes a deck just looks like it needs some refreshing! If you feel like your deck could use a facelift, go ahead and give it a new coat of stain. Following these tips, you can keep your deck looking great all season long!

Frequently Asked Questions:

When’s the best time to stain your deck?

The best time to stain your deck is in late spring or early summer when the weather is warm and dry. Because you want to make sure the stain has plenty of time to dry and cure before any bad weather hits.  Applying a deck stain in direct sun will cause the stain to dry too quickly and can result in premature stain failure.

How much does it cost to stain a deck?

The cost of staining a deck varies depending on the size of the deck, the type of stain used, and the geographic region. Generally, you can expect to pay anywhere from $0.25 to $0.75 per square foot for professional deck staining services.

Can you stain a deck in the rain?

It’s not advisable to stain a deck in the rain because the wet weather can cause the stain to streak or run. If you must apply stain in humid or rainy conditions, use a product designed for those conditions.

What is the best deck stain?

The best deck stain depends on your personal preferences and the condition of your deck. If you have a new deck, you’ll want to use a product that will protect the wood and help it resist weathering. For an older deck, you may want to use a stain that will revive the wood’s natural color.

Conclusion

Conclusion paragraph: Deck staining is a necessary evil for most homeowners. It’s an ongoing task that, when done correctly and at the right time, will keep your deck looking beautiful for years to come. We hope our blog post has helped you better understand when to re-stain your deck and what signs to look out for so that the process goes as smoothly as possible. Be sure to visit our blog regularly for more helpful tips like this!

Deck Stripper: How To Strip Paint From A Deck?

Stripping Old Paint from a Deck What You Need to Know

You’re staring at an old, peeling deck, and all you can think is “UGH.” You know the hours it will take to strip off all that paint, and you just don’t have the time or patience. But before you write off your deck as a lost cause, consider this: stripping paint can be therapeutic.

It’s a chance to get outside, listen to some music, and watch as the pile of old paint chips grows larger. Not to mention, once you’re done, you’ll have a brand-new deck ready for summer barbecues. So go ahead and roll up your sleeves—stripping paint may not be fun, but it’s worth it.

We have some tips for you if you strip peeling paint from your deck and don’t know where to start! In this blog post, we’ll go over what you need to know about how to strip old paint from a deck.

How to Strip Old Paint off a Deck without Damaging the Wood? 7 Steps:

Most people don’t believe stripping paint from a deck is possible without damaging the wood. Even more, people think it’s a huge project that will take days to complete. But with the right tools and a little elbow grease, anyone can strip an old deck in no time.

There are a few things you need to know to do the job right. With just a little preparation, you can strip away the old paint without damaging the wood beneath.

Here’s how:

1. Assess the condition of your deck:

1. Assess the condition of your deck:

Don’t let your deck become an eyesore. A few simple steps in the assessment process can mean the difference between peeling paint and a beautiful repainted deck. By taking the time to evaluate the condition of your deck, but how?

Here’s what to look for: 

  • First, check for any brittle or flaking paint. This is a sure sign that it’s time to strip old paint and apply a new coat of paint. Be sure to scrape away the old paint before applying a new layer.
  • Second, look for any cracks or splits in the wood. These need to be repaired before painting, as they will only worsen over time.
  • Finally, check the ledger board – the board that attaches the deck to your house – to ensure it is securely fastened. If it isn’t, it could cause serious damage to your home if left unchecked. 

By taking these simple steps, you can assess the condition of your deck and make sure it’s in good shape before you start stripping away the old paint.

2. Choose the Right Paint Stripper:

Paint strippers are not all created equal. Different formulas are better suited for different types of paint and surfaces. Choosing the wrong paint stripper can lead to a lengthy and frustrating stripping process or even damage to the surface beneath the paint.

Always choose the standard quality paint stripper for the job to avoid further damage. There are two main types of paint strippers.

Chemical stripper:

Chemical stripper:

Chemical strippers are made with strong acids or bases that dissolve paint, varnish, and other finishes. Chemical strippers are better for removing multiple layers of paint. Chemical strippers are typically faster and more effective, but they can be harsh on the environment and difficult to clean up.

Mechanical stripper:

Mechanical stripper:

On the other hand, mechanical strippers use abrasion to strip off old paint. Mechanical strippers are better for stripping a single layer of paint. Mechanical strippers are slower and require more elbow grease, but they are gentle on the surroundings and easy to tidy up afterward.

Now that you know the difference between chemical and mechanical strippers, you can choose the right one for your project.

3. Protect your plants:

Most people know you should strip the paint off your deck before repainting it. However, many people don’t realize that this process can be dangerous for your plants. Paint strippers typically contain chemicals that can seep into the soil and harm your plants.

In addition, the stripping process can generate a lot of dust, damaging your plants. Therefore, it’s important to take some simple steps to protect your plants before you start stripping the paint from your deck.

Covering your plants with plastic sheeting or tarps can help ensure that they stay safe and healthy during the stripping process. In addition, it’s a good idea to wet down the area around your plants before you start stripping the paint.

4. Apply the stripper according to the manufacturer’s directions:

Applying the stripper according to the manufacturer’s directions is vital for ensuring you get the most out of your purchase. The stripper contains a chemical that will eat through the paint, so it is important to be very careful when using it.

Make sure to read the instructions thoroughly before beginning the stripping process. In addition, be sure to wear gloves and a mask to protect yourself from the fumes. Taking these precautions will help you to strip the paint quickly and safely.

5. Allow the stripper to work its magic:

Once you’ve applied the stripper, let it sit for the time specified on the product label. This will give it time to break down the bonds between the paint and the wood so that it can be easily removed.

So with this step, be patient and wait for the stripper to do its job. Depending on the type of paint and the condition of your deck, this could take anywhere from a few minutes to a few hours.

6. Scrape away the old paint:

Applying the stripper to the surface of your deck and allowing it to sit for the recommended amount of time will soften the old paint so it can be easily scraped away.

To remove the paint, you can use a putty knife, paint scraper, or wire brush. For areas that are difficult to reach, you may need to use a power washer on a low setting. But be careful not to damage the wood.

7. Wash away any residual stripper and paint particles:

Once you’ve removed all of the old paint, you’ll need to wash away any residual stripper and paint particles. The best way to do this is with a garden hose or pressure washer. The garden hose and pressure washer will greatly remove any leftover stripper or paint from your deck surface.

But a pressure washer is the most effective way to remove the stripper. Pressure washing your deck will also help to remove any loose paint chips or debris clinging to the surface. Once you’ve pressure washed your deck, rinse it thoroughly with clean water before allowing anyone on it.

How Much Does it Cost to Strip Paint From a Deck?

Whether you’re planning to sell your home or simply want to increase its curb appeal, stripping paint from your deck is a project that’s worth considering. Not only will it give your deck a fresh look, but it will also help to protect the wood from further damage. But how much does it cost to strip paint from a deck? The answer may surprise you.

On average, it costs between $50 and $100 to strip paint from a deck. However, the actual cost will depend on the size of the deck and the type of paint used. For example, if the paint is oil-based, it will be more difficult to remove than if it is water-based. Additionally, if the deck is large or has multiple levels, the project will likely be more expensive.

If you’re considering stripping paint from your deck, get several estimates before deciding on a contractor. With a little research, you can find a qualified professional who can get the job done quickly and efficiently. And while the upfront cost may be higher than you expected, the long-term benefits are worth it.

Is sanding Necessary after Stripping Old Paint from a Deck?

Spring is the perfect time to tackle that home improvement project you’ve been putting off all winter. And what could be more satisfying than stripping away the layers of old paint from your deck, revealing the beautiful wood grain beneath? But before you start slapping on a new coat of paint, you need to ask yourself one important question: is sanding necessary after stripping old paint from a deck?

On the one hand, sanding can help to smooth out any rough edges and unevenness left behind by the stripping process. This can give your deck a more polished and professional look. On the other hand, sanding can be a time-consuming and difficult task.

And if you’re not careful, you could damage the wood. So before you start your next home improvement project, make sure you take the time to sand the deck. It will save you time and hassle in the long run.

Frequently Asked Questions:

Q. How long does it take to strip paint from a deck?

A. The time it takes to strip paint from a deck will vary depending on the size of the deck and the type of paint used. For example, if the paint is oil-based, it will be more difficult to remove than if it is water-based. Additionally, the project will likely take longer f the deck is large or has multiple levels. In most cases, it takes between two and four hours to strip paint from a deck.

Q. Can I strip paint from my deck myself?

A. Stripping paint from a deck is a fairly easy do-it-yourself project. However, it is important to note that the process can be time-consuming and labor-intensive.

If you’re considering stripping paint from your deck, get several estimates before deciding on a contractor. With a little research, you can find a qualified professional who can get the job done quickly and efficiently.

Q. How can I prevent my deck from being damaged during the stripping process?

A. The best way to prevent damage to your deck is to hire a professional contractor with experience stripping paint from decks. Additionally, be sure to sand the deck before you start the stripping process. This will help to smooth out any rough edges and unevenness left behind by the stripping process.

Q. Does vinegar remove paint from wood?

A. Vinegar is a natural, effective way to remove paint from wood surfaces. To use vinegar to remove paint, simply soak a rag in vinegar and then rub the paint off the wood. Simply apply vinegar to the area with a cloth or brush, and let it sit for a few minutes. Then, use a putty knife or other scraper to remove the paint. For stubborn areas, you may need to repeat the process.

Conclusion

Stripping old paint from a deck can be a daunting task, but it doesn’t have to be. With the right tools and knowledge, you can do it yourself and avoid damaging the wood in the process. We’ve outlined seven steps to help make the stripping process as easy as possible, plus we’ve included some tips on how to save money while doing it. Be sure to visit our blog regularly for more helpful DIY tips!

How to Choose a Deck Stain to coordinate with your house?

How to Choose the Perfect Deck Stain to Coordinate Your House

First impressions are important, and your home is no exception. When guests come over, the first thing they see is your house. You want to make sure that it looks amazing, from the paint job to the landscaping. But what about your deck stain? If it’s peeling, it can bring down the whole look of your home.

Choosing the perfect deck stain is essential to maintaining curb appeal. But with so many different colors and brands on the market, how do you know which one to choose? 

Fear not. We’re here to help.

If you’ve decided to stain your deck to improve its appearance, you may be wondering which type of stain to use. In this article, we’ll give you tips on choosing the perfect deck stain to coordinate with your house. We’ll cover everything from color to type, so you can make sure your deck looks its best.

Now it’s time to get started.

What Factors To Consider When Choosing A Deck Stain:

Creating the perfect outdoor living space starts with choosing the right deck stain. But with all the different brands, formulas, and shades available, how do you know which one is right for you? Here are a few factors to keep in mind as you make your selection:

1. The type of wood:

The type of wood deck

When choosing a deck stain, there’s more to consider than the color. The type of wood is important to think about as well. Different woods have different porosity levels, meaning some absorb the stain more readily than others.

Cedar is a very popular deck because it’s naturally resistant to rot and decay. However, cedar can also be tricky to stain because it has a high degree of porosity. The stain can be easily absorbed, leading to uneven results.

On the other hand, pine is a softer wood with a lower degree of porosity. This makes it easier to work with, but it also means that the results may not be as long-lasting.

Ultimately, the best way to choose a deck stain is to consult a professional who can help you select the right product for your specific needs.

2. The desired look:

The desired look wood deck

You also need to think about the desired look of your deck. Are you looking for a natural finish or something more colorful?

If you want a natural look, you’ll likely want to choose a stain that is close to the color of the wood. This will give your deck a warm and inviting appearance. So you can enjoy your outdoor living space.

On the other hand, if you’re looking for something more colorful, you have a few different options. You can choose a stain a few shades darker than the wood or go with a bolder color like red or blue. Remember that dark stains can absorb heat, so they may not be the best choice for areas with many suns.

3. The Weather:

The Weather wood deck

The weather conditions in your area will also play a role in choosing the right deck stain. If you live in an area with high humidity, you’ll want to choose a longer-lasting formula that won’t fade or wash away easily. If you live in a dry climate, however, you may be able to get away with a less durable formula. Remember to reapply more frequently to maintain the color and protect your wood from fading.

4. Your Budget:

Your-Budget-wood-deck

Of course, the cost is always going to be a factor when choosing any type of product for your home. With deck stains, you’ll find a wide range of prices depending on the quality and durability of the product.

If you’re working with a limited budget, choose a basic formula that will still provide adequate protection for your wood. However, if you’re willing to spend a little extra, there are high-end formulas that will last longer and provide better protection against UV rays and other weather damage.

5. The level of protection:

The level of protection-wood deck

Another important factor to consider is the level of protection you need. Some stains offer more protection than others, so it’s important to choose a product that will meet your specific needs.

If you have a deck exposed to the elements, you’ll want to choose a stain that offers more protection against UV rays and moisture. On the other hand, if your deck is in a more sheltered location, you may get away with a less durable formula.

Keep these factors in mind as you shop for deck stains, and you’ll be sure to find the perfect product to coordinate with your home’s color scheme.

6. Your Personal Style:

Your Personal Style: wood deck

In the end, it’s important to choose a deck stain that reflects your personal style. After all, this is your outdoor living space, and you should enjoy looking at it!

If you prefer a more natural look, choose a stain that is close to the color of the wood. If you’re looking for something more colorful, go with a bolder shade. And if you’re working with a limited budget, choose a basic formula that will still provide adequate protection.

No matter what your personal style may be, there is a deck stain out there that is perfect for you. So take your time and find the right product to coordinate with your home’s color scheme.

Ideas for What Color to Stain Your Deck:

Deciding what color to stain your deck can be a tough choice – so many options! But don’t worry. We’ve got you covered. Here are a few great ideas for what color to stain your deck:

Mahogany:

Mahogany is an excellent choice for staining your deck. This rich, reddish-brown color can give any deck a high-end look and is also surprisingly versatile. Mahogany stains can range from light and natural-looking to dark and dramatic, so you can easily find a shade that suits your style.

In addition, mahogany is a durable and long-lasting material, so you can enjoy your stain for years to come. If you’re ready to upgrade your deck, mahogany is the perfect color to start with.

Red:

Red is the perfect color for staining your deck this summer. Not only does it add a touch of vibrancy to your outdoor space, but it also helps to mask any dirt or grime that may have accumulated over the winter months.

In addition, red is an excellent color for hiding any imperfections in the wood, giving your deck a flawless finish. So if you’re looking for a color that will make your deck stand out from the rest, look no further than red.

Brown:

Brown is an excellent color for deck staining because it is neutral and goes with anything, it is classic and timeless, and it hides dirt and wears well. When choosing a color for deck staining, brown is often overlooked in favor of more trendy colors.

However, Brown has several advantages that make it the perfect choice for many homeowners. First, brown is a neutral color that can be paired with any other color. This makes it easy to coordinate with your existing furniture and decor.

Second, brown is a classic color that will never go out of style. It also can hide dirt and wear better than lighter colors. For these reasons, brown is an excellent choice for deck staining.

Gray:

Love spending time outdoors on your deck but hate the thought of maintaining it? You’re in luck! A gray deck stain is an excellent low-maintenance option that will keep your deck looking sharp while sparing you the effort of constant upkeep.

And it’s not just low-maintenance – a gray deck stain also has several other great benefits. For one thing, it’s highly resistant to fading, so you won’t have to worry about your deck looking dull and drab after a few months in the sun.

Plus, gray is a neutral color that will complement any home style. Whether your taste runs traditional or contemporary, a gray deck stain will give your outdoor space the perfect finishing touch.

So why wait? Give your deck the makeover it deserves with a gray deck stain today!

Black:

From the classic black of an oil stain to the modern sophistication of a black semi-transparent, there’s no denying that black deck stains make a bold statement. But beyond being an eye-catching color, black is also an excellent choice for protecting your deck against the elements.

Black deck stains are absorbed more readily by the wood, providing better coverage and longer-lasting protection. In addition, black deck stains are less likely to fade in sunlight, ensuring that your deck will maintain its handsome appearance for years to come.

So, if you want to make a strong impression, consider choosing a black deck stain for your next project.

Blue:

Blue is the bold color for deck staining because it creates a calming and inviting atmosphere. Blue has been shown to reduce stress and anxiety, making it the perfect choice for a deck that will be used for entertaining or relaxation.

Additionally, blue is a versatile color that can be paired with nearly any other shade, making it easy to find complementary furniture and accessories. And because blue is such a popular color, it is easy to find deck stains in various shades to create the perfect look for your home.

So if you’re looking for a color that will create a serene and inviting outdoor space, blue is a perfect choice.

Green:

If you’re thinking about deck staining and are stuck on which color to choose, consider going green. Green is ideal for several reasons. For one, it’s perfect for complementing or continuing a nature-themed backyard design. A green-stained deck will feel like an extension of your garden instead of a jarring contrast.

Additionally, green is a calming color that can help create a relaxing ambiance on your deck – perfect for summer evenings spent chatting with friends or family. And finally, if you have concerns about the environment, you’ll be happy to know that green stains are typically made from natural ingredients like plant oils and beeswax.

So when you go green with your deck stain, you’re not just making a stylish choice – you’re also making a sustainable one.

Frequently Asked Questions:

Q. What is the best way to apply deck stain?

A. The best way to apply deck stain is with a brush or roller. This will ensure even coverage and prevent any streaks or drips. If you’re using a brush, choose one with synthetic bristles, as they are less likely to shed and leave behind bristles in the stain.

Q. Can I use deck stain on my fence?

A. Yes, you can use deck stain on your fence. Just be sure to choose a product specifically designed for exterior use and follow the manufacturer’s instructions for application and drying times.

Q. Will deck stain protect my wood from rot?

A. No, deck stain will not protect your wood from rot. However, it will help to prevent water and sun damage which can lead to rot. If you’re concerned about rot, be sure to choose a product that contains UV inhibitors.

Q. How often do I need to reapply deck stains?

A. The frequency with which you’ll need to reapply deck stain depends on the type of product you choose and the conditions in which your deck is exposed. Generally speaking, oil-based stains will need to be reapplied more often than water-based stains.

Conclusion:

While there are many factors to consider when choosing the perfect deck stain, we hope this guide has helped you narrow down your options. With so many beautiful colors and textures available, it can be hard to choose just one! Be sure to visit our blog regularly for more helpful tips on how to improve your home both inside and out. Happy staining!

How Long should you Wait to Stain Your Deck After Cleaning?

How Long should you Wait to Stain Your Deck After Cleaning

You just spent hours scrubbing your deck clean and now you’re ready to stain it so it will look nice for the summer. But how long should you wait to stain your deck after cleaning it? If you don’t wait long enough, the stain won’t adhere properly and will start to peel.

If you wait too long, the wood will start to warp and crack. Luckily, we’ve put together a quick and easy guide on how long to wait to stain your deck after cleaning it.In this guide, we’ll provide you with the exact time you should wait to stain your deck. So you can get the perfect result every time.

What is the Best Time to Stain Your Deck after it has been Cleaned?

What-is-the-Best-Time-to-Stain-Your-Deck-after-it-has-been-Cleaned

You just spent hours cleaning your deck. You washed away all the dirt, debris, and old stain that’s been sitting there for a long. Now’s time for the fun part: choosing a new color to breathe some life back into your deck.

But before you can enjoy your handiwork, you need to know how long to wait before staining your deck. The experts say it’s best to wait at least 24-48 hours after cleaning your deck before applying any type of stain or sealant. This will give the wood time to dry completely so that the stain or sealant can penetrate evenly and provide maximum protection against the elements.

So while you may be tempted to apply a fresh coat of stain as soon as the surface is dry, resist the urge and wait patiently for 24-48 hours. Your deck will thank you for it!

What Factors Impact the Time it Takes for a Deck to Dry after being Cleaned?

What Factors Impact the Time it Takes for a Deck to Dry after being Cleaned

Cleaning a deck is often a time-consuming task that requires hours of waiting for the surface to dry. But why does it take so long? And is there anything you can do to speed up the process? Let’s take a closer look at what factors impact the amount of time it takes for a deck to dry after being cleaned.

The type of wood:

The wood used in the deck can affect the drying time after cleaning. Hardwoods such as teak and mahogany typically take longer to dry than softwoods such as pine and spruce. This is because hardwoods are denser and absorb less water. As a result, they require more time to dry fully.

The average time required for a deck of different types of wood to dry is as follows :

  • Hardwoods: 24-48 hours
  • Softwoods: 12-24 hours

The weather:

The weather also plays a role in how long it takes for your deck to dry after being cleaned. The drying process will accelerate if it’s sunny and warm outside. However, the drying time will be extended if it’s cloudy or cool.

If you clean your deck on a sunny day with temperatures in the 80s, the deck will likely be dry within 12 hours. However, if you clean your deck on a cloudy day with temperatures in the 60s, it could take up to 24 hours for the surface to dry completely.

The size of the deck:

The size of your deck also impacts the time it takes for the surface to dry after being cleaned. A small deck will take less time to dry than a large deck. This is because there is less surface area for the water to evaporate from.

As a general rule of thumb, you can expect a small deck (up to 200 square feet) to take 6-12 hours to dry, while a large deck (500 square feet or more) could take up to 24 hours to dry completely.

The type of cleaner used:

Finally, the type of cleaner used can also affect the time it takes for a deck to dry after cleaning. Many types of cleaners contain chemicals that cause the wood to swell. This can prolong the drying time as the wood needs time to shrink back to its original size.

If you’re unsure about the cleaner you use, it’s always best to wait at least 24 hours before applying any type of stain or sealant. This will give the wood plenty of time to dry completely.

How Can You Tell if Your Deck is Completely Dry?

How Can You Tell if Your Deck is Completely Dry

One of the best ways to tell if your deck is completely dry is to conduct a simple test. First, pour a small amount of water onto the surface of the deck. If the water beads up and rolls off, the surface is still wet and needs more time to dry.

If the water soaks into the wood, the deck is dry and ready to be stained or sealed. So stain your deck with the right tools and color.

Another way to tell if your deck is dry is to check the temperature of the surface. If the surface is warm to the touch, then it’s still in the process of drying and needs more time. If the surface is cool to the touch, then it’s likely that the deck is completely dry.

Finally, you can also check for mold or mildew growth. If mold or mildew is present, the deck is still wet and needs more time to dry. Once your deck is completely dry, you can apply a fresh coat of stain or sealant. But be sure to wait at least 24 hours before cleaning!

How Can You Clean the Deck in an Hour or Less?

When you decide to stain your deck, it’s important to clean the deck first. This will ensure that the new stain or sealant adheres properly and lasts longer. Cleaning involves the removal of all dirt, debris, and old stain from the surface of the wood. So the deck is ready for a new coat of stain.

There are a few different ways to clean your deck, but the most important thing is to choose a method that will be effective and efficient. Here are a few popular ways to clean your deck:

Pressure Washer:

Pressure Washer deck

Pressure washers are quickly becoming a must-have tool for anyone who owns a home. They are an easy and effective way to clean everything from driveways and sidewalks to decks and patios. And, because they use high-pressure water instead of harsh chemicals, they are also much better for the environment.

How does a pressure washer work?

Here’s a step-by-step guide to using a pressure washer to clean your deck: 

First, you need to set up your pressure washer. Make sure that you have all of the necessary hoses, connectors, and nozzles. Once everything is properly connected, turn on the water supply and start the engine.

Next, you need to choose the right nozzle for the job. There are different nozzles for different purposes, so selecting the one that best removes the dirt and grime from your deck is important. Depending on the type of decking material, you may also need to use a different nozzle setting.

Once you have the right nozzle attached, hold down the trigger and move the nozzle in a steady back-and-forth motion across the surface of your deck. Start at one end of the deck and work until you’ve covered the entire area. Be careful not to point the nozzle directly at any spot for too long, as this can damage your decking material.

After washing your deck, turn off the power washer and disconnect all the hoses. Once everything is disconnected, rinse off your deck with fresh water.

Bleach:

If you’re looking for a strong cleaning solution, bleach may be the answer. Bleach is a powerful disinfectant and can kill mold, mildew, and algae. It can also remove stubborn stains that pressure washing alone cannot remove.

However, bleach is also a corrosive material, so it’s important to use it with caution. Read the manufacturer’s instructions carefully before using bleach on your deck.

Deck Cleaner:

If you don’t want to use bleach, many different deck cleaners on the market can be just as effective. Deck cleaners come in both liquid and powder form and are usually mixed with water before being applied to the surface of the deck.

A deck cleaner is a great option if you’re looking for an easy and effective way to clean your deck. However, it’s important to read the manufacturer’s instructions carefully before using any type of cleaner on your deck.

Frequently Asked Questions:

Q. Can I clean and stain my deck on the same day?

A. We don’t recommend it. Let the deck dry for at least 24 hours after cleaning before applying the stain. If you applied a sealer or topcoat, wait 30 days before staining. If rain is in the forecast, reschedule your project so you can apply the stain on a dry day.

Q. How long do I need to wait to stain my newly installed deck?

A. If your deck is made of pressure-treated lumber, wait at least six months before staining. This gives the lumber time to dry out so the stain will be absorbed better.

Q. Do I need to sand my deck before staining?

A. That depends. If the deck is new, you probably won’t need to sand it. If it’s an older deck, you might want to sand it to rough the surface so the stain will be absorbed better.

Conclusion:

Deck cleaning and staining is a process that should be done periodically to ensure the longevity of your deck. We’ve outlined some tips on how long your deck will dry, but it is important to remember that depending on the climate and environment, these times may vary. Check our blog regularly for more tips on keeping your home looking beautiful all year round!

How Long Does A Wood Deck Last Without Pressure Treated?

How Long Does a Pressure Treated Wood Deck Last

You’re thinking of building a pressure-treated wood deck. But before you start nailing boards to your joists, you might be wondering: how long does a pressure-treated wood deck last? The answer, unfortunately, is not as straightforward as you might hope.

A pressure-treated wood deck can last a long time if it is properly maintained. But how long does a pressure-treated wood deck last? This is a question that many people ask when they are thinking about building a new deck.

While the answer may vary depending on the individual, some general tips can help you prolong the life of your wood deck pressure-treated. In this blog, we guide you about the average lifespan of pressure-treated wood decks and how you can make yours last even longer!

What is the Expected Life Span of a Pressure-Treated Wood Deck?

What is the Expected Life Span of a Pressure-Treated Wood Deck

Most people have heard of pressure-treated wood, but they may not know exactly what it is. Pressure-treated wood is lumber infused with chemicals to help it resist rot, insects, and weathering. This type of wood is often used for outdoor projects like decks, porches, and playgrounds.

Pressure-treated wood is a popular choice for decks because it’s durable and long-lasting.

Because pressure-treated wood is so durable, it has a longer lifespan than other types of lumber. In fact, pressure-treated wood can last up to 40 years if it is properly maintained!

However, the average lifespan of a pressure-treated wood deck is 15-20 years. But with proper care and maintenance, your deck can last even longer!

What Factors Influence the Duration of a Wood Deck Treated at a High Pressure?

What Factors Influence the Duration of a Wood Deck Treated at a High Pressure?

When trying to determine how long your pressure-treated wood deck will last, there are a few factors that you need to take into account. These include:

The type of pressure-treated wood:

There are two types of pressure-treated wood on the market today: CCA and ACQ.

  • CCA (Chromated copper arsenate) is the most common type of pressure-treated wood.
  • ACQ (alkaline copper quat) is a newer type of pressure-treated wood that is less toxic than CCA.

When choosing pressure-treated wood for your deck, be sure to choose the one that is right for your needs.

The climate:

The climate plays a big role in how long a pressure-treated wood deck will last.

If the deck is in a hot and humid climate, it may not last as long as it would in a cooler climate. The same is true for a cold climate. In a colder climate, the deck may not last as long in a colder climate because the wood may crack from the cold weather.

Pressure-treated wood is also more durable than non-pressure-treated wood. The pressure-treated wood is excellent for decks in regions with high humidity and significant precipitation.

The amount of sunlight:

The-amount-of-sunlight

Another factor that can influence the lifespan of your pressure-treated wood deck is the amount of sunlight it receives. When pressure-treated wood is exposed to direct sunlight, it will start to fade and turn gray. If you want your deck to last a long time, choosing a location that gets partial sun or shade is important.

The amount of traffic:

The amount of traffic:

The amount of traffic your deck gets will also affect how long it lasts. A deck that gets a lot of foot traffic will not last as long as a deck that gets less traffic. If you have a deck that gets a lot of foot traffic, it’s important to choose pressure-treated wood rated for heavy traffic.

The type of soil:

Another factor to consider is the soil your deck is built on.

  • If the soil is too sandy, it can cause the deck to shift and settle over time.
  • If the soil is too clay-like, it can cause the deck to crack and heave.

It’s important to choose a pressure-treated wood that is rated for your soil type.

Proper care and maintenance:

One of the most important factors in determining how long your pressure-treated deck will last is proper care and maintenance. It’s important to clean your deck regularly to remove dirt, leaves, and other debris.

Proper cleaning will help to extend the lifespan of your deck. Cleaning involves using a mild soap and water solution. You can also use a pressure washer to clean your deck, but be sure to use the low setting, so you don’t damage the wood.

Should you Paint or Seal your Pressure-treated Wood Deck?

Should you Paint or Seal your Pressure-treated Wood Deck?

You just had a beautiful pressure-treated wood deck, and now you want to protect your investment. You’ve heard that painting or sealing the deck will prolong its life, but you’re unsure which route to go.

Both have their benefits, so it comes down to personal preference. If you want a low-maintenance option, sealing is the way to go. You’ll still need to clean your deck regularly, but you won’t have to worry about chipping or fading paint.

On the other hand, painting provides a more finished look and allows you to personalize your space. If you opt for this route, use high-quality paint and apply several coats for optimal protection.

Ultimately, whether to paint or seal your deck comes down to what you’re looking for in terms of appearance and maintenance.

Is your Pressure-treated Wood Deck Rotting?

Have you ever gone to sit on your beautiful pressure-treated wood deck only to have the whole thing collapse beneath you? Or maybe you’ve noticed that the boards are starting to warp and rot, and you’re wondering why. It’s a common problem with pressure-treated wood decks, and it’s happening for a few different reasons.

First, the chemicals used to treat the wood are designed to repel water, but over time they break down and absorb water instead. This causes the wood to swell and eventually warp and rot.

In addition, the chemicals make the wood more susceptible to fungal growth, which can also lead to rot. So if you’re thinking about building a wood deck, be warned – it may not be as long-lasting as you hope, but proper care and maintenance can help to extend its lifespan.

Will vinegar stop wood rot?

Vinegar is a common household product used for cleaning, cooking, and gardening. But did you know that it can also be used to stop wood rot?

Wood rot is caused by a fungus that breaks down the cellulose in wood, and vinegar is an effective fungicide. Simply mix equal parts vinegar and water in a spray bottle and apply it to the affected area. For best results, use white vinegar rather than apple cider or other vinegar.

You can also use vinegar to clean your deck regularly. This will help to prevent the build-up of dirt, leaves, and other debris that can lead to rot. Simply mix a solution of vinegar and water in a bucket and use it to scrub your deck clean.

So if you’re looking for a natural way to stop wood rot, give vinegar a try. You may be surprised at how well it works.

Frequently Asked Questions:

Q. How often should I clean my pressure-treated wood deck?

A. That also depends on a few things, but as a general rule of thumb, you should aim to clean your deck at least once a year. This will help to keep it looking its best and prevent any build-up of dirt or grime that could potentially damage the wood.

If you live in an area with a lot of pollen or other airborne debris, you may need to clean your deck more often. And if you have any pets that use the deck, you’ll definitely want to make sure you give it a good cleaning regularly!

Q. What’s the best way to clean my pressure-treated wood deck?

A. The best way to clean your deck will depend on what type of cleaner you use. If you opt for a chemical cleaner, follow the instructions carefully and always wear gloves and a mask to protect yourself from inhaling any fumes.

You can also use a pressure washer to clean your deck, but be careful not to damage the wood. If you’re unsure how to use a pressure washer, it’s best to hire a professional.

Conclusion:

A pressure-treated wood deck can last many years if properly taken care of. The duration of a wood deck treated at high pressure will be influenced by various factors, such as the type of lumber used, the climate, and how well it is maintained. It is important to keep in mind that proper maintenance includes regular cleaning and sealing. Be sure to visit our blog regularly for more tips on taking care of your outdoor spaces!

How Long After Rain Can You Paint Wood Deck? Expert Guide

How Long Do You Have to Wait Before Painting Your Deck After the Rain

After a long day of rain, you might be anxious to get outside and enjoy the fresh air. However, before painting your deck, you break out the paintbrush; it’s important to give your deck a chance to dry. Otherwise, you could end up with a peeling mess.

But how long should you wait before painting your deck after the rain? The answer may surprise you. In this blog post, we’ll explore how long to wait after the rain. We also provide tips on what to do if you can’t wait long.

However, before we get started, let’s take a quick look at why it’s important to wait.

After it Rains, How Long Should You Wait for Deck Paint?

After it Rains, How Long Should You Wait for Deck Paint?

After a long rain, your deck might be in desperate need of a new coat of paint. But before you get to work, it’s important to know how long you should wait for deck painting.

If you paint too soon, the paint will not adhere properly to the wet surface and could start to peel.

On the other hand, if you wait too long, the wood will start to warp and rot. The key is to strike a balance between these two extremes.

Generally, it’s best to wait at least 24 to 48 hours after rain before painting your deck. This will give the wood time to dry without leaving it vulnerable to damage.

Once you’ve waited the appropriate amount of time, take proper precautions to protect yourself from paint fumes and debris. With a little patience and preparation, you can give your deck a fresh new look that will last for years to come.

What is the Best Time to Paint the Deck?

What is the Best Time to Paint the Deck?

Most people believe that painting the deck is a summertime chore. Summertime, however, is the worst time to paint the deck. The hot sun can cause the paint to dry too quickly, leading to patchy coverage.

But any experienced painter will tell you that the fall season is the best time to paint the deck. The reason for this is twofold.

  • First, the weather is more cooperative in the fall. The days are typically sunny but not too hot, and the evenings are cool but not cold. This makes for ideal painting conditions.
  • Second, in the fall, there is less foot traffic on decks, which means that the paint will have a chance to cure before it gets too much wear and tears fully.

Ultimately, the best time to paint your deck is whenever it works best for you. But if you’re looking for the ideal conditions, aim for a day with low humidity and temperatures between 50 and 80 degrees Fahrenheit.

Following this advice, you can keep your deck looking great for years.

Dos and Don’ts for Painting Your Deck after Rain:

Spring is perfect for giving your deck a fresh coat of paint. However, if you don’t take the right precautions, you could end up in a mess. Here are a few dos and don’ts to help you get the job done right.

Do wait for a dry day:

The paint will be less likely to peel when your deck is dry because the dry deck will provide a better surface for the paint to adhere to. So paint goes on smoothly and evenly.

But after the heavy rains, you should let the deck dry for at least 24 hours before starting to paint. Because the wood can swell, and the paint will not go well on a wet surface. The wet surface of the deck will also cause the paint to thin out and will not give you even coverage.

If you can’t wait 24 hours, you can use a hairdryer or space heater to dry the deck more quickly. Just be sure to keep the heaters away from flammable materials, such as leaves or debris. You have to be careful that you don’t want to fire.

Don’t use a pressure washer:

Don't use a pressure washer:

It might seem like a pressure washer would speed up the drying process, but it can damage the wood. The high-pressure stream of water can strip away the natural oils from the wood, leaving it susceptible to damage.

So, even though you’re anxious to get started, it’s important to wait for the deck to dry completely before you begin painting. By taking the time to do it right, you’ll end up with a beautiful deck that will last for years to come.

Do use a primer:

Do use a primer:

A primer will help the paint to adhere to the surface of the deck and will also help to protect the wood. If you’re using paint that’s darker than the natural color of the wood, you’ll need to use a primer. This will help to prevent the dark paint from seeping into the wood grain and causing stains.

Don’t use a paint sprayer:

Don't use a paint sprayer:

A paint sprayer might seem the quickest way to get the job done, but it’s not the best option. The paint can end up uneven, and it’s also more likely to chip. If you do decide to use a paint sprayer, be sure to back brush after you’ve sprayed the surface. This will help to ensure even coverage.

Don’t start painting if there’s a chance of rain:

If you plan to paint your deck, it’s important to check the forecast in advance. If there’s a chance of rain, you should wait until the weather clears up before starting your project. Otherwise, your paint job could be ruined.

Don’t Use Oil-Based Paints.

Oil-based paints are actually not suitable for use on decks that are wet due to rain. The oil in the paint can react with the water and cause the paint to peel. So the deck must be completely dry before using this type of paint.

Sticking with water-based paints is best because they are more durable and last longer.

Water-based paints are also less likely to peel, so you won’t have to worry about your paint job being ruined by the rain.

Now that you know the dos and don’ts of painting a deck after rain, you can confidently start your project. By taking the time to do it right, you’ll end up with a beautiful deck that will last for years to come.

Can you Paint a Deck in the Rain? Is it safe to do so?

One of the most important steps in deck care is painting or staining the surface. This helps to protect the wood from moisture and sun damage and can also give the deck a fresh new look.

But what if it’s raining when you need to paint? Is it safe to paint a deck in the rain? The short answer is no.

Here’s why:

  • The paint will not adhere to a wet surface.
  • Wood rot, humidity, and an uneven surface can all cause the paint to thin out, resulting in patchy coverage.
  • Paint can react with water and cause the paint to peel.
  • It’s more difficult to paint in the rain, leading to accidents.

So, how long do you have to wait after it rains before you can paint your deck? The best answer is to wait until the surface is completely dry. This could be a few hours on a sunny day or a day or two after the rain has stopped. If you’re in a hurry, you can use a fan or dehumidifier to speed up the drying process.

Frequently Asked Questions:

Q. Can I paint the deck if it rains in 12 hours?

A. No, it is not recommended to stain the deck if rain is expected in the next 12 hours. The paint will not have time to dry properly and could be washed away by the rain. Wait until the weather clears up before staining your deck.

Q. What should I do if my deck is already painted and it rains?

A. If your deck is already painted and it rains, you should wait until it has stopped and the deck is dry before applying a new coat of paint. You don’t want to trap moisture under the fresh coat of paint, which could lead to peeling and flaking.

Q. I just painted my deck, and it started raining. What should I do?

A. If you have already painted your deck, and it starts raining, you should try covering it with a tarp or plastic sheeting. This will help protect the paint from being washed away by the rain. If the rain is heavy, you may need to reapply the paint after the weather clears up.

Conclusion:

Wait to paint your deck after a rainstorm is always a good idea, but how long should you wait? Depending on the type of paint you use, anywhere from 12 to 72 hours may be necessary. In this post, we’ve outlined some dos and don’ts for painting your deck after it rains. If you want to get started as soon as possible, check the weather forecast so that you can time your project accordingly. We hope you found this information helpful!

How to Stop Algae Growing on Decking: 5 Tips for a Spotless Deck

How to Stop Algae Growth on Decking Our Top Tips

If you’re the proud deck owner, you know it’s the perfect place to enjoy the outdoors with family and friends. When they look at your deck and praise its beauty, you probably don’t want to mention the time and effort you put into ensuring it looks that way.

But what you may not know is that your deck could be harboring a hidden danger: algae.

Algae growth in decking is unsightly and slippery, making it a hazard for anyone using your deck. It can also lead to the deterioration of your decking material. But there’s no need to panic – there are plenty of ways to stop algae growth on your deck.

In this article, we’ll explore some of the best methods for preventing algae growth so that you can enjoy your deck worry-free. Your deck will be the talk of the neighborhood. So don’t let algae take over your deck this season, and read on to learn how to stop it in its tracks.

How to Stop Algae from Ruining Your Decking in 5 Easy Steps

Algae growth in decking is becoming problematic for more and more homeowners. In fact, a recent study found that 61% of deck owners have had to deal with algae growth at some point. The good news is that there are plenty of ways to prevent algae growth on your deck.

Here are 5 easy steps you can take to stop algae from ruining your deck:

1. Keep your deck clean

Keep your deck clean

One of the best ways to prevent algae growth on your deck is to keep it clean. Does cleaning involve regular sweeping and washing with soapy water? Yes. But it also means taking care of any spills or stains as soon as possible.

If you have a spill on your deck, clean it up immediately. If you let it sit, it will be much harder to remove later and could lead to the growth of algae. So the algae will have nothing to feed off of.

Here’s a fantastic method to clean up your deck:

Use a power washer

Use a power washer

Power washing your deck is an effective way to remove algae. But it’s important to use the right settings on your power washer, otherwise, you could damage your deck. When you use a power washer, always start with the lowest setting and work your way up if necessary.

It is important to set the pressure washer to the right pressure. Too much pressure can cause irreversible damage to your deck. If you’re not sure what setting to use, then the following point is for you.

  • Set the pressure to 1,500 psi or less
  • Use a fan tip nozzle, not a zero-degree nozzle
  • Keep the power washer moving to avoid damaging the wood

After you power washes your deck, make sure to rinse it with plain water to remove any chemicals that could damage the wood.

2. Inspect your deck regularly

Inspect your deck regularly

Inspecting your deck regularly is another great way to prevent algae growth. Look for areas that are starting to show signs of wear and tear. These areas may be more susceptible to algae growth. So it’s important to take care of them right away.

If your deck starts to show signs of algae growth, then it’s time to take action.

Remove any existing algae

Remove any existing algae

When you inspect your deck, look for any areas that already have algae growth. If you find any algae, then you’ll need to remove it before you can start preventing future growth. There are a few different ways to remove algae from your deck:

Scrubbing with a brush:

This is the most common method for removing algae. Use a stiff brush to scrub the algae off of your deck. A stiff brush will help to loosen the algae so you can remove it more easily.

The first step is to scrub the affected areas of the deck with a stiff brush. This will help loosen the algae and make it easier to remove. Be sure to work in small sections so the brush doesn’t overload. Once you’ve brushed away the algae, you can vacuum up any remaining debris.

3. Apply a deck sealer

If you have a wood deck, one of the best ways to prevent algae growth is to apply a sealer. Sealers are the suspension of waterproofing agents in a solvent. When you apply the sealer, the solvent evaporates, and the waterproofing agents are left behind. This creates a barrier that helps to prevent water from penetrating the wood.

When the deck is sealed, there will be no water for the algae to feed off. Algae need water to grow, so a sealed deck is an inhospitable environment for algae.

4. Use a deck cleaner

Deck cleaners contain chemicals that kill algae and prevent it from taking hold. A deck cleaner can help prevent algae growth, keeping your deck looking its best. Just mix the cleaner with water according to the instructions and apply it to the surface of your deck. Then let it sit for a few minutes before rinsing it off. For best results, do this once a week or as needed. By keeping your deck clean, you can enjoy it for years to come.

5. Remove any standing water

Most people think that standing water is just an annoyance. They don’t realize that it can cause a lot of problems, like algae growth on the deck. Standing water is a breeding ground for algae.

When water is allowed to sit on the surface of the deck, it provides the perfect environment for algae to grow. The algae will eventually start to discolor the deck and make it look dirty.

The good news is that there are ways to remove the water and prevent the algae from coming back. One way to do this is to install a drainage system beneath your deck. This will allow water to quickly drain away, preventing it from pooling on the surface. 

How can you get rid of green algae on your deck using a chlorine solution?

How can you get rid of green algae on your deck using a chlorine solution?

Are you tired of looking at that green algae on your deck? If you are looking for an effective way to get rid of green algae on your deck. Well, there is good news. There is a relatively simple solution that can help you get rid of the green algae on your deck for good. All you need is a chlorine solution.

Chlorine is a powerful disinfectant that can kill bacteria and algae. When used in a concentrated form, it can be an effective way to clean your deck and get rid of green algae. To use a chlorine solution, mix one-part chlorine bleach with ten parts water.

Then, apply the solution to the affected areas of your deck and let it sit for about fifteen minutes. After that, rinse the area with clean water. You may need to repeat this process a few times to get rid of the green algae completely, but it will eventually go away if you are persistent.

So if you are looking for a way to get rid of green algae on your deck, a chlorine solution may be just what you need. Give it a try today.

Can you use vinegar to kill algae on decks?

Vinegar is a weak acid, which means it can help to break down tough dirt and grime. It’s also effective at killing bacteria and fungi. As a result, vinegar can be used to clean everything from countertops to bathtubs. And vinegar’s cleaning power doesn’t stop there-it can also be used to kill algae growth on decks.

Algae are a type of plant life that grows in moist conditions. They often form a green film on surfaces like decks. While algae are technically harmless, they can make your deck look dirty and uninviting.

Fortunately, vinegar can help to get rid of algae quickly and effectively. Mix equal parts vinegar and water in a spray bottle, and then apply the mixture to the affected area. Let it sit for several minutes before scrubbing it with a brush or hose.

You’ll be surprised at how well vinegar works in banishing algae growth – and you won’t have to use harsh chemicals in the process.

Frequently Asked Questions

Can you stain a deck over algae?

It’s not recommended. Algae can cause staining and streaks on the surface of your deck, making it difficult to achieve an even finish. If you do decide to stain over algae, be sure to power wash or scrub the area first to remove as much of the algae growth as possible.

Is green algae on wood harmful?

While green algae on the wood aren’t harmful to humans, it can cause the wood to deteriorate over time. Green algae is a plant that grows in moist environments and gets its energy from sunlight. When it grows on wood, it can cause the wood to rot and become discolored.

How can I prevent algae from growing on my decking in the future?

In order to prevent algae from growing on your decking in the future, you should keep it clean and dry. Algae need moist conditions to grow, so by keeping your decking clean and dry, you will make it less hospitable for algae. You can also try using a deck sealer or stain to create a barrier between the deck and the algae.

Conclusion

The algae growth can be unsightly and cause decking to rot, so it’s important to take steps to prevent it from happening in the first place. Follow our easy tips for stopping algae growth, and you can keep your deck looking great all season long. Be sure to visit our blog regularly for more helpful hints on how to keep your outdoor spaces looking their best.